> ## Documentation Index
> Fetch the complete documentation index at: https://docs.jelou.ai/llms.txt
> Use this file to discover all available pages before exploring further.
# IP Addresses
> Manage the IP addresses authorized to access the platform as an additional security filter
## Access IP Addresses
Go to **Settings** > **IP Addresses** in the side menu.
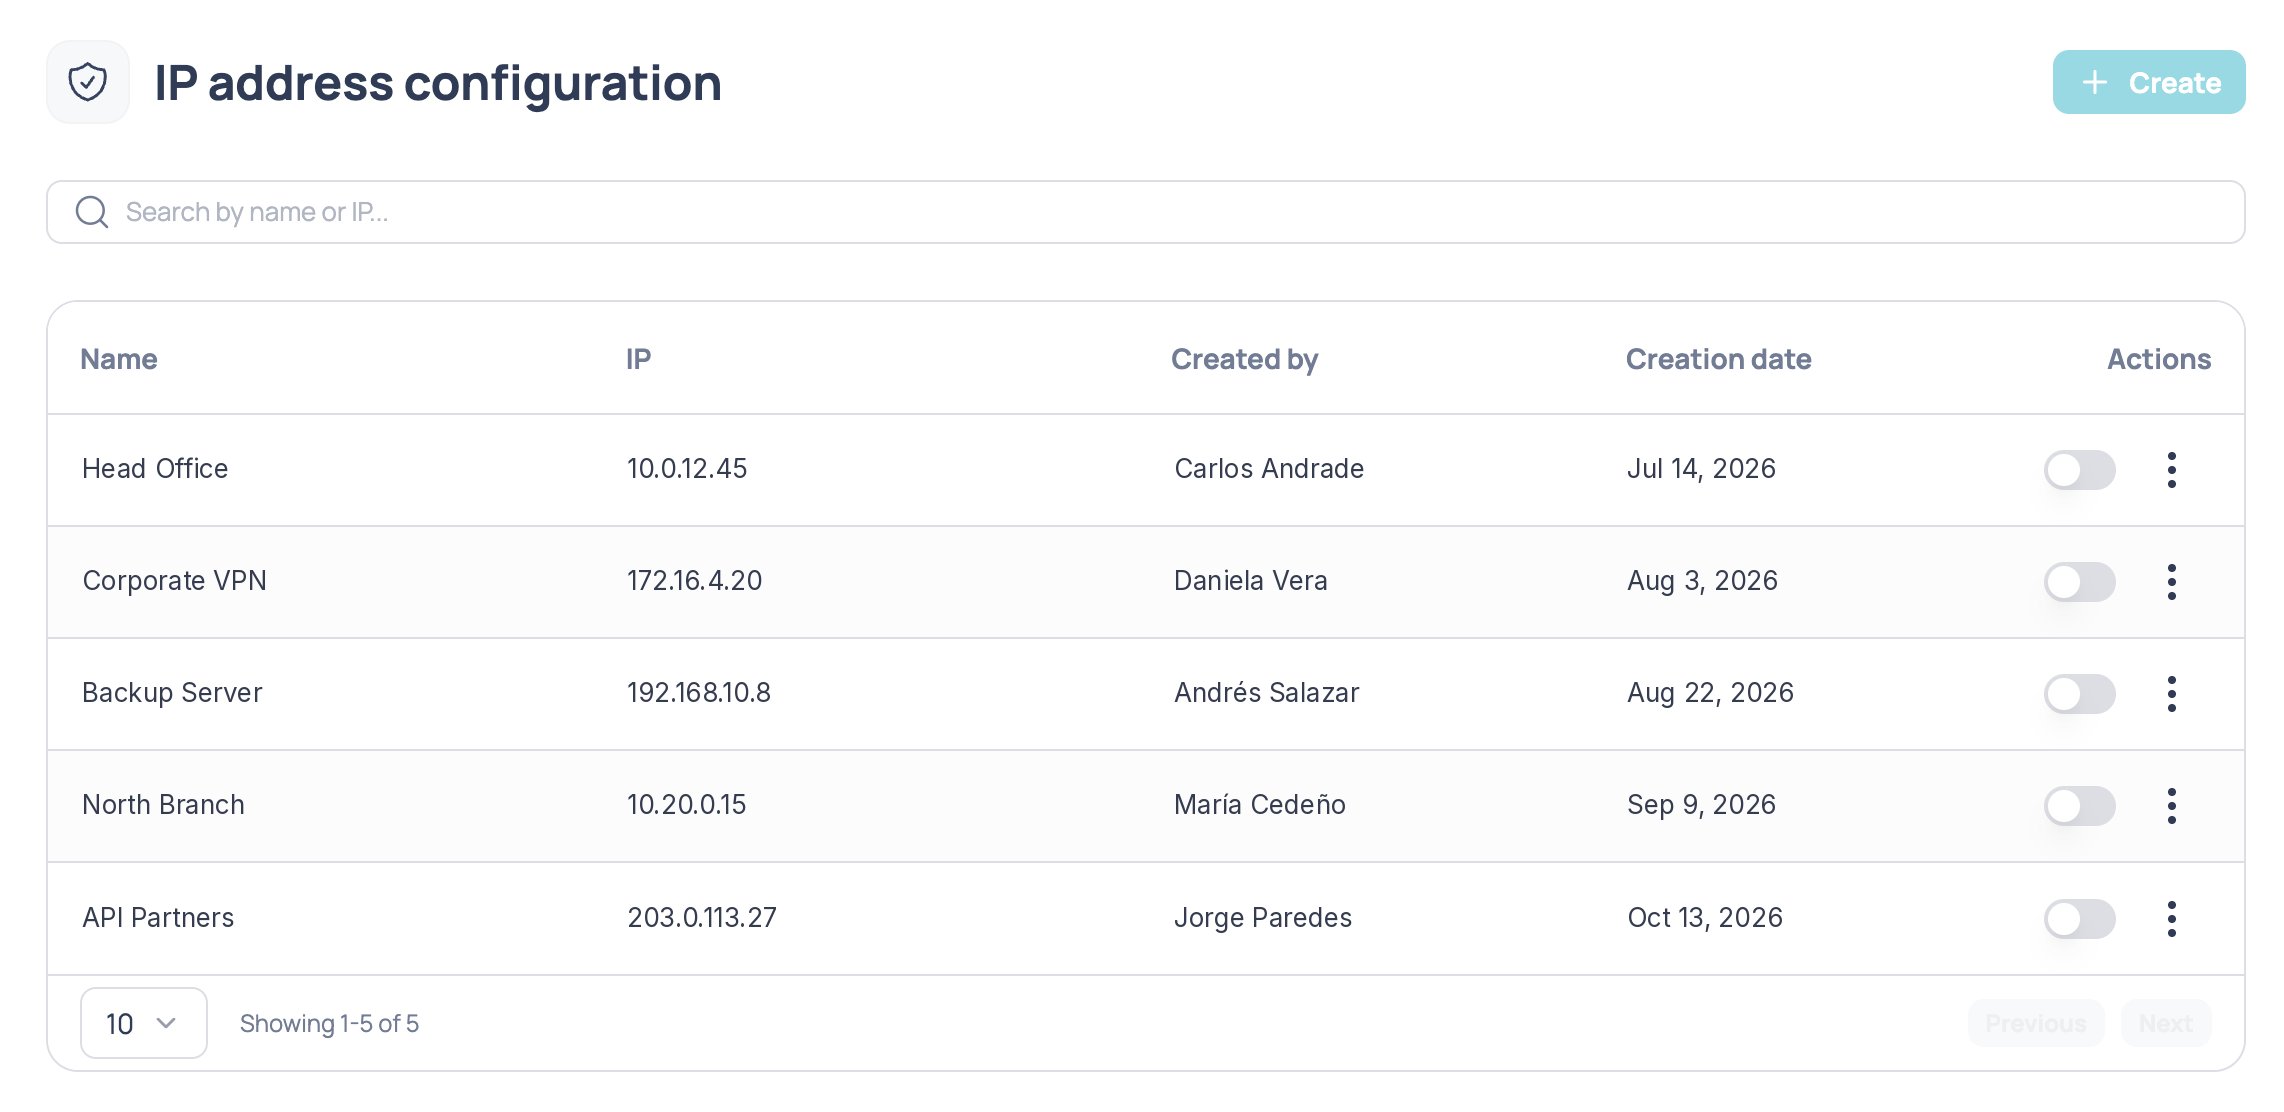 The screen shows the title **IP address settings**, the **Create** button, and a table with the registered addresses:
| Column | Description |
| - | - |
| **Name** | Identifier for the address |
| **IP** | IP address or CIDR range |
| **Created by** | User who registered it |
| **Creation date** | Registration date, formatted for your language |
| **Actions** | Switch to activate or deactivate the address and menu to edit or delete |
If there are no addresses yet, you'll see the message "You don't have any IP addresses yet".
## Limits and validations
| Rule | Detail |
| - | - |
| **Maximum addresses** | 5 per company. When you reach the limit, the **Create** button is disabled and a tooltip explains why |
| **Name** | Required, between 3 and 120 characters |
| **IP** | Required, maximum 100 characters |
| **Initial status** | New addresses are created **active** |
### Accepted IP formats
* **IPv4**: four numbers between 0 and 255 separated by dots, **with no leading zeros**. `192.168.1.1` is valid; `192.168.01.1` is not.
* **CIDR range**: for example, `192.168.1.0/24`.
* **IPv6**.
Values that aren't a valid IP format, such as `1234`, are rejected with an invalid IP error message.
## Create IP addresses
Click **Create**. The **Create IP addresses** side panel opens.
Enter a name and the IP address. To register more than one in the same operation, click **Add address**; each extra row has an ✕ button to remove it. You can add rows until you reach the limit of 5 addresses.
Click **Create**. The button is only enabled when every row has a valid name and a valid IP.
If you close the panel with unsaved data, an unsaved changes warning appears with the option to leave without saving. When creation succeeds, you'll see a notification and the table updates.
## Search and filter
When at least one address exists, a search bar appears above the table:
* **Free text**: searches by name, IP, or creator.
* **Status**: filters by **Active** or **Inactive**.
* **Created by**: filters by the users who registered addresses.
* Filters of the same type are added together (for example, created by Ana **or** by Luis); filters of different types are combined (for example, **Active** **and** created by Ana).
* Use the clear button to remove all filters.
If no address matches, you'll see "No results found".
## Edit an address
Open the row's actions menu and select **Edit address**. A panel opens with the current name and IP. The same validations as creation apply, and the address keeps its status. If you close with unsaved changes, the confirmation warning appears.
## Activate or deactivate an address
Use the switch in the **Actions** column. The change shows immediately and a notification like "The IP address of {name} was activated" appears. If the change can't be saved, the switch returns to its previous state.
## Delete an address
On the address row, open the actions menu and select **Delete address**.
Confirm in the dialog. Deleting it frees up one slot of the 5-address limit.
Deleting an address is **permanent**. If you only want to stop using it temporarily, deactivate it with the switch in **Actions**.
This documentation is built and hosted on [Mintlify](https://mintlify.com), a developer documentation platform.
The screen shows the title **IP address settings**, the **Create** button, and a table with the registered addresses:
| Column | Description |
| - | - |
| **Name** | Identifier for the address |
| **IP** | IP address or CIDR range |
| **Created by** | User who registered it |
| **Creation date** | Registration date, formatted for your language |
| **Actions** | Switch to activate or deactivate the address and menu to edit or delete |
If there are no addresses yet, you'll see the message "You don't have any IP addresses yet".
## Limits and validations
| Rule | Detail |
| - | - |
| **Maximum addresses** | 5 per company. When you reach the limit, the **Create** button is disabled and a tooltip explains why |
| **Name** | Required, between 3 and 120 characters |
| **IP** | Required, maximum 100 characters |
| **Initial status** | New addresses are created **active** |
### Accepted IP formats
* **IPv4**: four numbers between 0 and 255 separated by dots, **with no leading zeros**. `192.168.1.1` is valid; `192.168.01.1` is not.
* **CIDR range**: for example, `192.168.1.0/24`.
* **IPv6**.
Values that aren't a valid IP format, such as `1234`, are rejected with an invalid IP error message.
## Create IP addresses
Click **Create**. The **Create IP addresses** side panel opens.
Enter a name and the IP address. To register more than one in the same operation, click **Add address**; each extra row has an ✕ button to remove it. You can add rows until you reach the limit of 5 addresses.
Click **Create**. The button is only enabled when every row has a valid name and a valid IP.
If you close the panel with unsaved data, an unsaved changes warning appears with the option to leave without saving. When creation succeeds, you'll see a notification and the table updates.
## Search and filter
When at least one address exists, a search bar appears above the table:
* **Free text**: searches by name, IP, or creator.
* **Status**: filters by **Active** or **Inactive**.
* **Created by**: filters by the users who registered addresses.
* Filters of the same type are added together (for example, created by Ana **or** by Luis); filters of different types are combined (for example, **Active** **and** created by Ana).
* Use the clear button to remove all filters.
If no address matches, you'll see "No results found".
## Edit an address
Open the row's actions menu and select **Edit address**. A panel opens with the current name and IP. The same validations as creation apply, and the address keeps its status. If you close with unsaved changes, the confirmation warning appears.
## Activate or deactivate an address
Use the switch in the **Actions** column. The change shows immediately and a notification like "The IP address of {name} was activated" appears. If the change can't be saved, the switch returns to its previous state.
## Delete an address
On the address row, open the actions menu and select **Delete address**.
Confirm in the dialog. Deleting it frees up one slot of the 5-address limit.
Deleting an address is **permanent**. If you only want to stop using it temporarily, deactivate it with the switch in **Actions**.
This documentation is built and hosted on [Mintlify](https://mintlify.com), a developer documentation platform.