> ## Documentation Index
> Fetch the complete documentation index at: https://docs.jelou.ai/llms.txt
> Use this file to discover all available pages before exploring further.
# MCP
> Connect Databases with AI tools like ChatGPT, Claude, Cursor, and VS Code using the MCP protocol
**MCP** (Model Context Protocol) lets you connect your Databases database directly with AI tools. Once connected, you can query, create, and modify records using natural language from your favorite tool.
 ## How does it work?
Databases generates an **MCP URL** that acts as a bridge between your database and the AI tool. The tool connects to this URL to access the CRUD operations of your collections. The URL remains active until you regenerate it manually from the settings.
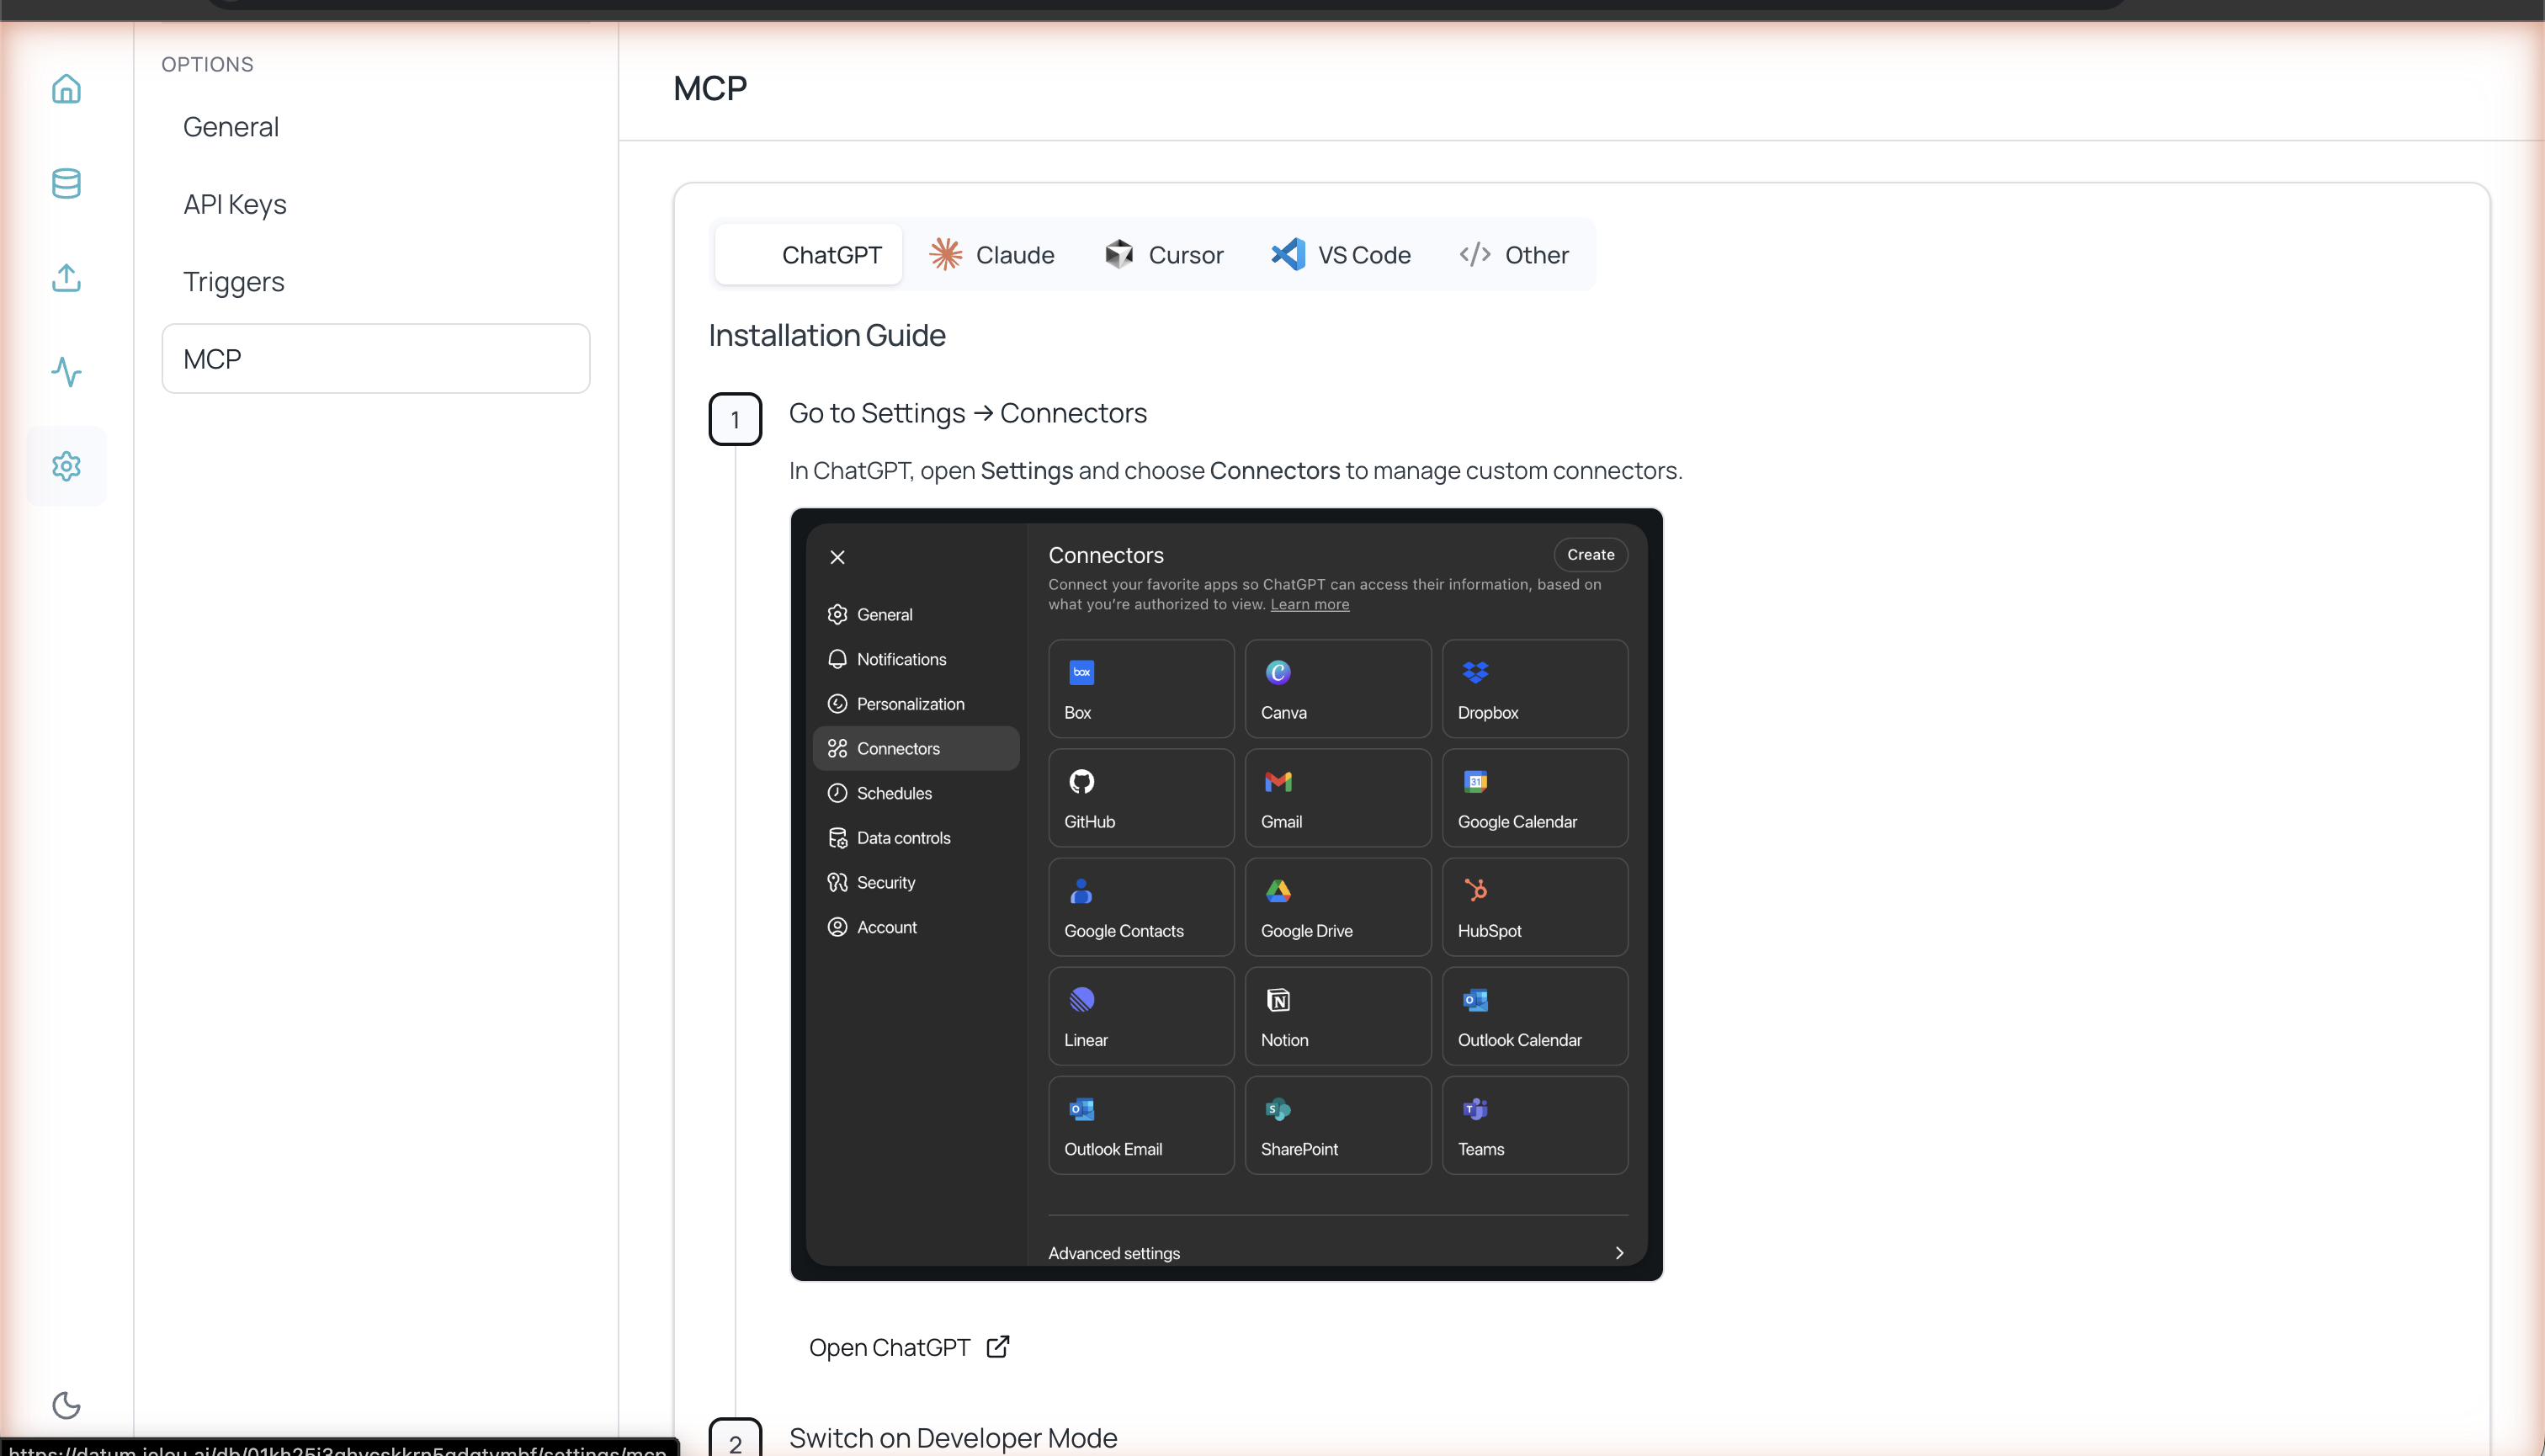
To access the MCP configuration, go to **Settings > MCP** from the left sidebar.
## Setup by tool
In ChatGPT, open **Settings** and select **Connectors** to manage custom connectors.
Enable **Developer Mode** in the Connectors → Advanced settings section to accept custom connector URLs.
On the Databases MCP page, copy the generated URL.
In ChatGPT Connectors:
* Select **Create connector** and add a name
* Set authentication to **No Authentication**
* Paste the MCP URL and check **I trust this application**
* Click **Create**
Open a new chat, go to **More → Developer Mode** to activate the connector.
Click **Add sources**, enable your Databases database, and interact with your data.
On the Databases MCP page, copy the generated URL.
In Claude Desktop, go to **Add connectors** to manage integrations.
Paste the Databases MCP URL and follow the instructions to complete the connection.
**Automatic installation:**
On the Databases MCP page, copy the generated URL.
Click the **Add to Cursor** button or copy the provided Cursor deeplink.
When Cursor opens:
* Review the connector details and click **Install**
* Allow Cursor to restart if necessary
* Open a new chat and enable the Databases tools
**Manual installation:**
Add this JSON in **Settings → Cursor Settings → MCP → Add new global MCP server**:
```json theme={null}
{
"datum": {
"url": "https://datum.jelou.cloud/YOUR_UNIQUE_ID/mcp"
}
}
```
On the Databases MCP page, copy the generated URL.
In your workspace, create the `.vscode/mcp.json` file with the Databases server configuration:
```json theme={null}
{
"servers": {
"datum": {
"type": "http",
"url": "https://datum.jelou.cloud/YOUR_UNIQUE_ID/mcp"
}
}
}
```
Use the Command Palette to:
* Run **MCP: Add Server**, choose **HTTP**, and provide the Databases URL
* Select **Workspace Settings** to create `.vscode/mcp.json` if it doesn't exist
Avoid including secrets directly in the configuration file. Use environment variables or input files for credentials.
On the Databases MCP page, copy the generated URL.
Use the generated URL with the transport method supported by your client. Most clients support HTTP-based MCP connections.
## How does it work?
Databases generates an **MCP URL** that acts as a bridge between your database and the AI tool. The tool connects to this URL to access the CRUD operations of your collections. The URL remains active until you regenerate it manually from the settings.
To access the MCP configuration, go to **Settings > MCP** from the left sidebar.
## Setup by tool
In ChatGPT, open **Settings** and select **Connectors** to manage custom connectors.
Enable **Developer Mode** in the Connectors → Advanced settings section to accept custom connector URLs.
On the Databases MCP page, copy the generated URL.
In ChatGPT Connectors:
* Select **Create connector** and add a name
* Set authentication to **No Authentication**
* Paste the MCP URL and check **I trust this application**
* Click **Create**
Open a new chat, go to **More → Developer Mode** to activate the connector.
Click **Add sources**, enable your Databases database, and interact with your data.
On the Databases MCP page, copy the generated URL.
In Claude Desktop, go to **Add connectors** to manage integrations.
Paste the Databases MCP URL and follow the instructions to complete the connection.
**Automatic installation:**
On the Databases MCP page, copy the generated URL.
Click the **Add to Cursor** button or copy the provided Cursor deeplink.
When Cursor opens:
* Review the connector details and click **Install**
* Allow Cursor to restart if necessary
* Open a new chat and enable the Databases tools
**Manual installation:**
Add this JSON in **Settings → Cursor Settings → MCP → Add new global MCP server**:
```json theme={null}
{
"datum": {
"url": "https://datum.jelou.cloud/YOUR_UNIQUE_ID/mcp"
}
}
```
On the Databases MCP page, copy the generated URL.
In your workspace, create the `.vscode/mcp.json` file with the Databases server configuration:
```json theme={null}
{
"servers": {
"datum": {
"type": "http",
"url": "https://datum.jelou.cloud/YOUR_UNIQUE_ID/mcp"
}
}
}
```
Use the Command Palette to:
* Run **MCP: Add Server**, choose **HTTP**, and provide the Databases URL
* Select **Workspace Settings** to create `.vscode/mcp.json` if it doesn't exist
Avoid including secrets directly in the configuration file. Use environment variables or input files for credentials.
On the Databases MCP page, copy the generated URL.
Use the generated URL with the transport method supported by your client. Most clients support HTTP-based MCP connections.