> ## Documentation Index
> Fetch the complete documentation index at: https://docs.jelou.ai/llms.txt
> Use this file to discover all available pages before exploring further.
# Triggers
> Configure webhooks that fire automatically when records are created, updated, or deleted
**Triggers** let you execute webhooks automatically when changes occur in your collections. They are ideal for synchronizing data with external systems, sending notifications, or running workflows.
 ## Creating a trigger
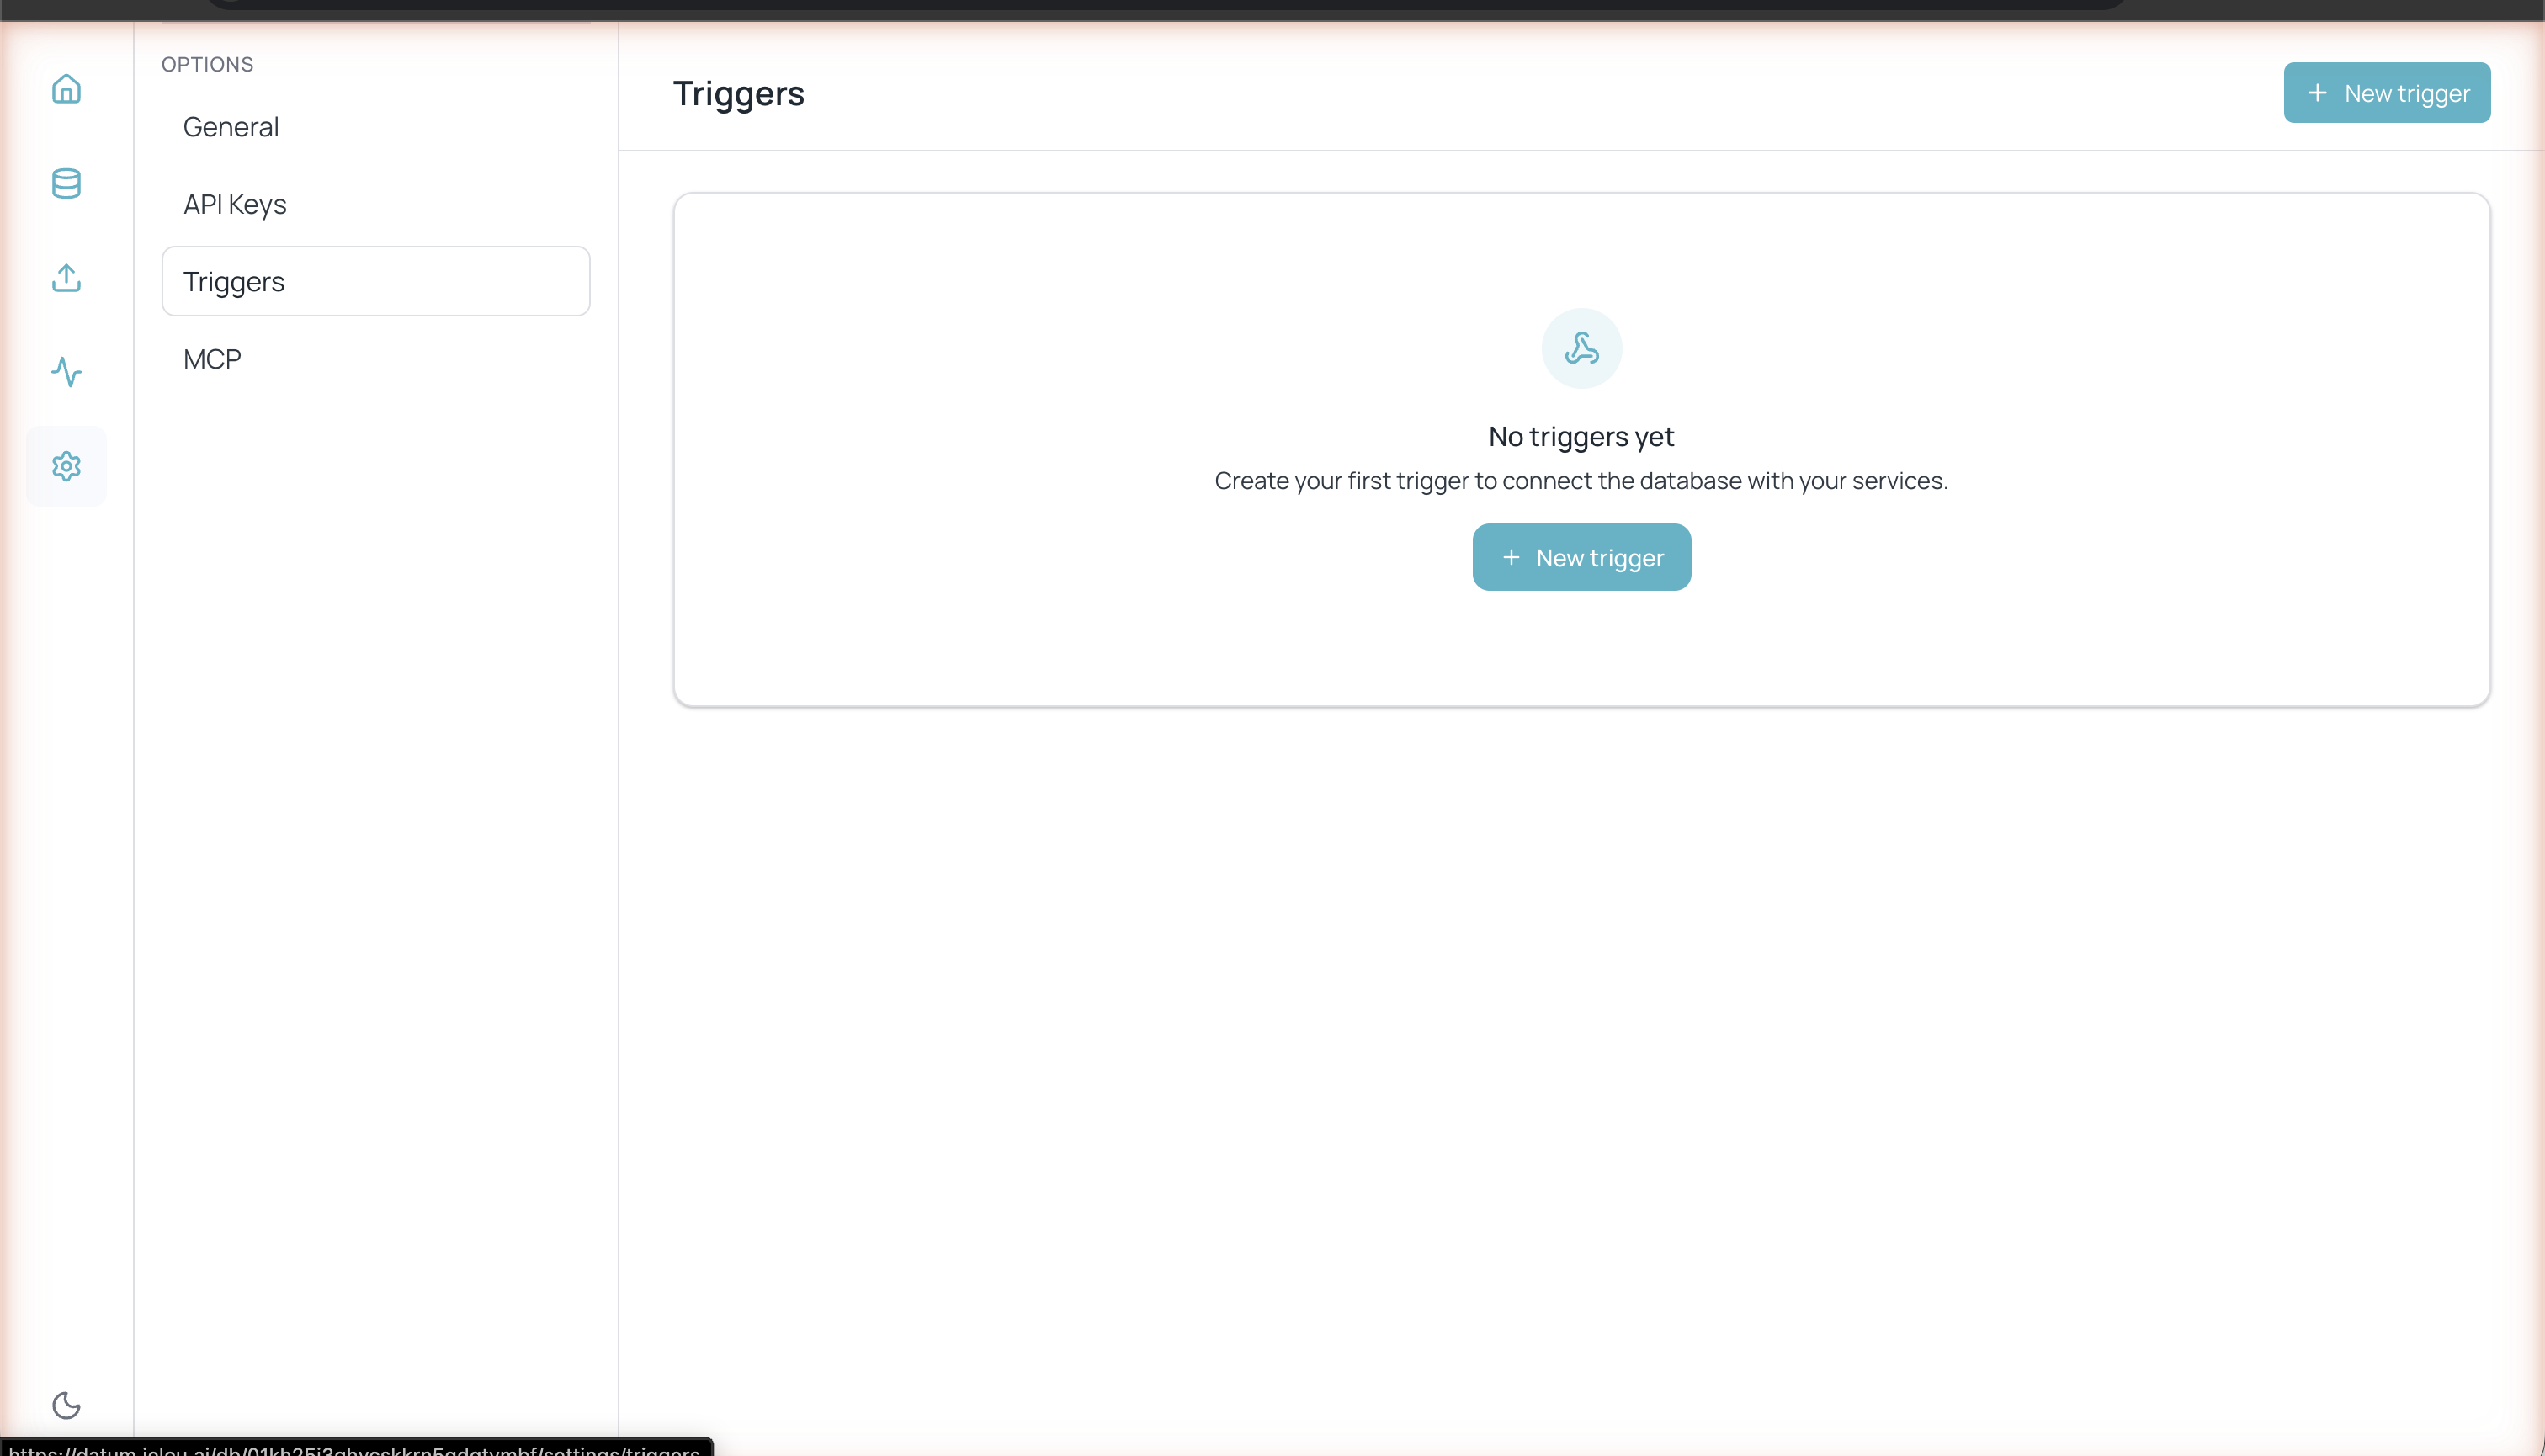
 Navigate to **Settings > Triggers** from the left sidebar.
The button is located in the upper-right corner.
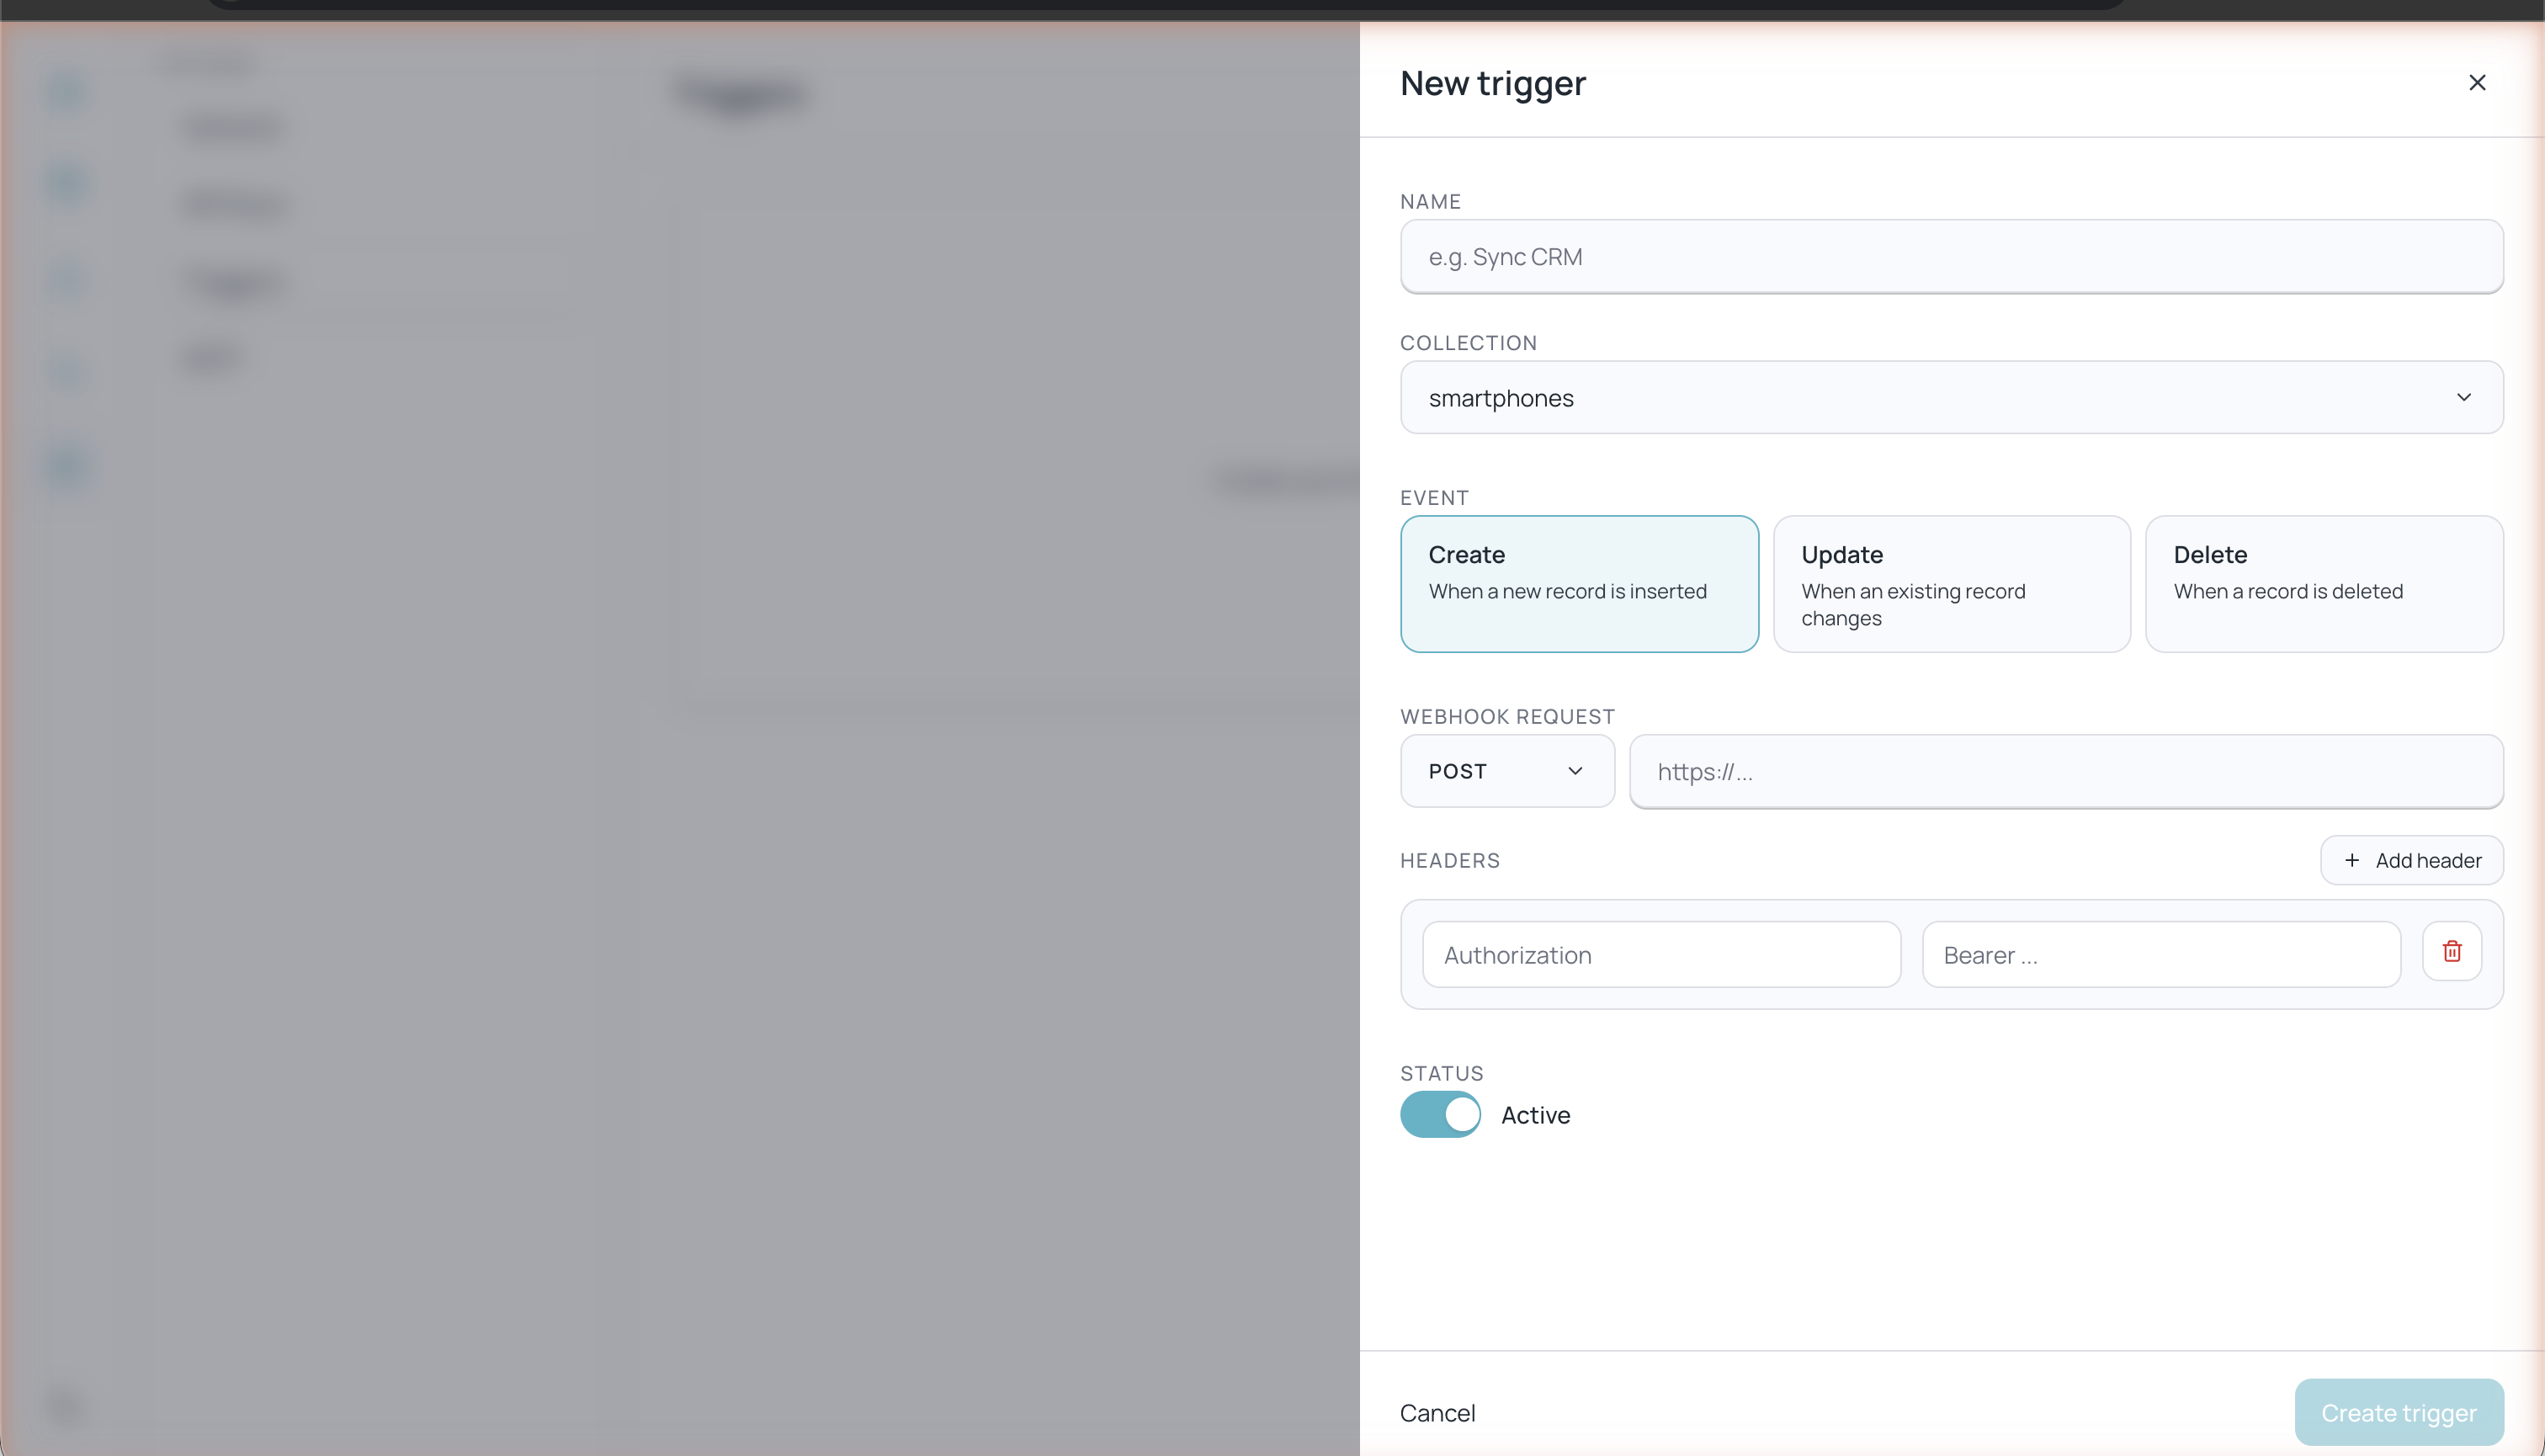
Fill in the following fields:
* **Name** — A descriptive name (e.g. "Sync CRM", "Notify new order")
* **Collection** — The collection you want to monitor
* **Event** — The type of event that fires the webhook
* **Webhook Request** — The HTTP method and destination URL
* **Headers** — Custom headers for the request
* **Status** — Enable or disable the trigger
The trigger activates immediately if the status is set to **Active**.
## Available events
| Event | Fires when... |
| ---------- | -------------------------------------------- |
| **Create** | A new record is inserted into the collection |
| **Update** | An existing record is modified |
| **Delete** | A record is deleted |
You can create multiple triggers for the same collection with different events. For example, one trigger to synchronize data on each **Create** and another to send an alert on each **Delete**.
## Webhook configuration
### HTTP method
Select the appropriate HTTP method for your endpoint:
| Method | Typical use |
| ---------- | -------------------------------------------- |
| **POST** | Send record data to the server (most common) |
| **GET** | Notify without sending data in the body |
| **PUT** | Replace a complete resource |
| **PATCH** | Partially update a resource |
| **DELETE** | Request deletion of a resource |
### Webhook URL
Enter the full URL of the endpoint that will receive the notification (e.g. `https://your-api.com/webhooks/datum`).
### Headers
Add custom headers for authentication or other purposes. By default, an example **Authorization** header with Bearer token format is included.
Click **+ Add header** to add additional headers. Each header has a name (key) and value field.
## Trigger status
The **Status** toggle lets you enable or disable a trigger without deleting it. A disabled trigger does not send webhooks even if events occur in the collection.
Navigate to **Settings > Triggers** from the left sidebar.
The button is located in the upper-right corner.
Fill in the following fields:
* **Name** — A descriptive name (e.g. "Sync CRM", "Notify new order")
* **Collection** — The collection you want to monitor
* **Event** — The type of event that fires the webhook
* **Webhook Request** — The HTTP method and destination URL
* **Headers** — Custom headers for the request
* **Status** — Enable or disable the trigger
The trigger activates immediately if the status is set to **Active**.
## Available events
| Event | Fires when... |
| ---------- | -------------------------------------------- |
| **Create** | A new record is inserted into the collection |
| **Update** | An existing record is modified |
| **Delete** | A record is deleted |
You can create multiple triggers for the same collection with different events. For example, one trigger to synchronize data on each **Create** and another to send an alert on each **Delete**.
## Webhook configuration
### HTTP method
Select the appropriate HTTP method for your endpoint:
| Method | Typical use |
| ---------- | -------------------------------------------- |
| **POST** | Send record data to the server (most common) |
| **GET** | Notify without sending data in the body |
| **PUT** | Replace a complete resource |
| **PATCH** | Partially update a resource |
| **DELETE** | Request deletion of a resource |
### Webhook URL
Enter the full URL of the endpoint that will receive the notification (e.g. `https://your-api.com/webhooks/datum`).
### Headers
Add custom headers for authentication or other purposes. By default, an example **Authorization** header with Bearer token format is included.
Click **+ Add header** to add additional headers. Each header has a name (key) and value field.
## Trigger status
The **Status** toggle lets you enable or disable a trigger without deleting it. A disabled trigger does not send webhooks even if events occur in the collection.