> ## Documentation Index
> Fetch the complete documentation index at: https://docs.jelou.ai/llms.txt
> Use this file to discover all available pages before exploring further.
# Jelou Agent
> Use the Brain Studio Agent to build conversational workflows or query data about your organization.
Brain Studio includes an agent directly on the home view. Choose **Build** mode to create workflows with AI, or **Insights** mode to query your conversation data and better understand your organization.
## How it works
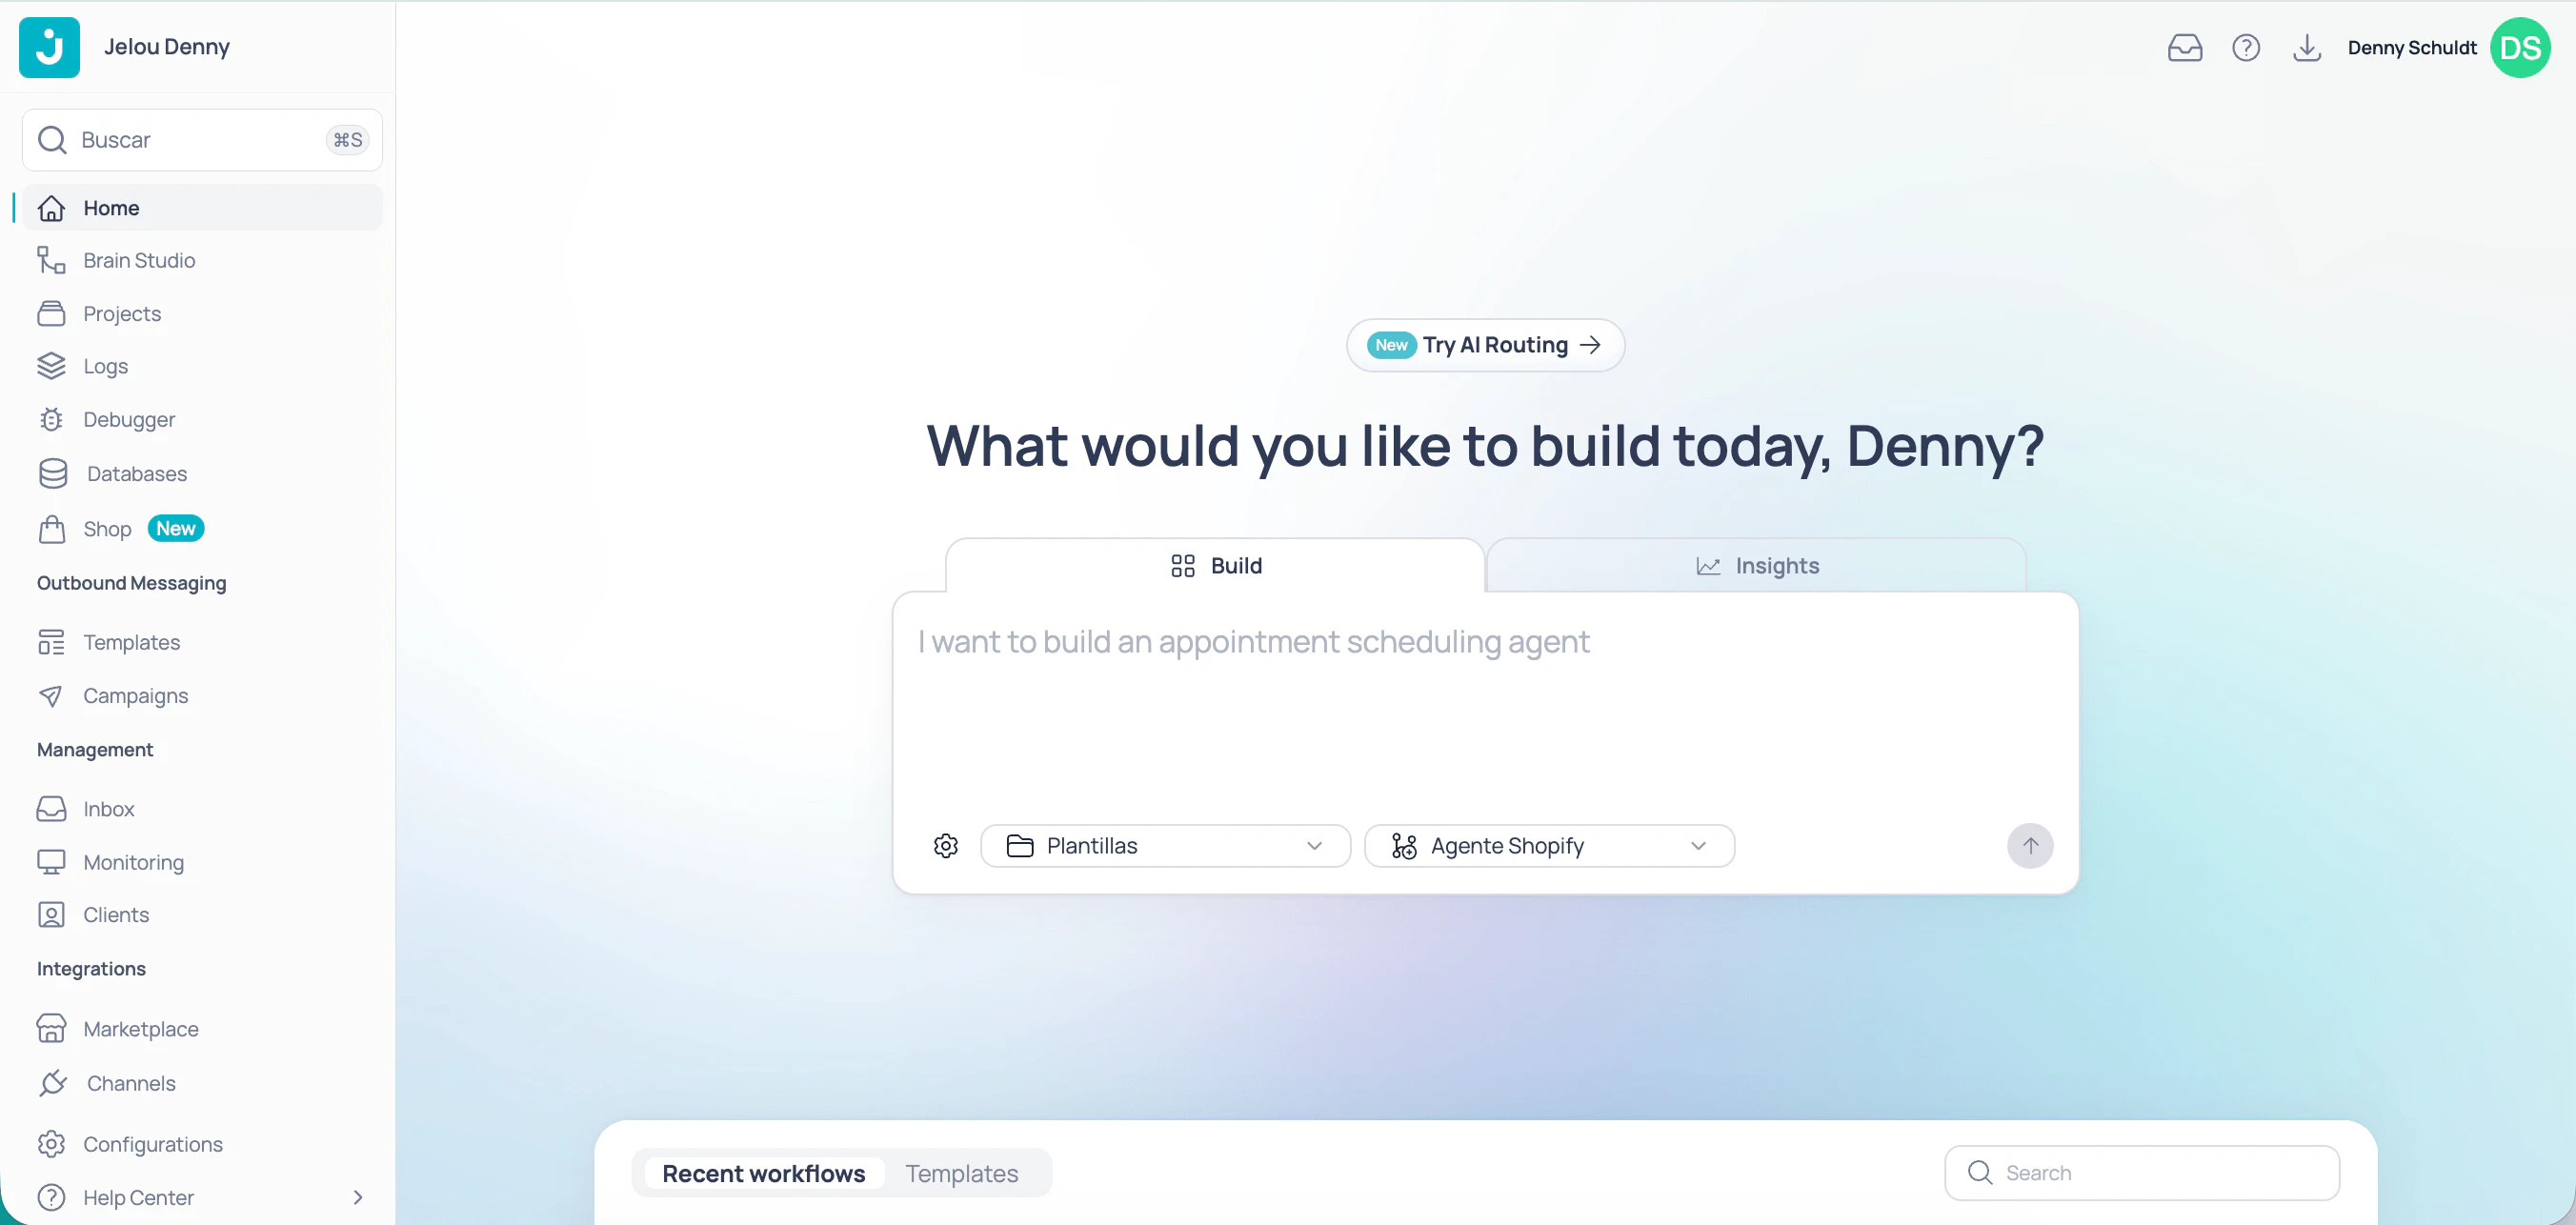 The home view has two tabs. Select the one that fits what you need.
The agent builds the solution on the canvas from your prompt. It creates nodes, configures connections, and applies the logic you described.
* Generates the flow from start to finish.
* You can review and adjust the result on the canvas.
* Ideal for quick prototyping or implementing known workflows.
**When to use it:** when you want to build or modify a conversational workflow.
The agent answers questions about your conversations and delivers metrics and information to help you understand how your organization operates.
* Query volumes, trends, and user behavior.
* Get specific data without navigating to manual reports.
* Ideal for making data-driven decisions.
**When to use it:** when you want to understand what is happening in your conversations.
In the prompting area, choose the **project** and **workflow** where you want the agent to work. If they don't exist, you can create them from the same selectors.
In the text field, write what you want to build or know. Be specific: state the goal, relevant data, or business logic.
```txt wrap theme={null}
Create a customer support flow that greets the user, asks for their order number, and checks order status via API at this URL: https://your-url.com, with this header credential: x-api-key: abc-123.
```
```txt wrap theme={null}
How many conversations did we have last week and what was the most frequent topic?
```
Click **Send**. In **Build** mode, the agent will take you to the canvas of the selected workflow and start building. In **Insights** mode, you will receive the data directly in the response.
## Work on the canvas with the Jelou Agent
In **Build** mode, once you send your prompt from the Home view, you land on the **canvas**: the visual editor where flows are built.
The home view has two tabs. Select the one that fits what you need.
The agent builds the solution on the canvas from your prompt. It creates nodes, configures connections, and applies the logic you described.
* Generates the flow from start to finish.
* You can review and adjust the result on the canvas.
* Ideal for quick prototyping or implementing known workflows.
**When to use it:** when you want to build or modify a conversational workflow.
The agent answers questions about your conversations and delivers metrics and information to help you understand how your organization operates.
* Query volumes, trends, and user behavior.
* Get specific data without navigating to manual reports.
* Ideal for making data-driven decisions.
**When to use it:** when you want to understand what is happening in your conversations.
In the prompting area, choose the **project** and **workflow** where you want the agent to work. If they don't exist, you can create them from the same selectors.
In the text field, write what you want to build or know. Be specific: state the goal, relevant data, or business logic.
```txt wrap theme={null}
Create a customer support flow that greets the user, asks for their order number, and checks order status via API at this URL: https://your-url.com, with this header credential: x-api-key: abc-123.
```
```txt wrap theme={null}
How many conversations did we have last week and what was the most frequent topic?
```
Click **Send**. In **Build** mode, the agent will take you to the canvas of the selected workflow and start building. In **Insights** mode, you will receive the data directly in the response.
## Work on the canvas with the Jelou Agent
In **Build** mode, once you send your prompt from the Home view, you land on the **canvas**: the visual editor where flows are built.
 The agent stays available on the canvas via the side chat panel. From there you can:
* **Iterate on the flow:** refine existing nodes, add new branches, or extend the logic.
* **Get answers:** ask how a node, variable, or integration works.
* **Change mode:** switch between Build and Insights at any time.
Whenever the agent generates solutions for you, drag them onto the canvas to try them out.
At the top of the side panel you also have the project selector, conversation history, and the option to create new chats.
### Complementary actions on the canvas
Besides the agent, from the canvas you can perform key actions to take your solution to production:
Connect your workflow to WhatsApp, Facebook Messenger, or a web widget so users can interact with it.
Publish your changes so the current version is available in production.
View, compare, and restore previous versions of your project.
## Next steps
Build a basic question-and-answer flow step by step.
Use an AI Agent node to collect structured data from the user.
The agent stays available on the canvas via the side chat panel. From there you can:
* **Iterate on the flow:** refine existing nodes, add new branches, or extend the logic.
* **Get answers:** ask how a node, variable, or integration works.
* **Change mode:** switch between Build and Insights at any time.
Whenever the agent generates solutions for you, drag them onto the canvas to try them out.
At the top of the side panel you also have the project selector, conversation history, and the option to create new chats.
### Complementary actions on the canvas
Besides the agent, from the canvas you can perform key actions to take your solution to production:
Connect your workflow to WhatsApp, Facebook Messenger, or a web widget so users can interact with it.
Publish your changes so the current version is available in production.
View, compare, and restore previous versions of your project.
## Next steps
Build a basic question-and-answer flow step by step.
Use an AI Agent node to collect structured data from the user.