> ## Documentation Index
> Fetch the complete documentation index at: https://docs.jelou.ai/llms.txt
> Use this file to discover all available pages before exploring further.
# Getting credentials
> Get Kushki's public key, private key, webhook signature, and merchant ID to connect the integration in Brain Studio.
Prepare **test** or **production** credentials and ask Kushki to configure the Jelou webhook.
When you finish, you will have the **public key**, **private key**, **webhook signature**, and **merchant ID**, with the webhook requested from Kushki.
***
## Before you begin
You need:
* To decide whether you will use **test** or **production** credentials
* Administrator access to the Kushki console for that environment
* To contact Kushki to configure the webhook (it is not created in self-service)
***
## Environments in Kushki
Kushki uses a different console per environment:
| Environment | Console | Contact |
| ----------- | ----------------------------------------------------------------------- | ----------------------------------------------------------------------------- |
| Test (UAT) | [uat-console.kushkipagos.com](https://uat-console.kushkipagos.com/auth) | [soporte@kushkipagos.com](mailto:soporte@kushkipagos.com) |
| Production | [console.kushkipagos.com](https://console.kushkipagos.com) | [gaelle.depenanros@kushkipagos.com](mailto:gaelle.depenanros@kushkipagos.com) |
Where to copy each value in the console:
| Section | Value |
| ---------------------------- | -------------------------- |
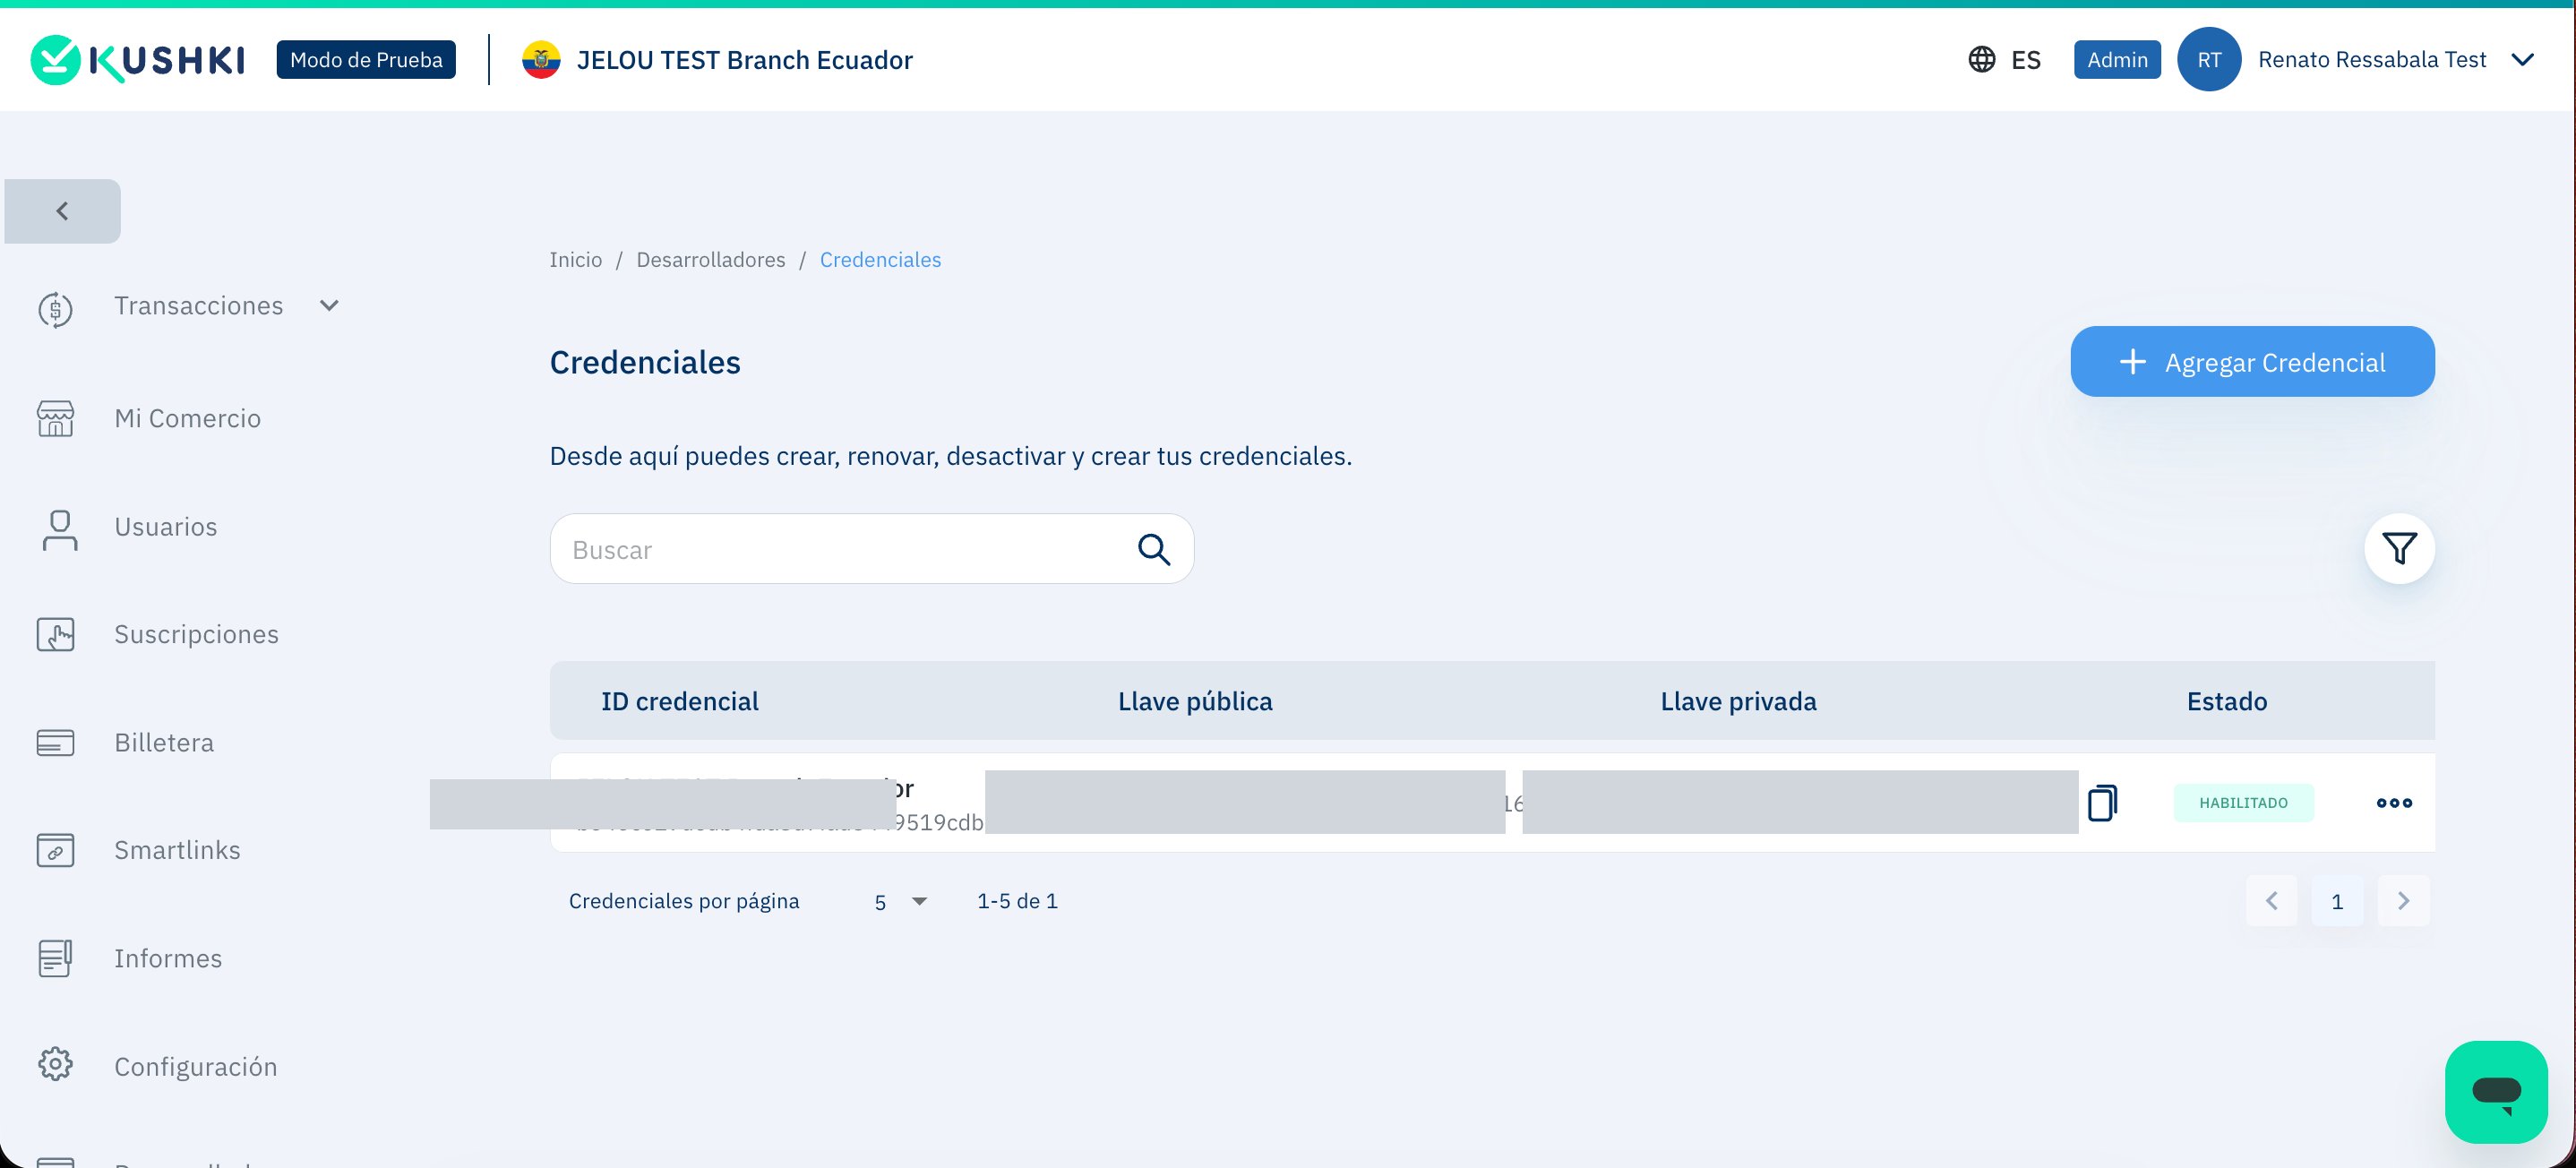
| **Developers → Credentials** | Public key and private key |
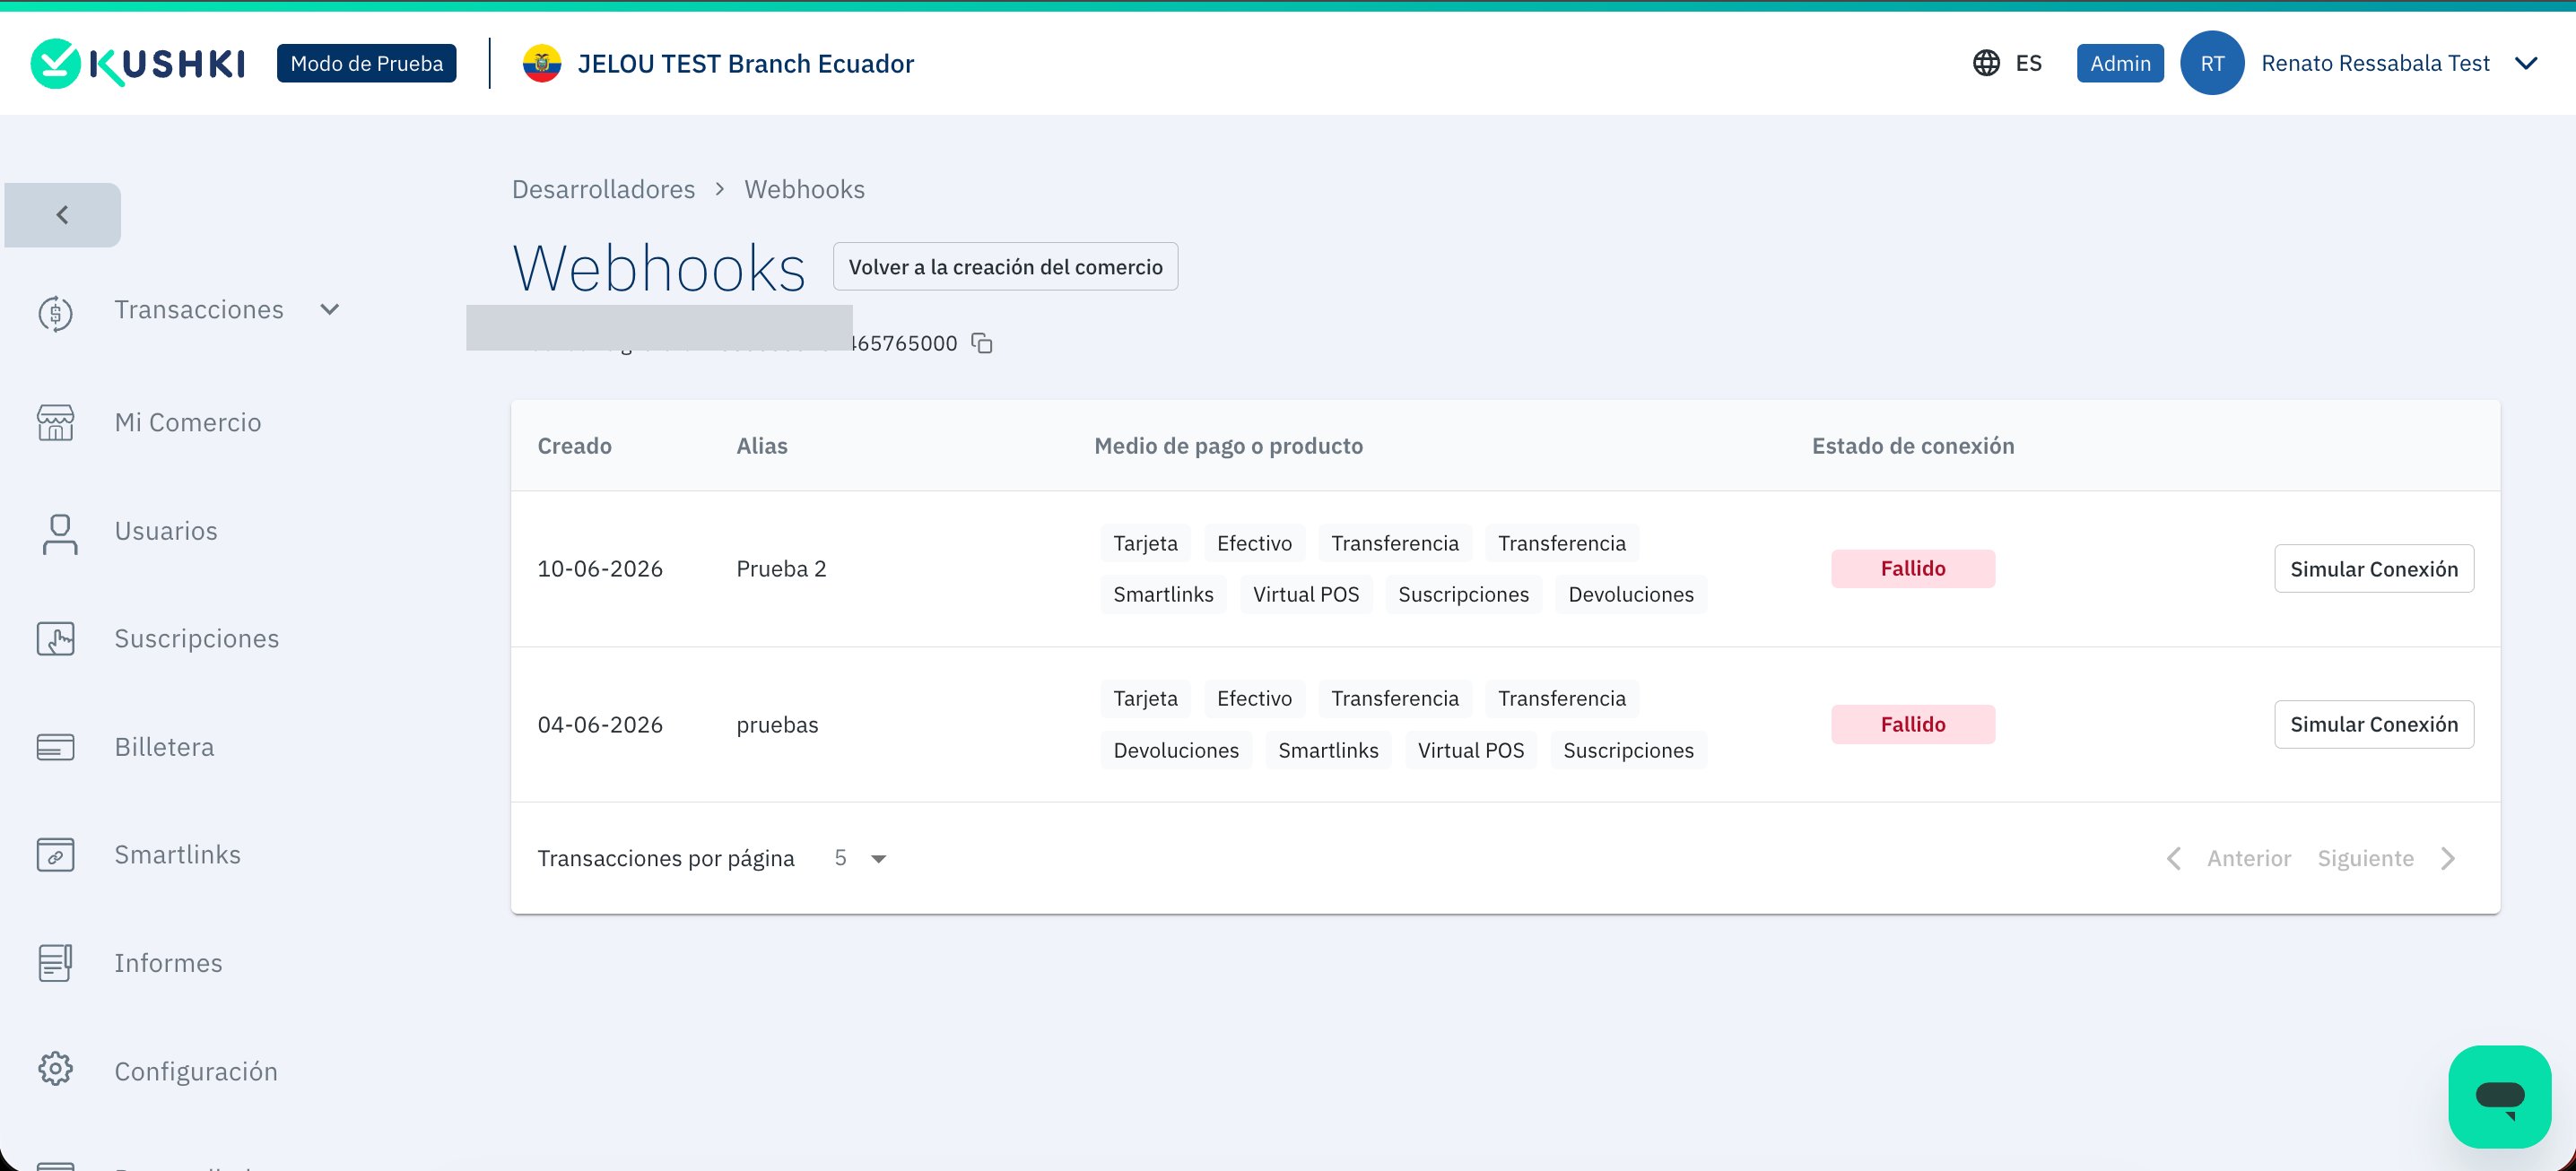
| **Developers → Webhooks** | Webhook signature |
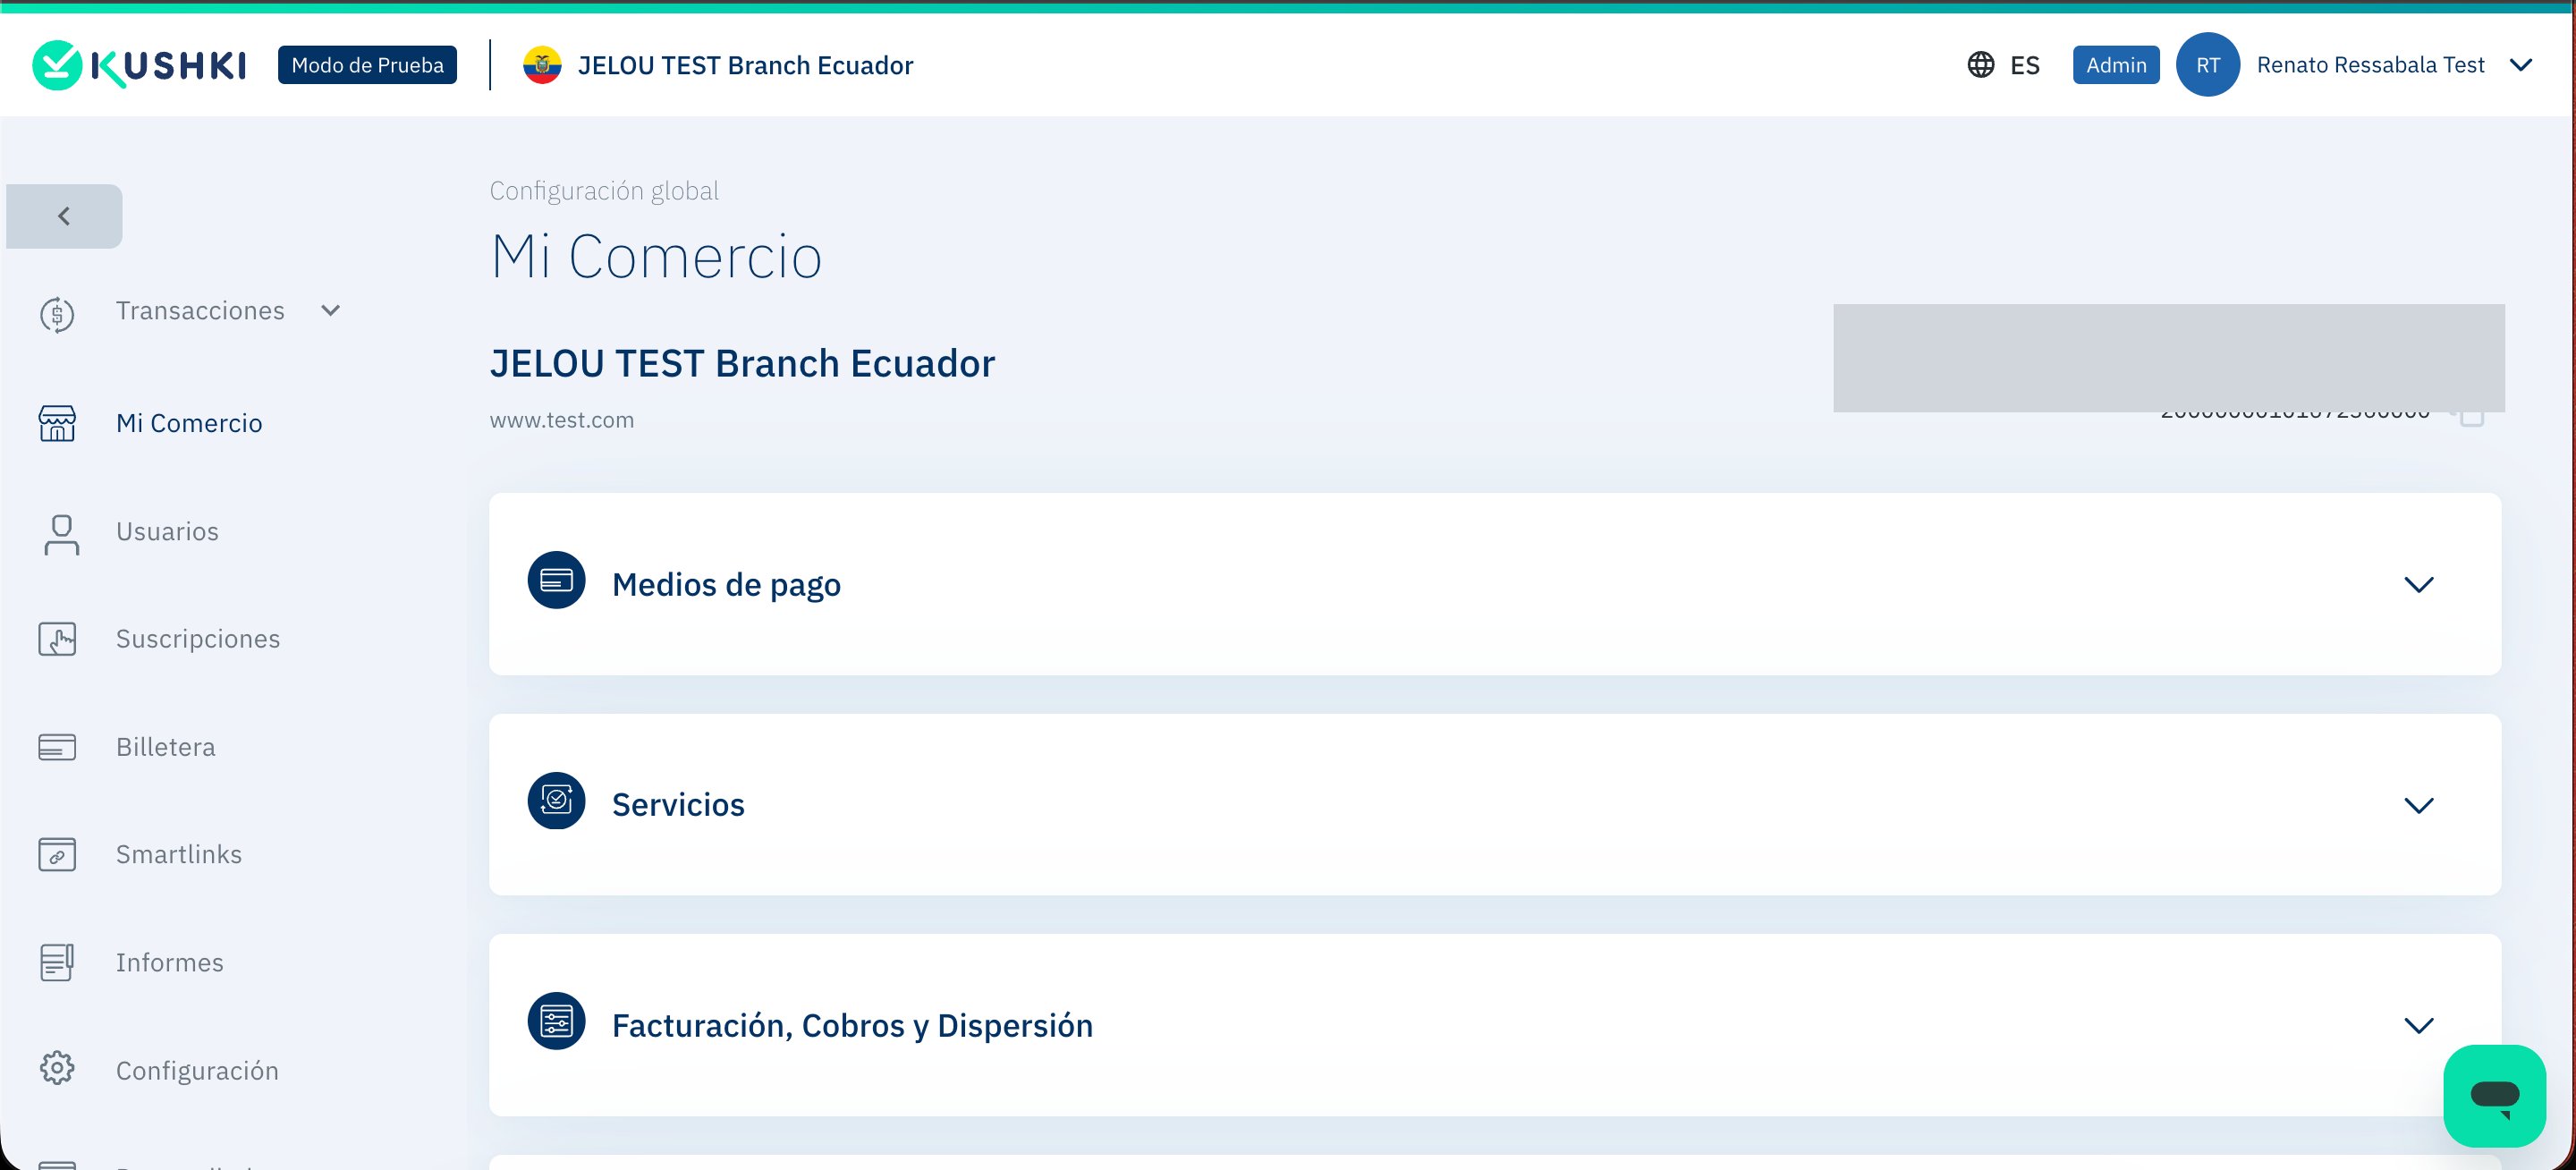
| **My Merchant** | Merchant ID |
Do not mix credentials across environments. If even one credential belongs to the wrong environment, installation may fail or payment statuses may not sync.
***
## Webhook URL
In test and production, Kushki must configure this URL:
```text theme={null}
https://chat-payments.jelou.ai/kushki-webhook
```
Request the configuration by email and include your **merchant ID**. In Brain Studio you only enter the **webhook signature**, not the URL.
***
## Part 1 — Test environment
Sign up at [https://uat-console.kushkipagos.com/auth/signup](https://uat-console.kushkipagos.com/auth/signup).
Then sign in at [https://uat-console.kushkipagos.com/auth](https://uat-console.kushkipagos.com/auth).
Open **Developers → Credentials** and copy:
* **Public key**
* **Private key**
 Open **Developers → Webhooks** and copy the **Webhook signature** value.
 Open **My Merchant** and copy the **Merchant ID**.
 Email [soporte@kushkipagos.com](mailto:soporte@kushkipagos.com) with your **merchant ID** and request:
* Configure the webhook with `https://chat-payments.jelou.ai/kushki-webhook`
* Enable the **payment button** service on that merchant ID
When the service is active, open **Settings → Integrations → Payment Button**.
Email [soporte@kushkipagos.com](mailto:soporte@kushkipagos.com) with your **merchant ID** and request:
* Configure the webhook with `https://chat-payments.jelou.ai/kushki-webhook`
* Enable the **payment button** service on that merchant ID
When the service is active, open **Settings → Integrations → Payment Button**.
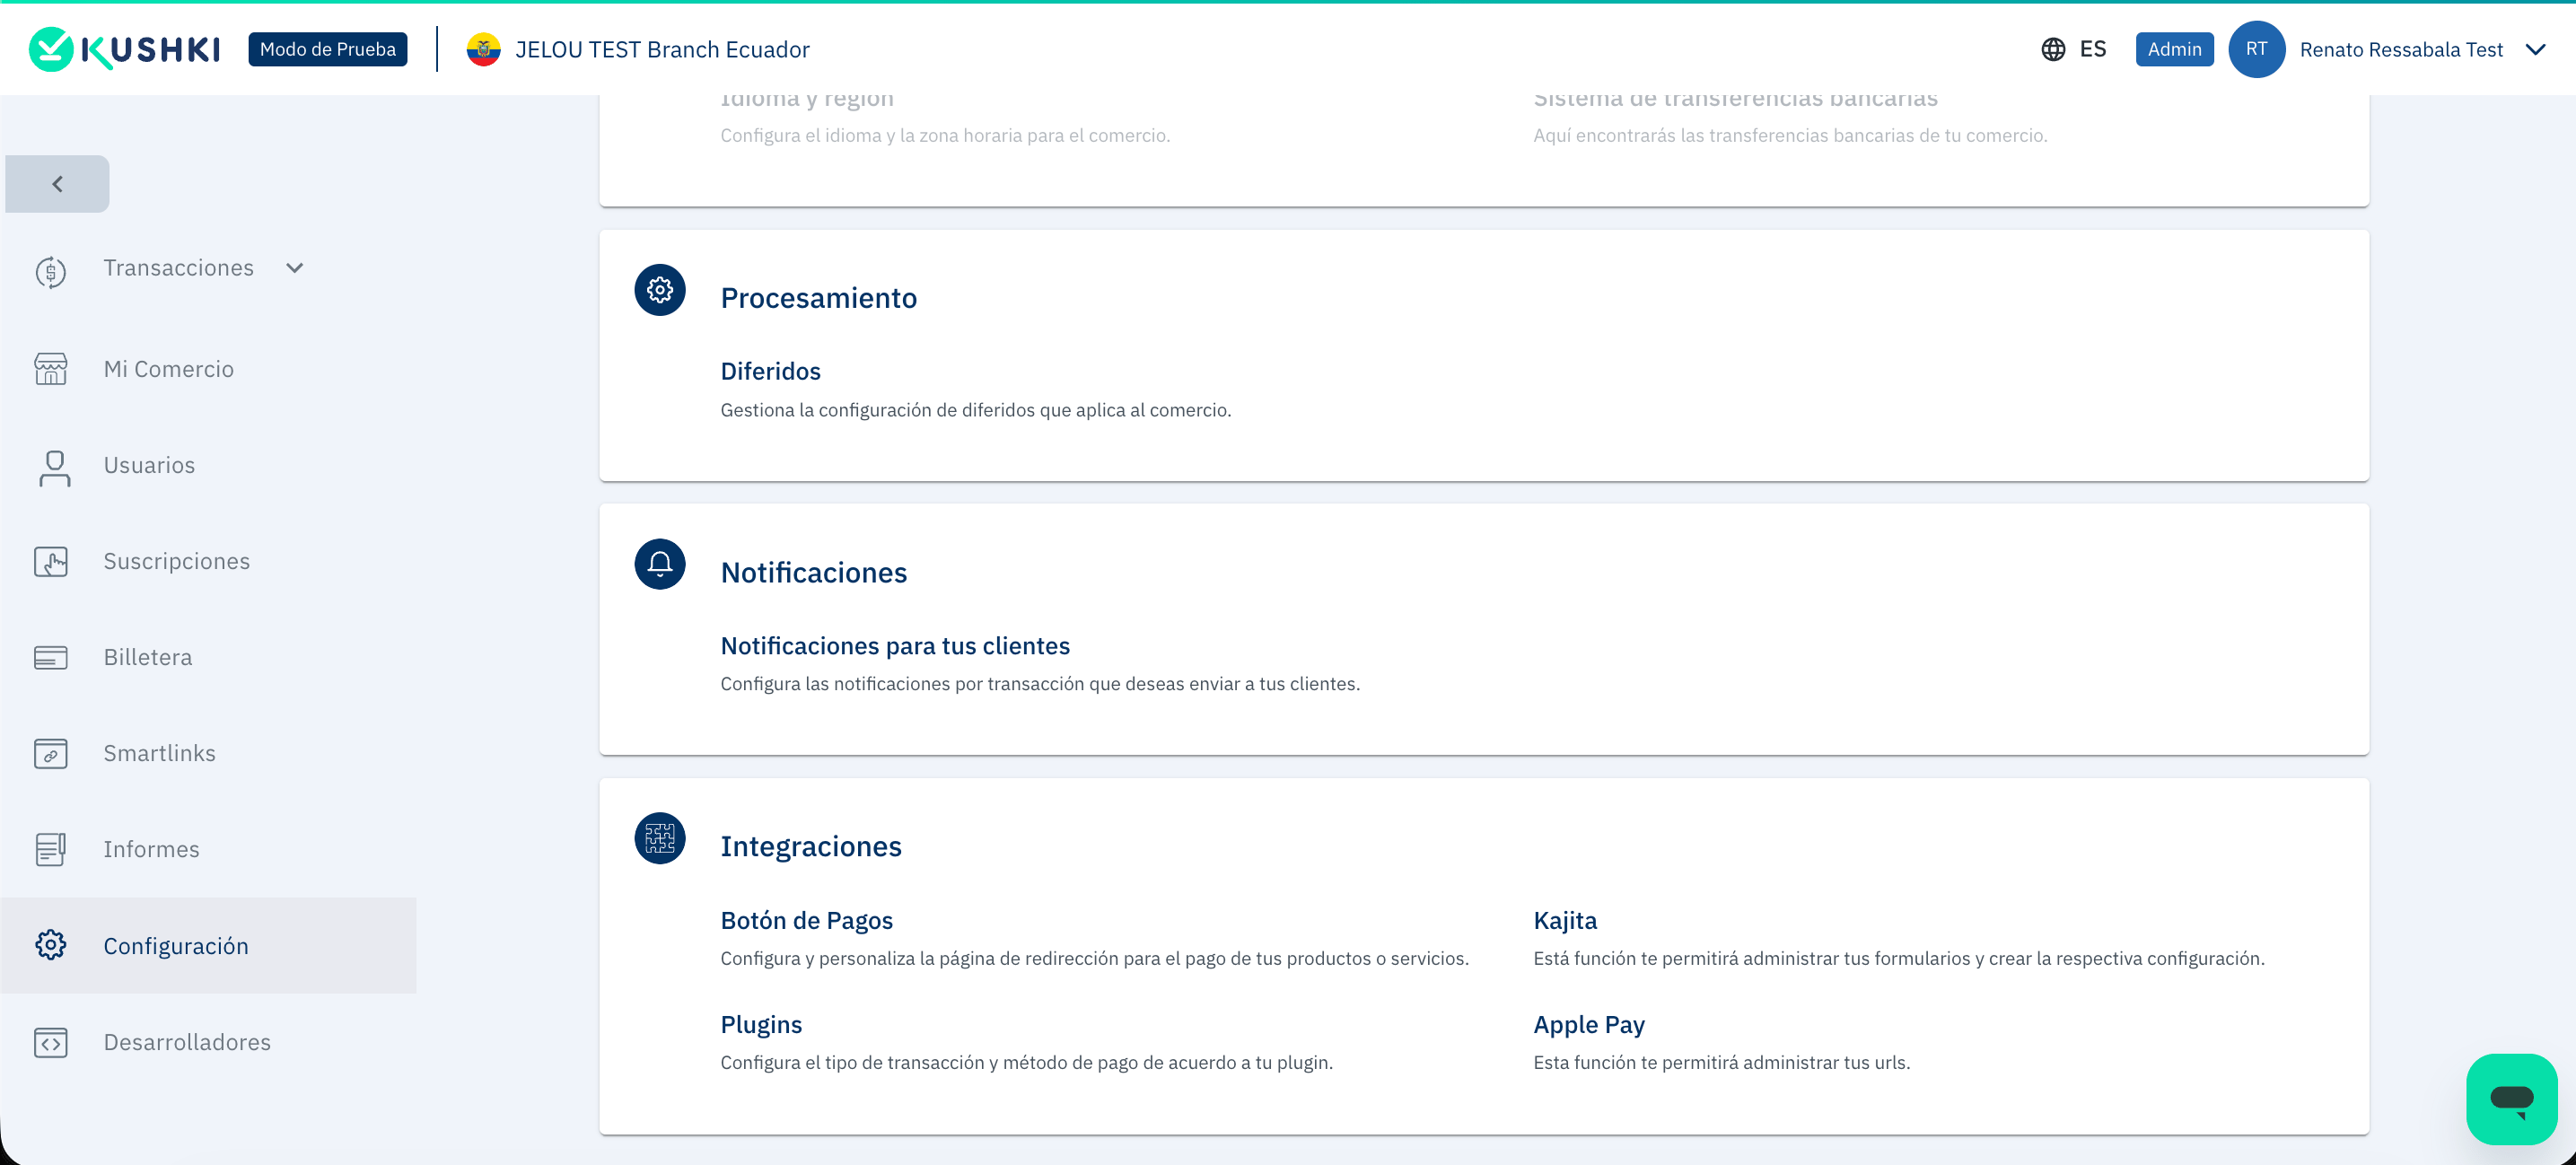 In the **Advanced** tab, enable **Additional product information**.
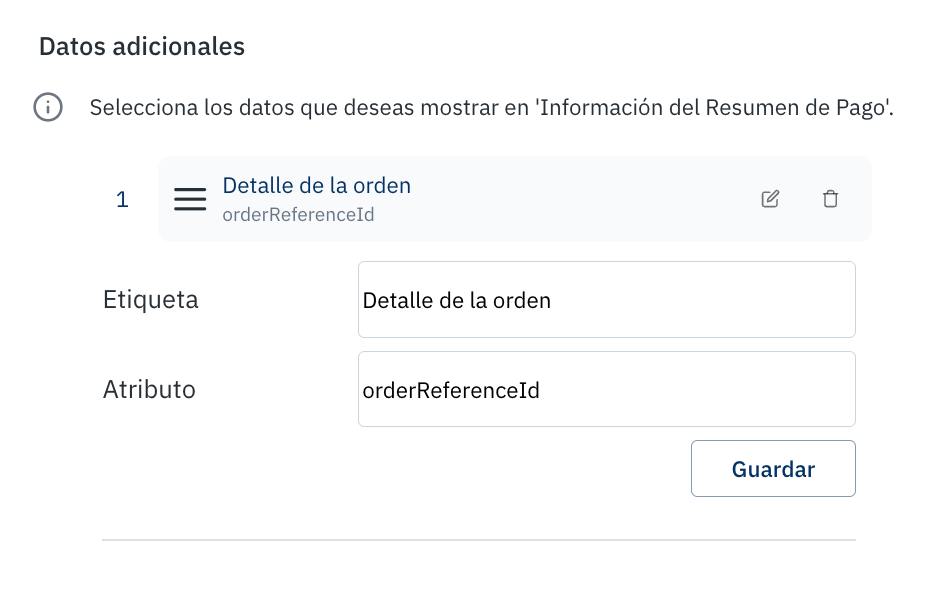
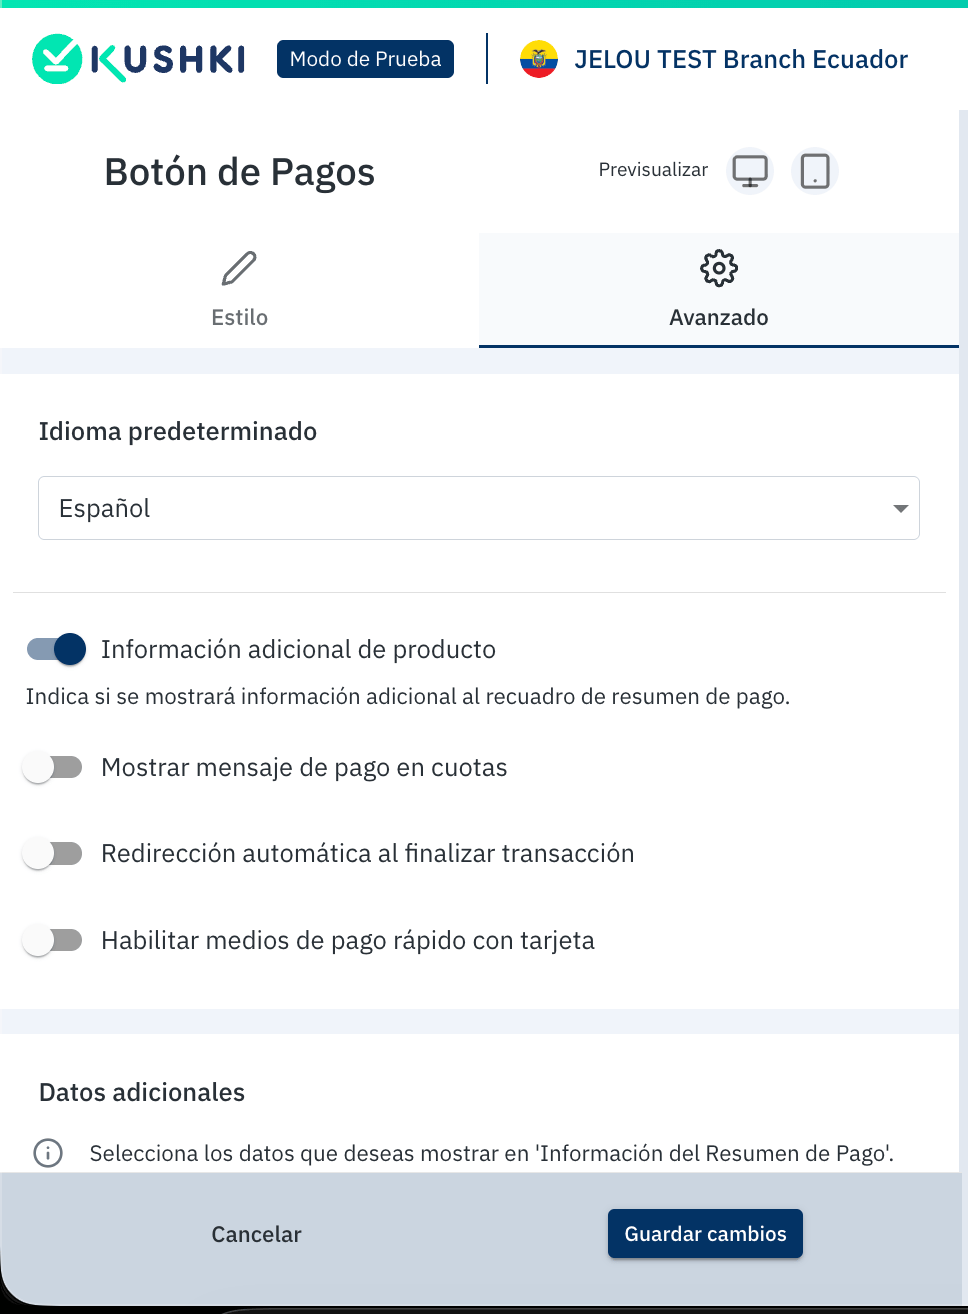 Under **Additional data**, configure:
* **Label:** `Detalle de la orden`
* **Attribute:** `orderReferenceId`
Save the changes.
Under **Additional data**, configure:
* **Label:** `Detalle de la orden`
* **Attribute:** `orderReferenceId`
Save the changes.
 Store the four credentials securely. You will use them when installing Kushki in Brain Studio.
***
## Part 2 — Production environment
Jelou is already certified as a platform with Kushki. You do not need additional merchant certification.
Email [gaelle.depenanros@kushkipagos.com](mailto:gaelle.depenanros@kushkipagos.com) (commercial / partnerships) and request:
* Access to the production console
* Production credentials
* Webhook configuration with `https://chat-payments.jelou.ai/kushki-webhook`
Kushki will send access to [console.kushkipagos.com](https://console.kushkipagos.com). Sign in with the production account.
Copy the same set of values:
* **Public key** and **private key** under **Developers → Credentials**
* **Webhook signature** under **Developers → Webhooks**
* **Merchant ID** under **My Merchant**
Use this set when moving Kushki to production in Brain Studio. Do not reuse test credentials.
Repeat the **Payment Button** configuration from Part 1:
* Enable **Additional product information**
* Under **Additional data**, use label `Detalle de la orden` and attribute `orderReferenceId`
* Save the changes
***
## What Brain Studio requests
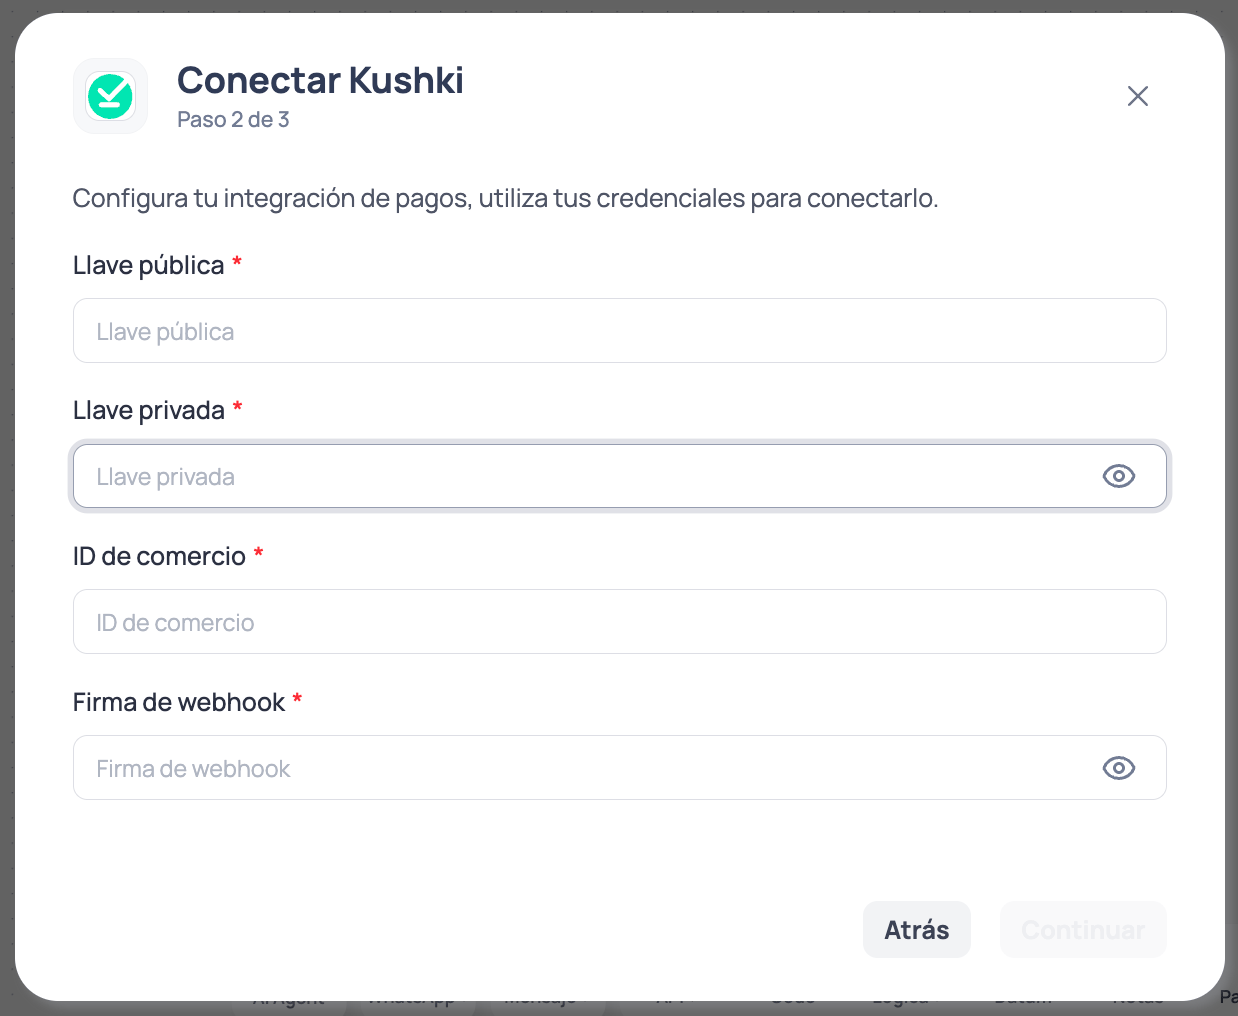
In step 2 of 3 of the connection modal, Brain Studio asks for:
| Field | Description |
| --------------------- | -------------------------------------------------- |
| **Public key** | Public key for the environment you are connecting |
| **Private key** | Private key for the environment you are connecting |
| **Merchant ID** | Merchant identifier in Kushki |
| **Webhook signature** | **Webhook signature** value from the console |
Store the four credentials securely. You will use them when installing Kushki in Brain Studio.
***
## Part 2 — Production environment
Jelou is already certified as a platform with Kushki. You do not need additional merchant certification.
Email [gaelle.depenanros@kushkipagos.com](mailto:gaelle.depenanros@kushkipagos.com) (commercial / partnerships) and request:
* Access to the production console
* Production credentials
* Webhook configuration with `https://chat-payments.jelou.ai/kushki-webhook`
Kushki will send access to [console.kushkipagos.com](https://console.kushkipagos.com). Sign in with the production account.
Copy the same set of values:
* **Public key** and **private key** under **Developers → Credentials**
* **Webhook signature** under **Developers → Webhooks**
* **Merchant ID** under **My Merchant**
Use this set when moving Kushki to production in Brain Studio. Do not reuse test credentials.
Repeat the **Payment Button** configuration from Part 1:
* Enable **Additional product information**
* Under **Additional data**, use label `Detalle de la orden` and attribute `orderReferenceId`
* Save the changes
***
## What Brain Studio requests
In step 2 of 3 of the connection modal, Brain Studio asks for:
| Field | Description |
| --------------------- | -------------------------------------------------- |
| **Public key** | Public key for the environment you are connecting |
| **Private key** | Private key for the environment you are connecting |
| **Merchant ID** | Merchant identifier in Kushki |
| **Webhook signature** | **Webhook signature** value from the console |
 In step 3 you define **applied VAT** and **collection currency**.
***
## Next step
Install Kushki with credentials for the environment you will use and define VAT and collection currency.
In step 3 you define **applied VAT** and **collection currency**.
***
## Next step
Install Kushki with credentials for the environment you will use and define VAT and collection currency.