> ## Documentation Index
> Fetch the complete documentation index at: https://docs.jelou.ai/llms.txt
> Use this file to discover all available pages before exploring further.
# Connect in Brain Studio
> Connect your Mercado Pago account from Marketplace using your Access Token.
Connect Mercado Pago from **Marketplace** to enable the provider in your workspace and make the payment node available in Brain Studio.
***
## Before you begin
Make sure you have:
* An **[active Mercado Pago merchant account](/guides/integraciones/pagos/proveedores/mercado-pago/obtener-credenciales#no-tienes-cuenta-en-mercado-pago)**
* An **Access Token** (Test or Production)
If you don't have your Access Token yet, follow the
[Obtaining credentials](/guides/integraciones/pagos/proveedores/mercado-pago/obtener-credenciales) guide.
***
## Connect from Marketplace
In Brain Studio, go to **Marketplace** from the side menu.
You can find Mercado Pago under the
**Payments & Processing** category or by using the search bar.
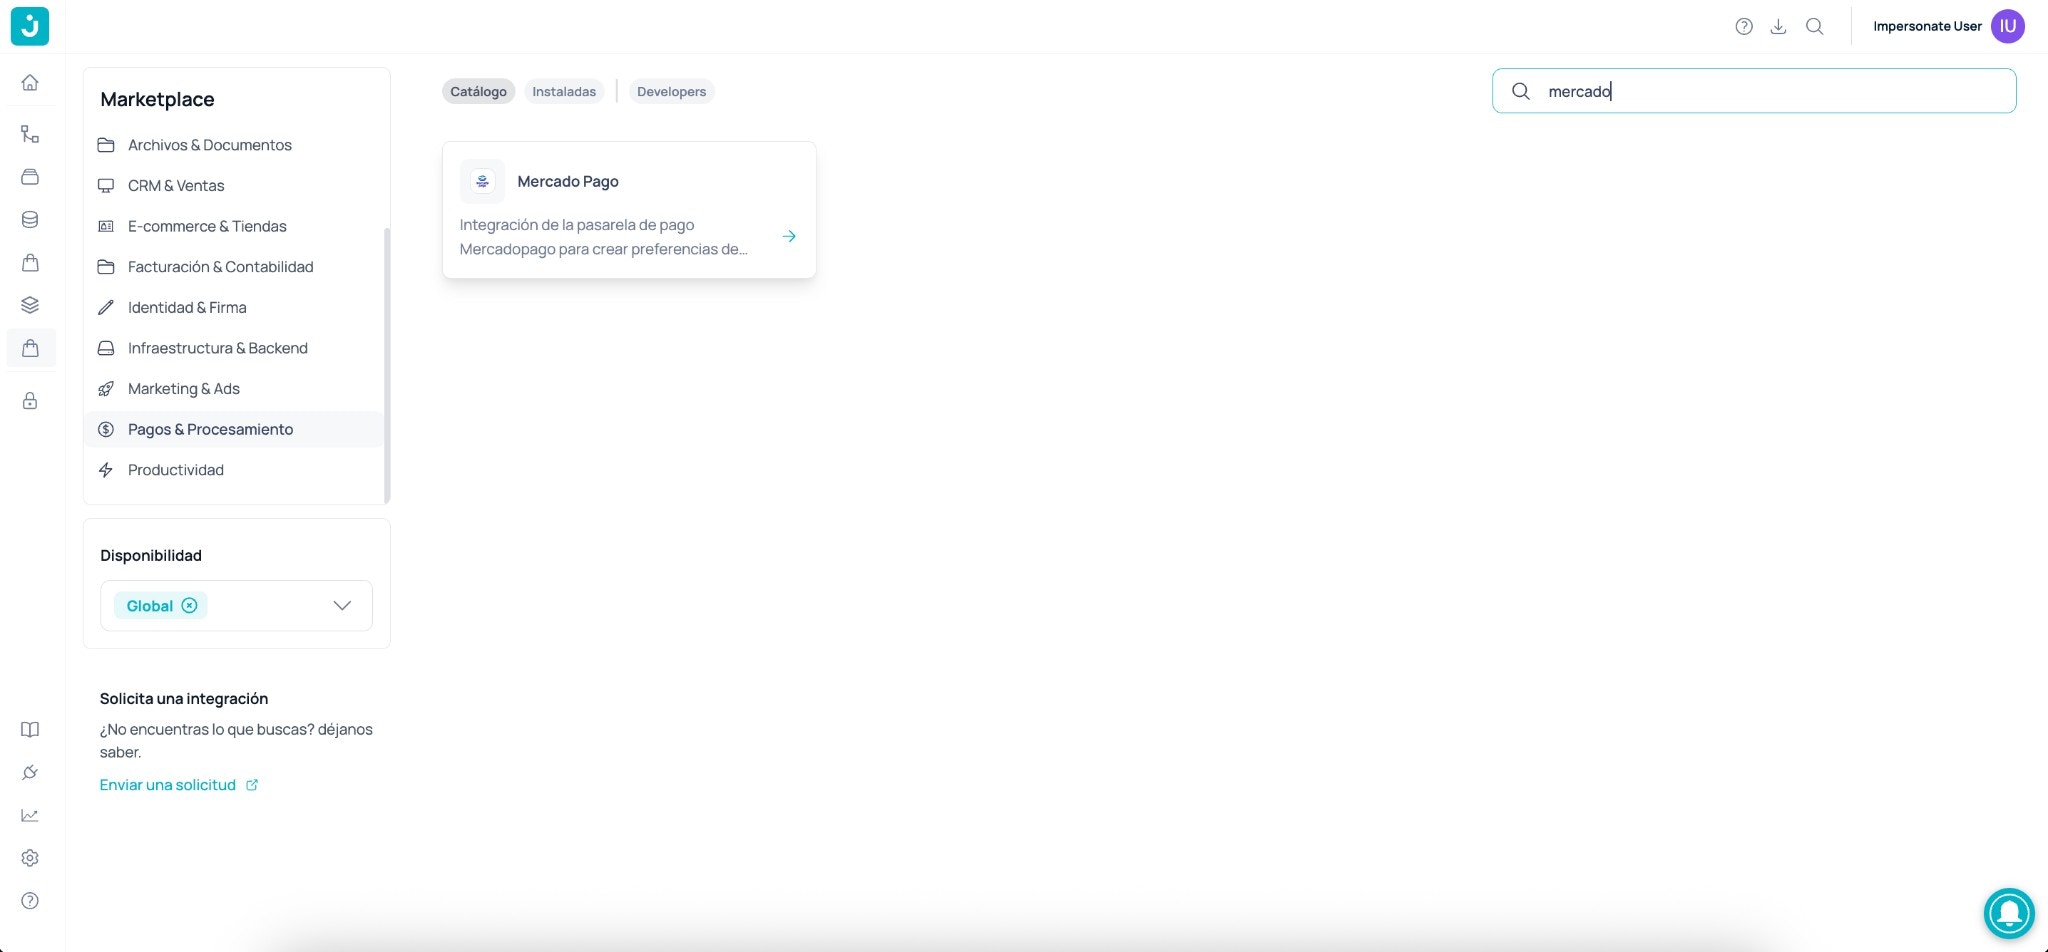 Click on the **Mercado Pago** card to open its detail view.
Click **Connect**.
In some UI versions the button may appear as **Install**.
Both serve the same purpose: initiating the provider connection.
A modal will open asking for your **Access Token**.
Click on the **Mercado Pago** card to open its detail view.
Click **Connect**.
In some UI versions the button may appear as **Install**.
Both serve the same purpose: initiating the provider connection.
A modal will open asking for your **Access Token**.
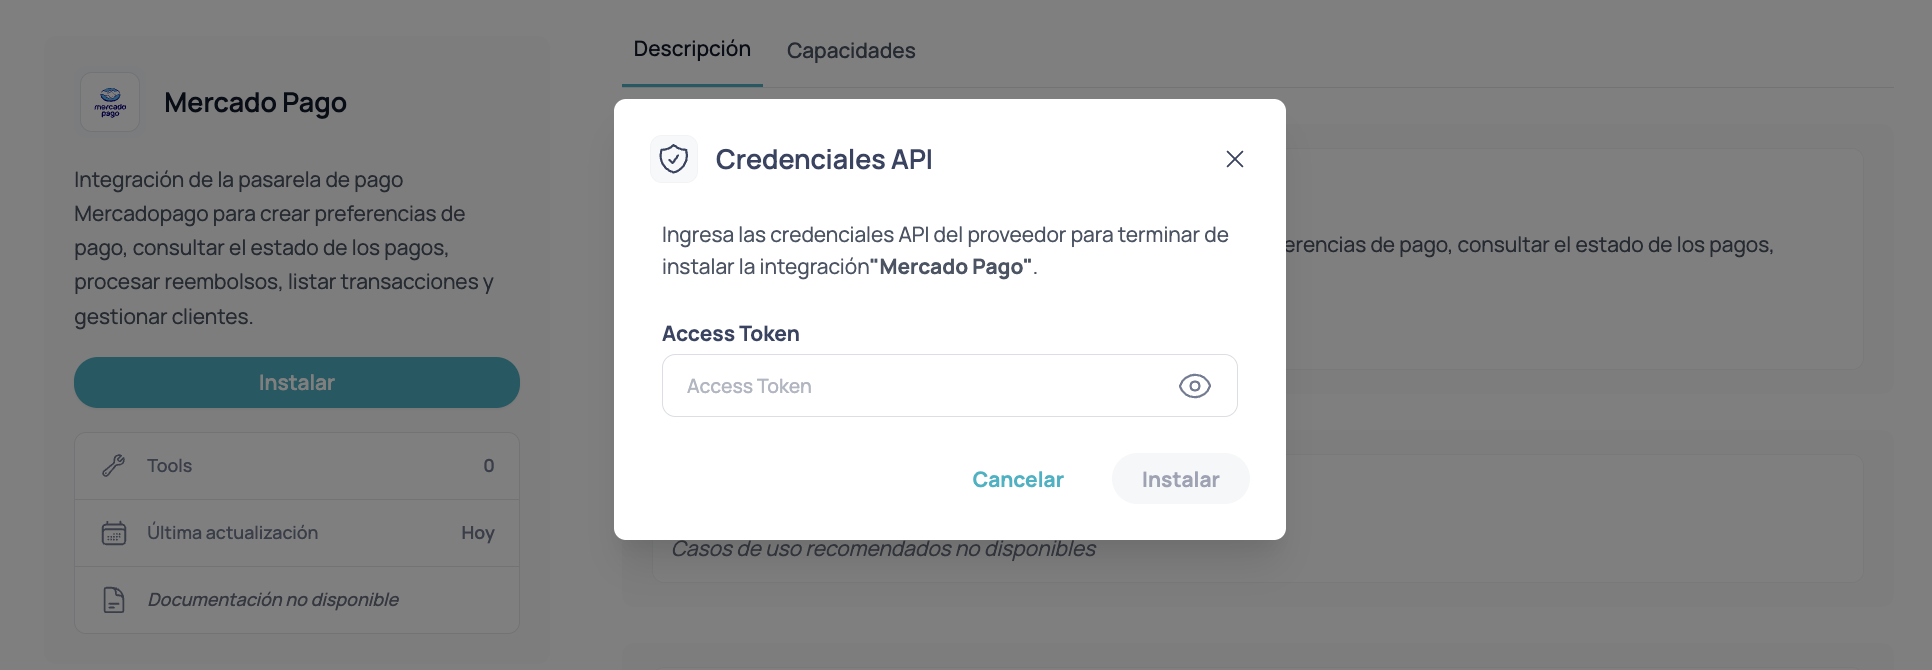 Paste your Access Token (Test or Production) and confirm the connection.
Brain Studio will validate the token and connect the provider to your workspace.
If Mercado Pago appears as connected in Marketplace and the node is available in Canvas, the integration was enabled successfully.
***
## Using a Test vs Production token
You can connect the integration with:
* **Test Access Token:** for test or QA environments.
* **Production Access Token:** to process real payments.
Test tokens do not process real payments.
Make sure to use Production credentials before going live.
***
## Changing the Access Token
If you need to move from **Test to Production** (or rotate credentials):
Remove or disconnect Mercado Pago from Marketplace.
Repeat the connection process and enter the new Access Token.
Once reconnected, the integration will use the new credentials.
***
## Next step
Once the integration is connected, continue with:
Configure the payment node and handle transaction states in your flow.
Paste your Access Token (Test or Production) and confirm the connection.
Brain Studio will validate the token and connect the provider to your workspace.
If Mercado Pago appears as connected in Marketplace and the node is available in Canvas, the integration was enabled successfully.
***
## Using a Test vs Production token
You can connect the integration with:
* **Test Access Token:** for test or QA environments.
* **Production Access Token:** to process real payments.
Test tokens do not process real payments.
Make sure to use Production credentials before going live.
***
## Changing the Access Token
If you need to move from **Test to Production** (or rotate credentials):
Remove or disconnect Mercado Pago from Marketplace.
Repeat the connection process and enter the new Access Token.
Once reconnected, the integration will use the new credentials.
***
## Next step
Once the integration is connected, continue with:
Configure the payment node and handle transaction states in your flow.