> ## Documentation Index
> Fetch the complete documentation index at: https://docs.jelou.ai/llms.txt
> Use this file to discover all available pages before exploring further.
# Usage and configuration
> Add the Mercado Pago node to your Canvas flow and configure its inputs and outputs.
Once the integration is connected in Marketplace, the **Mercado Pago** node becomes available in your workspace for use inside your flows.
This guide shows you how to add it to the Canvas and how to configure its inputs and outputs.
First time implementing a charge? Follow the [Tutorial: Implementing your first charge from WhatsApp](/guides/integraciones/pagos/implementando-tu-primer-cobro) guide first, which takes you step by step from zero to production.
***
## Add the node to the Canvas
In the left sidebar of Brain Studio, open the **Marketplace** folder.
If the integration is correctly connected, you will see **Mercado Pago** listed as an available provider.
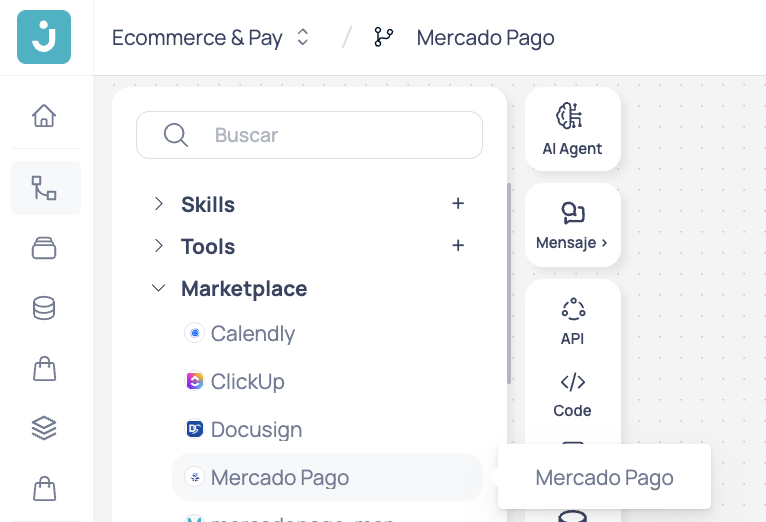 Drag **Mercado Pago** from the sidebar into your flow on the Canvas.
When you drop it, the node block will be created with its available outputs.
Drag **Mercado Pago** from the sidebar into your flow on the Canvas.
When you drop it, the node block will be created with its available outputs.
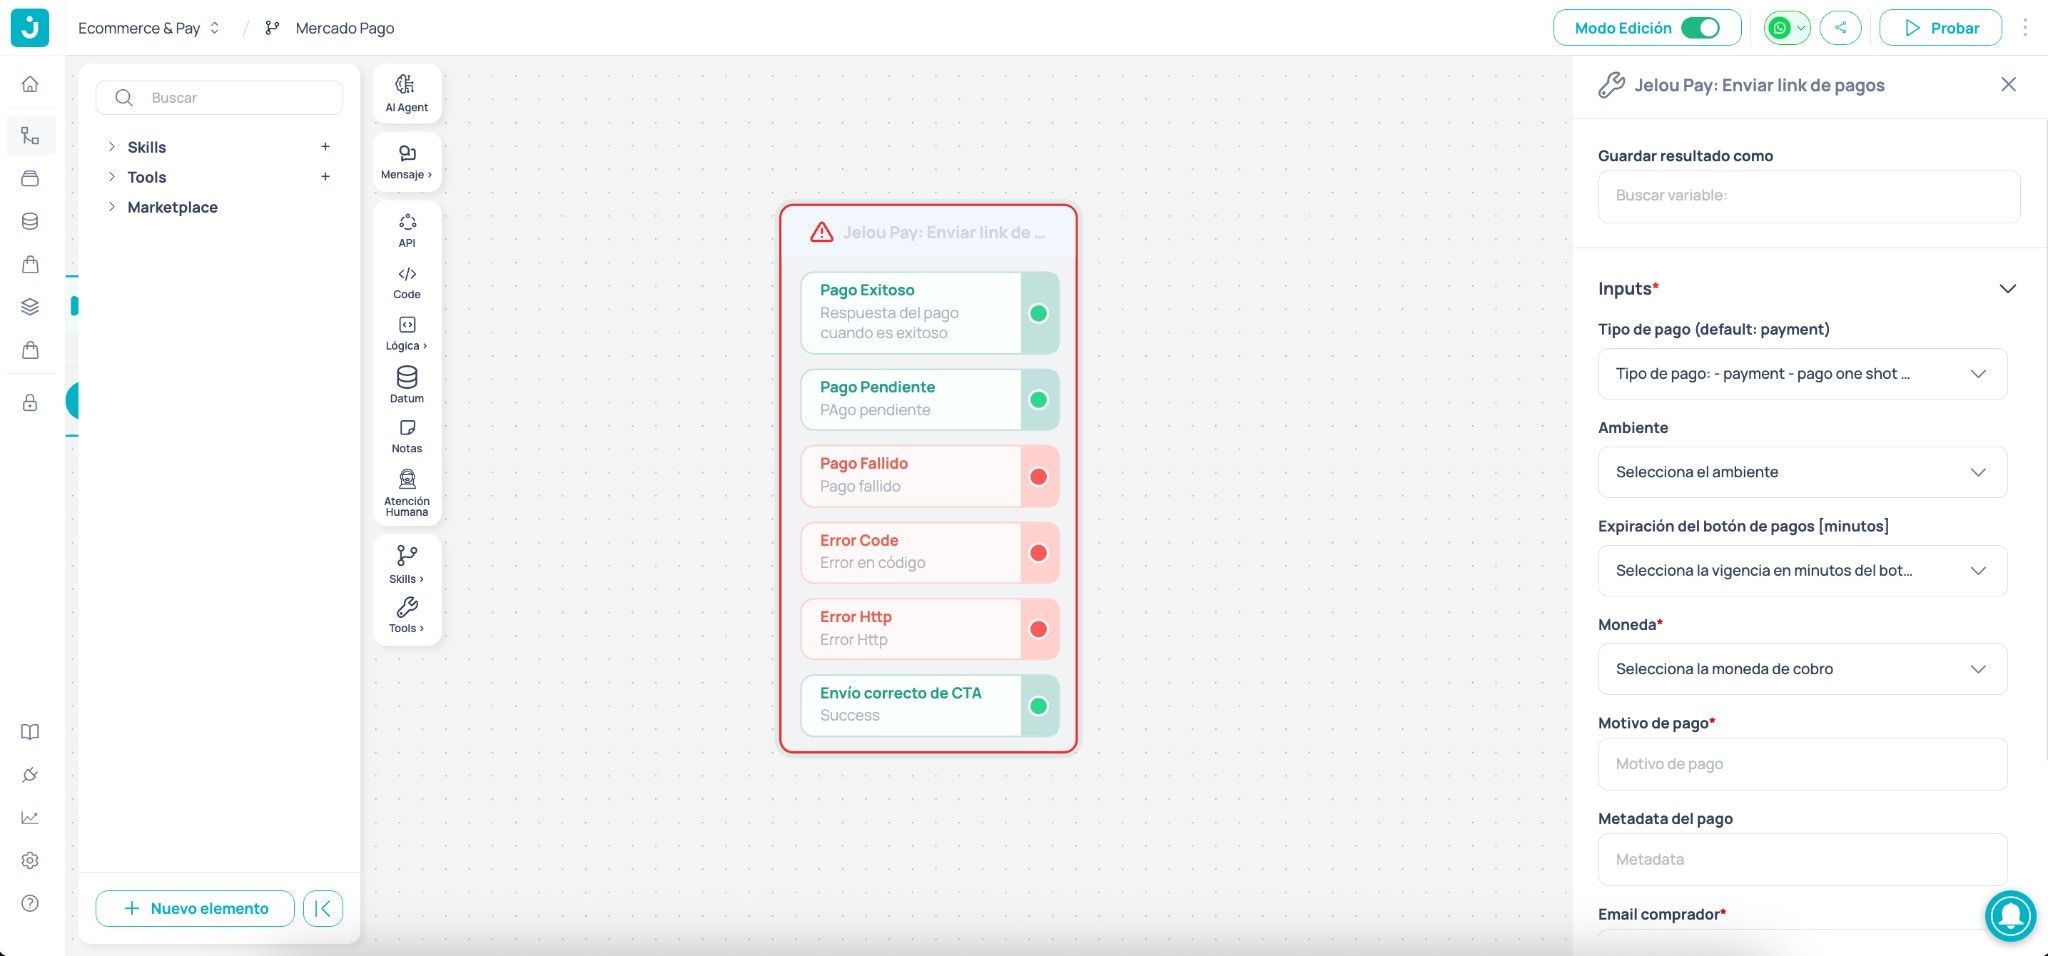 Select the node on the Canvas to open its configuration panel on the right side.
From there you can complete the **inputs** and review the available **outputs**.
***
## Configure the node in Canvas
Defines the name of the variable where Brain Studio will store the **complete JSON** response from the node.
Useful if you want to use the response later (logs, validations, traceability, or flow decisions).
Defines the type of charge.
**Available values:** `payment` (one-time payment), `subscription` (subscription)
If nothing is selected, `payment` will be used.
Defines the execution environment for the payment.
**Available values:** `Test`, `Production`
Must match the Access Token you connected in Marketplace (Test vs Production).
Defines how long the payment button is valid from the moment it is sent to the user.
**Available values:** `10`, `20`, `30`, `60`
Currency for the charge.
The available currency depends on the country of the connected Mercado Pago account or credentials.
Descriptive text for the charge (for example, order number or product/service description).
Ideally use it with flow variables so it aligns with the conversation context.
Additional information for traceability or internal reference.
You can use it for correlation with your order, reconciliation, or payment audit.
The buyer's email. It must have been collected previously in the flow and passed here as a variable.
If you select **Yes**, additional fields are enabled to customize the message that accompanies the payment button.
**Fields enabled when activated:**
* `Header` (required)
* `Body` (required)
* `Footer` (required)
When this option is active, you can fully modify the message the user will see before opening the checkout.
Select the node on the Canvas to open its configuration panel on the right side.
From there you can complete the **inputs** and review the available **outputs**.
***
## Configure the node in Canvas
Defines the name of the variable where Brain Studio will store the **complete JSON** response from the node.
Useful if you want to use the response later (logs, validations, traceability, or flow decisions).
Defines the type of charge.
**Available values:** `payment` (one-time payment), `subscription` (subscription)
If nothing is selected, `payment` will be used.
Defines the execution environment for the payment.
**Available values:** `Test`, `Production`
Must match the Access Token you connected in Marketplace (Test vs Production).
Defines how long the payment button is valid from the moment it is sent to the user.
**Available values:** `10`, `20`, `30`, `60`
Currency for the charge.
The available currency depends on the country of the connected Mercado Pago account or credentials.
Descriptive text for the charge (for example, order number or product/service description).
Ideally use it with flow variables so it aligns with the conversation context.
Additional information for traceability or internal reference.
You can use it for correlation with your order, reconciliation, or payment audit.
The buyer's email. It must have been collected previously in the flow and passed here as a variable.
If you select **Yes**, additional fields are enabled to customize the message that accompanies the payment button.
**Fields enabled when activated:**
* `Header` (required)
* `Body` (required)
* `Footer` (required)
When this option is active, you can fully modify the message the user will see before opening the checkout.
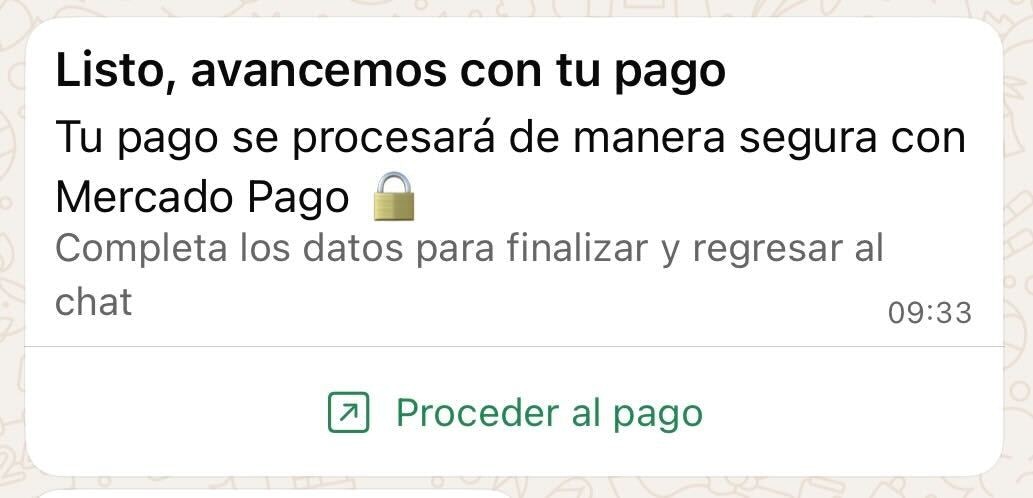 Title of the message that accompanies the payment button.
Main text of the message that accompanies the payment button.
Closing text or disclaimer of the message that accompanies the payment button.
Activated when the provider confirms the transaction was processed successfully.
This is the official payment confirmation point within the flow.
Usage examples:
* Issue invoice
* Activate subscription
* Release product or service
* Update order status in external system
Activated when the provider reports that the transaction is in a pending state.
This may depend on the payment method (transfers, additional validations, etc.).
Currently, monitoring the state change from pending to approved requires additional logic (for example, a webhook or subsequent status verification).
Activated when the transaction was rejected or declined.
Recommendations:
* Inform the user
* Allow retry
* Reuse the same Mercado Pago node
Activated when a communication error with the provider occurs (timeout, network, or invalid response).
Activated when the provider returns an internal error code during payment creation or processing.
Activated when the payment button was sent successfully in the conversation.
Indicates that the message with the button was displayed successfully in WhatsApp.
Can be connected to an AI Agent that assists the user while they decide to complete the payment.
**Example prompt (reference):**
```txt theme={null}
Act as a payment assistant.
The user has just received a button to complete their payment.
Do not send proactive messages.
Only respond if the user asks a question.
Help them understand how to complete the payment and resolve related questions.
```
Title of the message that accompanies the payment button.
Main text of the message that accompanies the payment button.
Closing text or disclaimer of the message that accompanies the payment button.
Activated when the provider confirms the transaction was processed successfully.
This is the official payment confirmation point within the flow.
Usage examples:
* Issue invoice
* Activate subscription
* Release product or service
* Update order status in external system
Activated when the provider reports that the transaction is in a pending state.
This may depend on the payment method (transfers, additional validations, etc.).
Currently, monitoring the state change from pending to approved requires additional logic (for example, a webhook or subsequent status verification).
Activated when the transaction was rejected or declined.
Recommendations:
* Inform the user
* Allow retry
* Reuse the same Mercado Pago node
Activated when a communication error with the provider occurs (timeout, network, or invalid response).
Activated when the provider returns an internal error code during payment creation or processing.
Activated when the payment button was sent successfully in the conversation.
Indicates that the message with the button was displayed successfully in WhatsApp.
Can be connected to an AI Agent that assists the user while they decide to complete the payment.
**Example prompt (reference):**
```txt theme={null}
Act as a payment assistant.
The user has just received a button to complete their payment.
Do not send proactive messages.
Only respond if the user asks a question.
Help them understand how to complete the payment and resolve related questions.
```