> ## Documentation Index
> Fetch the complete documentation index at: https://docs.jelou.ai/llms.txt
> Use this file to discover all available pages before exploring further.
# Connect in Brain Studio
> Install Stripe from Marketplace in Brain Studio using your Secret API Key.
Connect Stripe from **Marketplace** to enable the provider in your workspace and make its payment tools available in Brain Studio.
Stripe connects using the **BYOK (Bring Your Own Key)** model, using your own account.
***
## Before you begin
Make sure you have completed these two steps in Stripe Dashboard:
* Have a **Secret API Key (`sk_`)** (Test or Production)
* Have **configured webhooks** so Jelou receives payment events
If you haven't done this yet, follow the
[Configure your Stripe account](/guides/integraciones/pagos/proveedores/stripe/configurar-en-stripe) guide first.
***
## Connect from Marketplace
In Brain Studio, go to **Marketplace** from the side menu.
You can find Stripe under the
**Payments & Processing** category or by using the search bar.
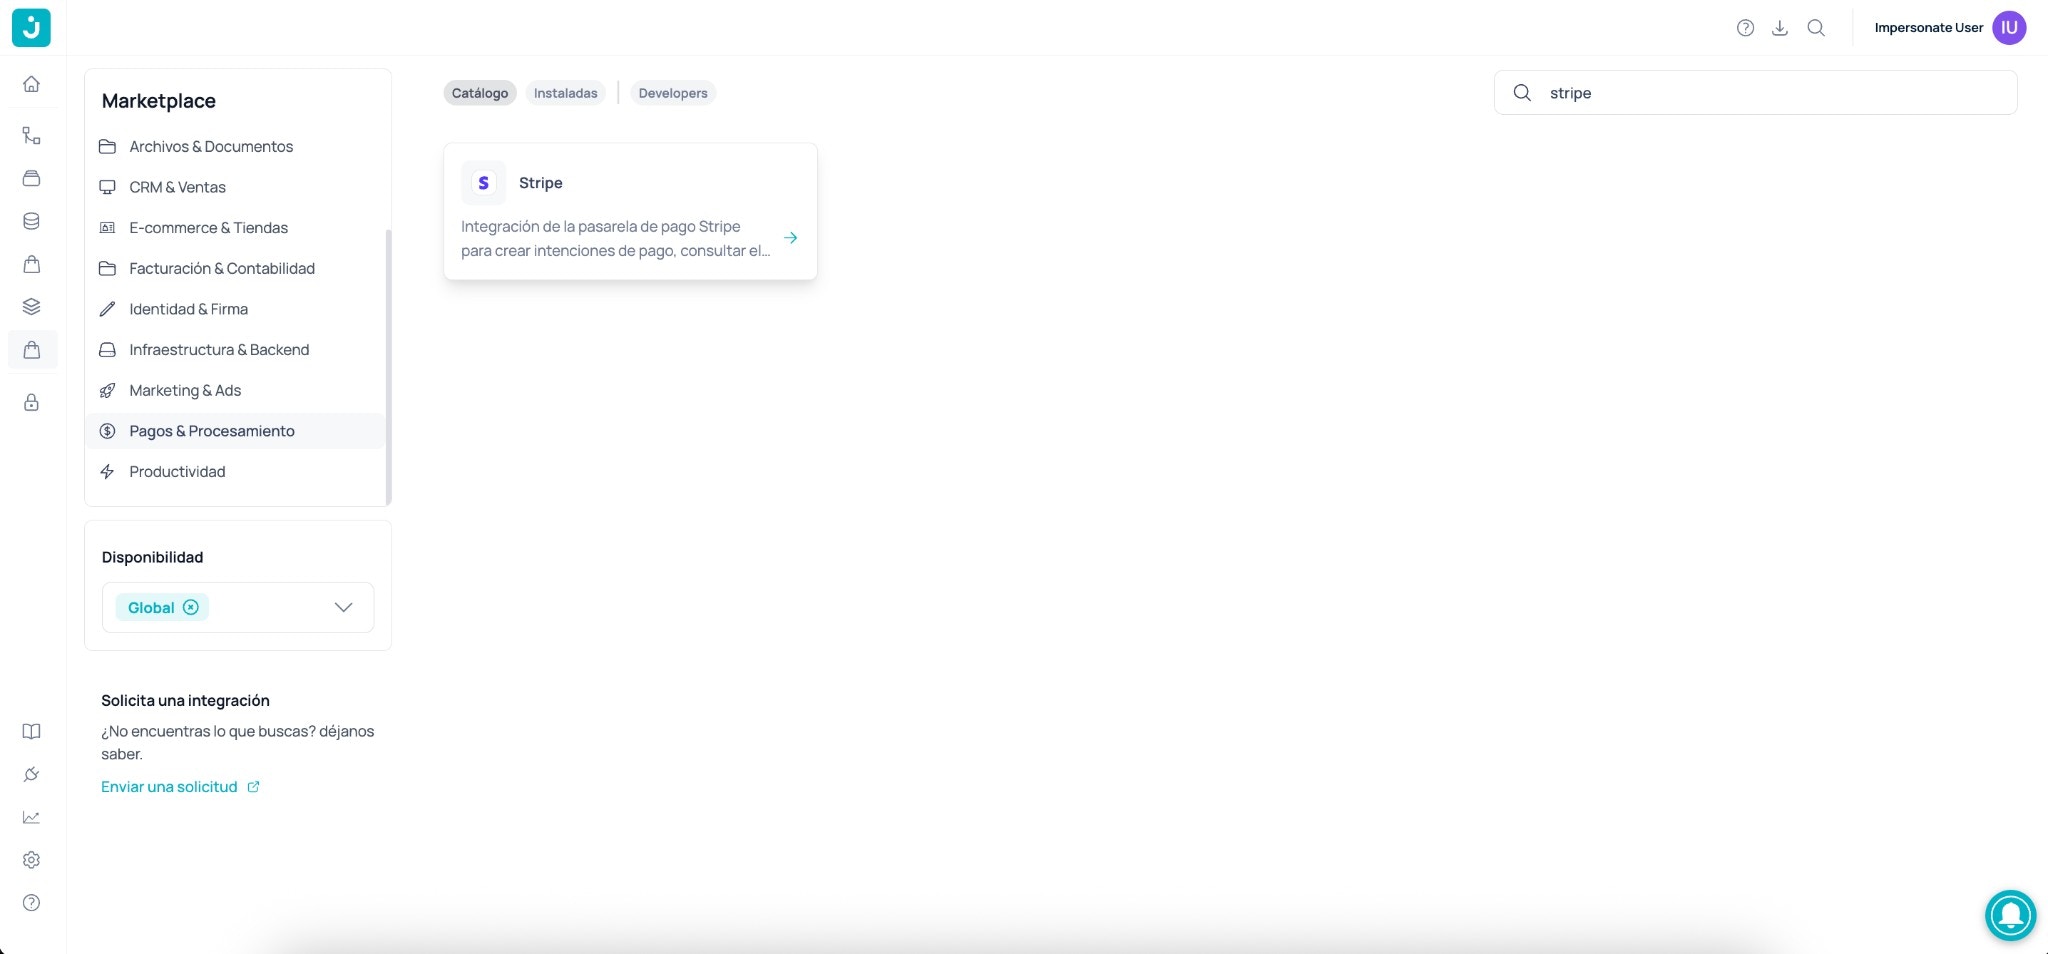 Click on the **Stripe** card to open its detail view.
Click **Install**.
In some UI versions the button may appear as **Connect**.
Both serve the same purpose: initiating the provider connection.
A modal will open asking for an **API Key**.
Click on the **Stripe** card to open its detail view.
Click **Install**.
In some UI versions the button may appear as **Connect**.
Both serve the same purpose: initiating the provider connection.
A modal will open asking for an **API Key**.
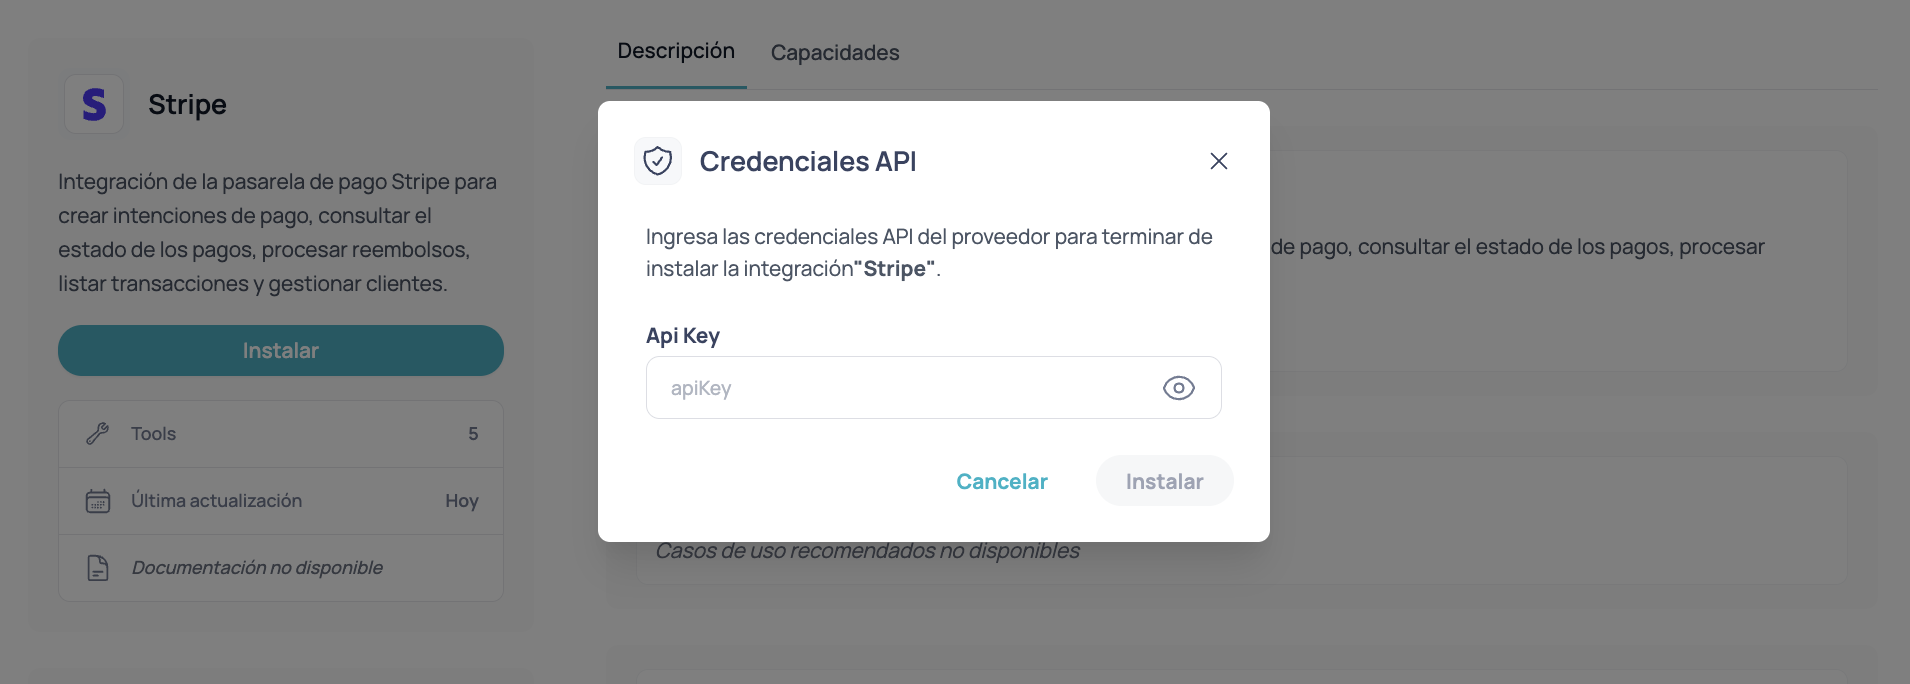 Paste your **Secret API Key (`sk_test_...` or `sk_live_...`)** and confirm the installation.
Do not use the **Publishable Key (`pk_`)**.
Brain Studio requires a **Secret Key (`sk_`)** to operate correctly.
Brain Studio will validate the key and connect Stripe to your workspace.
If Stripe appears as installed in Marketplace and its tools are available in Canvas, the integration was enabled successfully.
***
## Using Test vs Production credentials
You can connect the integration with:
* **Test Secret Key (`sk_test_`)** → For test or QA environments.
* **Production Secret Key (`sk_live_`)** → To process real payments.
The environment you use will depend on the key entered at the time of installation.
Test keys do not process real payments.
Make sure to use Production credentials before going live.
***
## Changing the API Key
If you need to move from **Test to Production** (or rotate credentials):
Remove or uninstall Stripe from Marketplace.
Repeat the connection process and enter the new Secret API Key.
Once reinstalled, the integration will use the new credentials.
***
## Validate the end-to-end integration
With Stripe connected and webhooks configured, you can confirm everything works together:
From your flow in Brain Studio, trigger the Stripe node in **Test mode** and complete a payment using a [Stripe test card](https://docs.stripe.com/testing#cards).
In **Stripe → Workbench → Webhooks**, open the destination and confirm that the `payment_intent.*` events were sent without errors.
The Stripe node should have advanced to the corresponding output (for example, **Payment successful** or **Payment failed**) based on the actual result of the test payment.
If the Stripe node advanced to the correct output and Stripe recorded the event delivery, the integration is working end-to-end.
***
## Next step
Once the integration is connected, continue with:
Configure Stripe tools and handle payment states in your flow.
Paste your **Secret API Key (`sk_test_...` or `sk_live_...`)** and confirm the installation.
Do not use the **Publishable Key (`pk_`)**.
Brain Studio requires a **Secret Key (`sk_`)** to operate correctly.
Brain Studio will validate the key and connect Stripe to your workspace.
If Stripe appears as installed in Marketplace and its tools are available in Canvas, the integration was enabled successfully.
***
## Using Test vs Production credentials
You can connect the integration with:
* **Test Secret Key (`sk_test_`)** → For test or QA environments.
* **Production Secret Key (`sk_live_`)** → To process real payments.
The environment you use will depend on the key entered at the time of installation.
Test keys do not process real payments.
Make sure to use Production credentials before going live.
***
## Changing the API Key
If you need to move from **Test to Production** (or rotate credentials):
Remove or uninstall Stripe from Marketplace.
Repeat the connection process and enter the new Secret API Key.
Once reinstalled, the integration will use the new credentials.
***
## Validate the end-to-end integration
With Stripe connected and webhooks configured, you can confirm everything works together:
From your flow in Brain Studio, trigger the Stripe node in **Test mode** and complete a payment using a [Stripe test card](https://docs.stripe.com/testing#cards).
In **Stripe → Workbench → Webhooks**, open the destination and confirm that the `payment_intent.*` events were sent without errors.
The Stripe node should have advanced to the corresponding output (for example, **Payment successful** or **Payment failed**) based on the actual result of the test payment.
If the Stripe node advanced to the correct output and Stripe recorded the event delivery, the integration is working end-to-end.
***
## Next step
Once the integration is connected, continue with:
Configure Stripe tools and handle payment states in your flow.