> ## Documentation Index
> Fetch the complete documentation index at: https://docs.jelou.ai/llms.txt
> Use this file to discover all available pages before exploring further.
# Configure your Stripe account
> Get your Secret API Key and configure the required webhooks in Stripe Dashboard before connecting to Brain Studio.
This guide covers the two tasks you must complete **in Stripe Dashboard** before connecting to Brain Studio:
1. **Get your Secret API Key** (Test or Live) to install Stripe in Marketplace.
2. **Configure webhooks** so Jelou receives payment events and your flow works correctly.
By the end of this guide you will have credentials and webhooks ready to connect Stripe in Brain Studio.
***
## Before you begin
You need an **active Stripe account**, access to the **Stripe dashboard**, and permissions to view/create **API Keys** and **Webhooks**.
No advanced technical knowledge is required.
***
## Environments in Stripe (Test vs Live)
Stripe separates environments by **key type**:
* **Test (`sk_test_...`)**: for testing without real transactions.
* **Live (`sk_live_...`)**: for real charges in production.
Brain Studio connects to Stripe using the key you enter.
If you install with a **Test** key, your integration stays in **test mode**.
If you install with a **Live** key, it is ready for **production**.
***
## Part 1 — Get your Secret API Key
Sign in to the merchant's Stripe account.
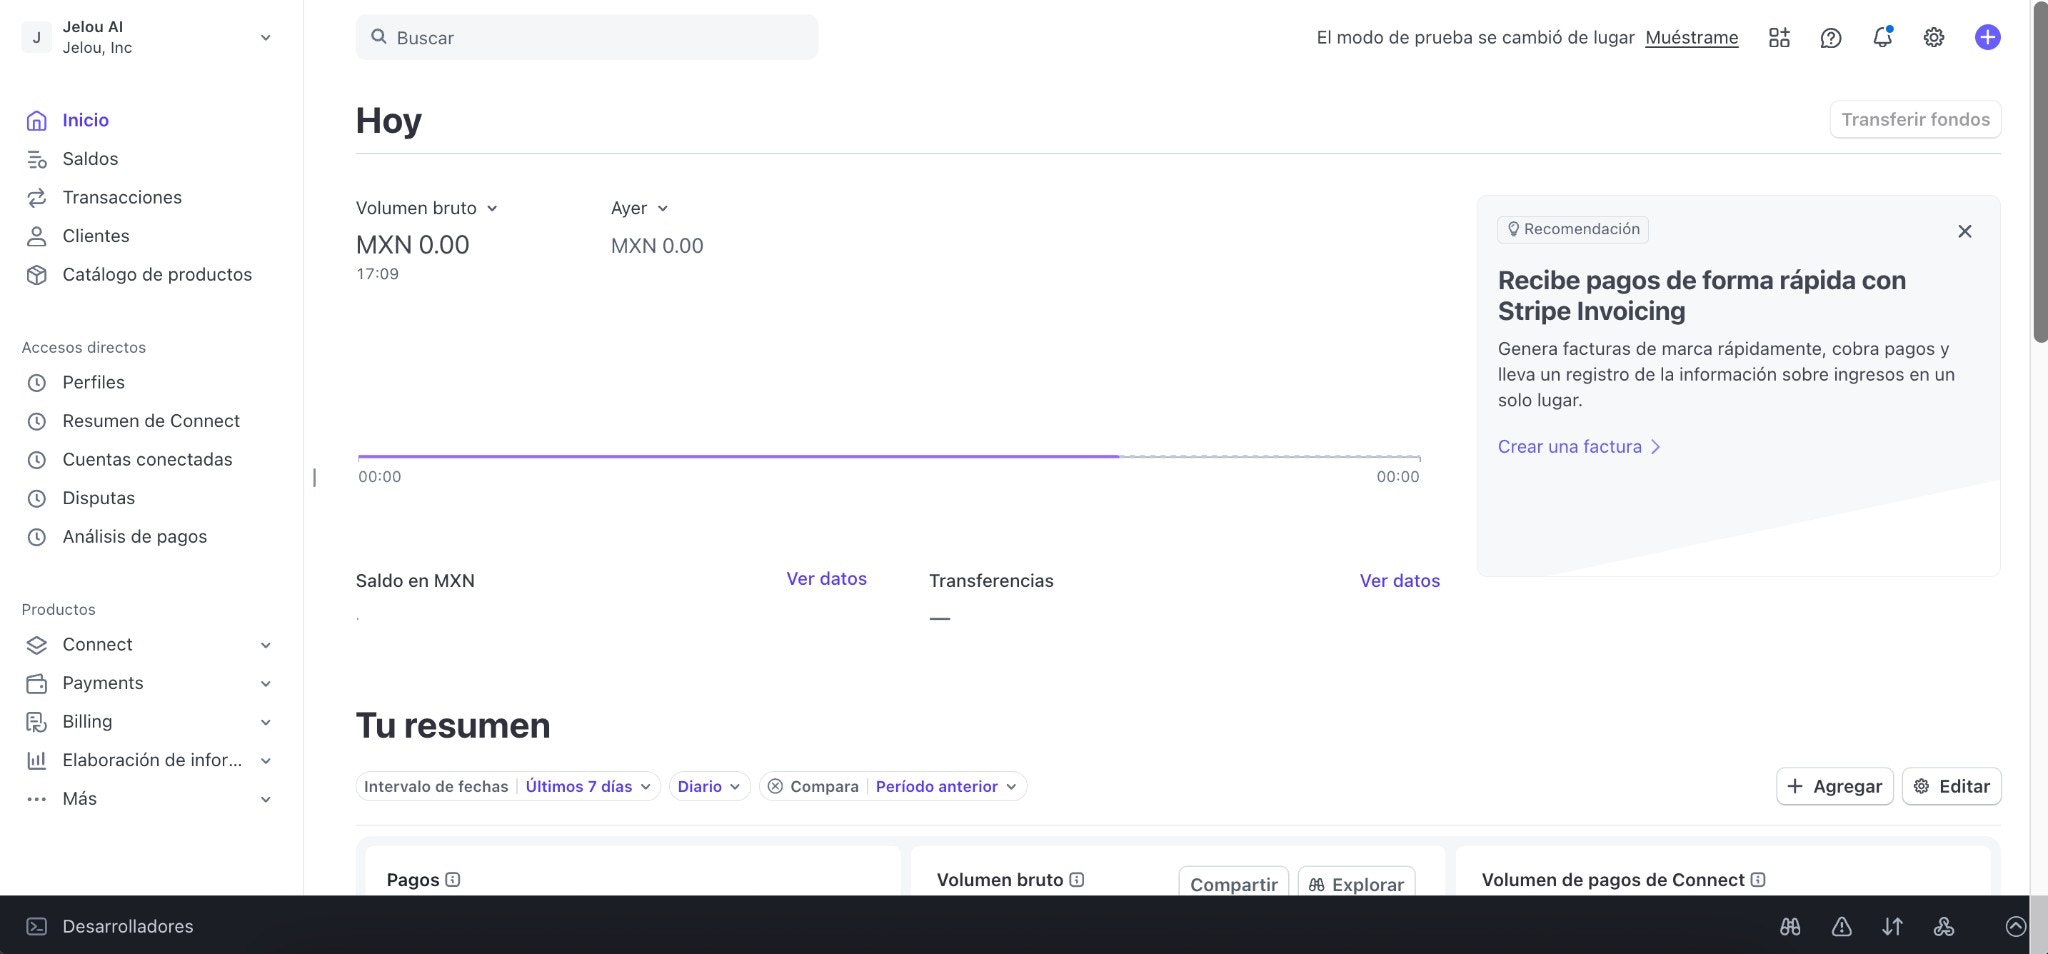 There are two ways to reach **API Keys**:
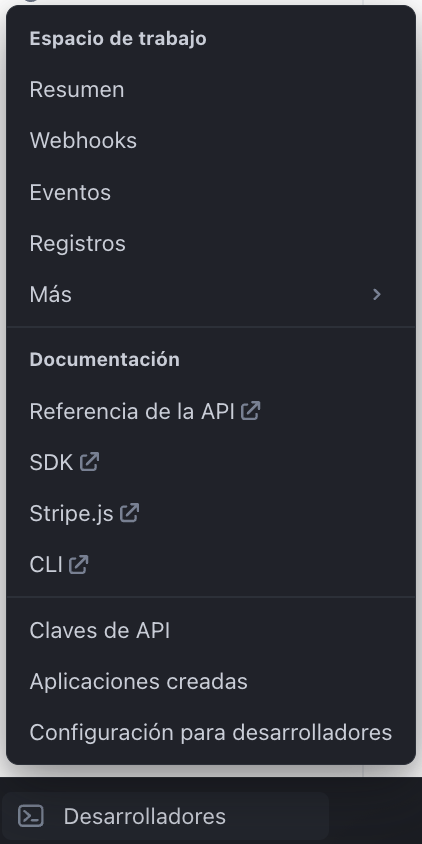
* Via settings (icon at the top right → Developers → Manage API keys)
* In the left side menu, find the **Developers** section and click **API Keys**.
There are two ways to reach **API Keys**:
* Via settings (icon at the top right → Developers → Manage API keys)
* In the left side menu, find the **Developers** section and click **API Keys**.
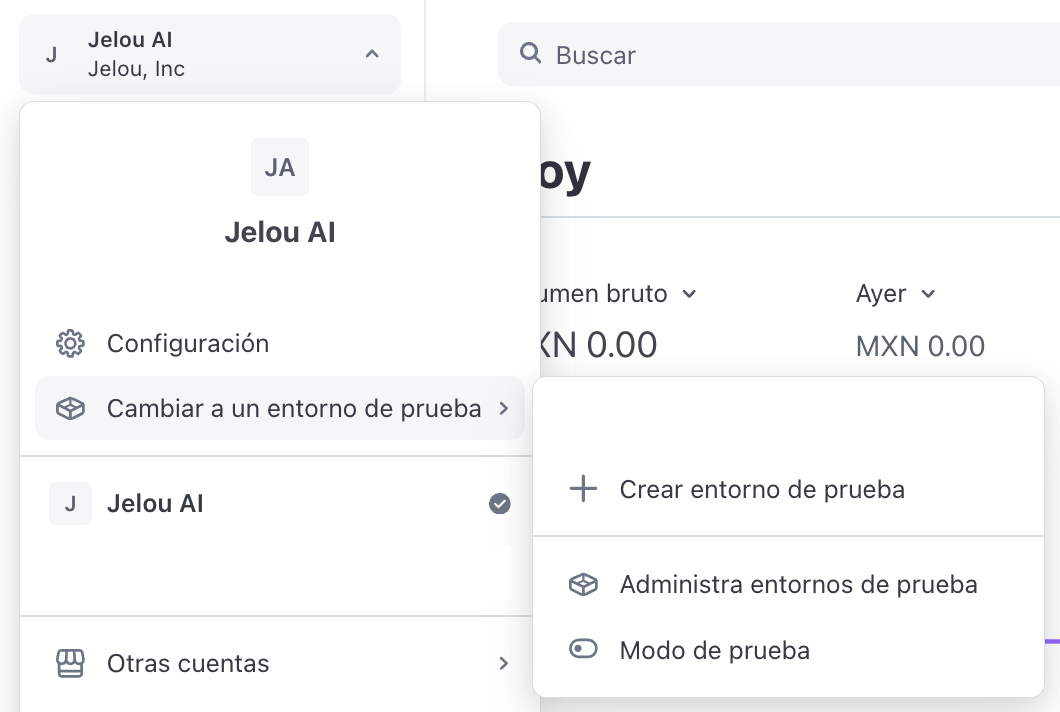
 Stripe may show test mode in two ways (depending on your account):
* An option like **"Test mode"** / **"Switch to a test environment"** from the account selector.
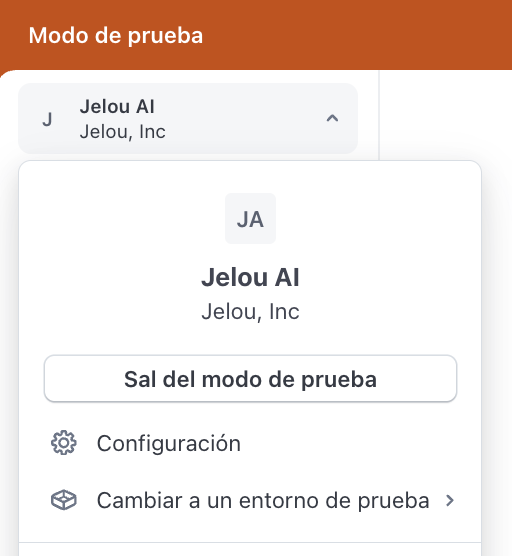
* A **top bar** indicating you are using test data.
Stripe may show test mode in two ways (depending on your account):
* An option like **"Test mode"** / **"Switch to a test environment"** from the account selector.
* A **top bar** indicating you are using test data.
 If your account is in **Live mode**, it is normal to see keys with `live` in the API Keys section.
To get **Test** keys, you must enter **Test mode** and return to this same screen.
If your account is in **Live mode**, it is normal to see keys with `live` in the API Keys section.
To get **Test** keys, you must enter **Test mode** and return to this same screen.
 In **API Keys**, you will see two types of keys:
* **Publishable key (`pk_...`)** → NOT used to install Stripe in Brain Studio
* **Secret key (`sk_...`)** → YES, this is the one you need
In Brain Studio you must always use a **Secret API Key** (`sk_test_...` or `sk_live_...`).
Do not use the Publishable Key (`pk_...`).
If you already have a **Secret key** ready to use, you can copy it.
If you need to create a new one, click **Create secret key**.
In **API Keys**, you will see two types of keys:
* **Publishable key (`pk_...`)** → NOT used to install Stripe in Brain Studio
* **Secret key (`sk_...`)** → YES, this is the one you need
In Brain Studio you must always use a **Secret API Key** (`sk_test_...` or `sk_live_...`).
Do not use the Publishable Key (`pk_...`).
If you already have a **Secret key** ready to use, you can copy it.
If you need to create a new one, click **Create secret key**.
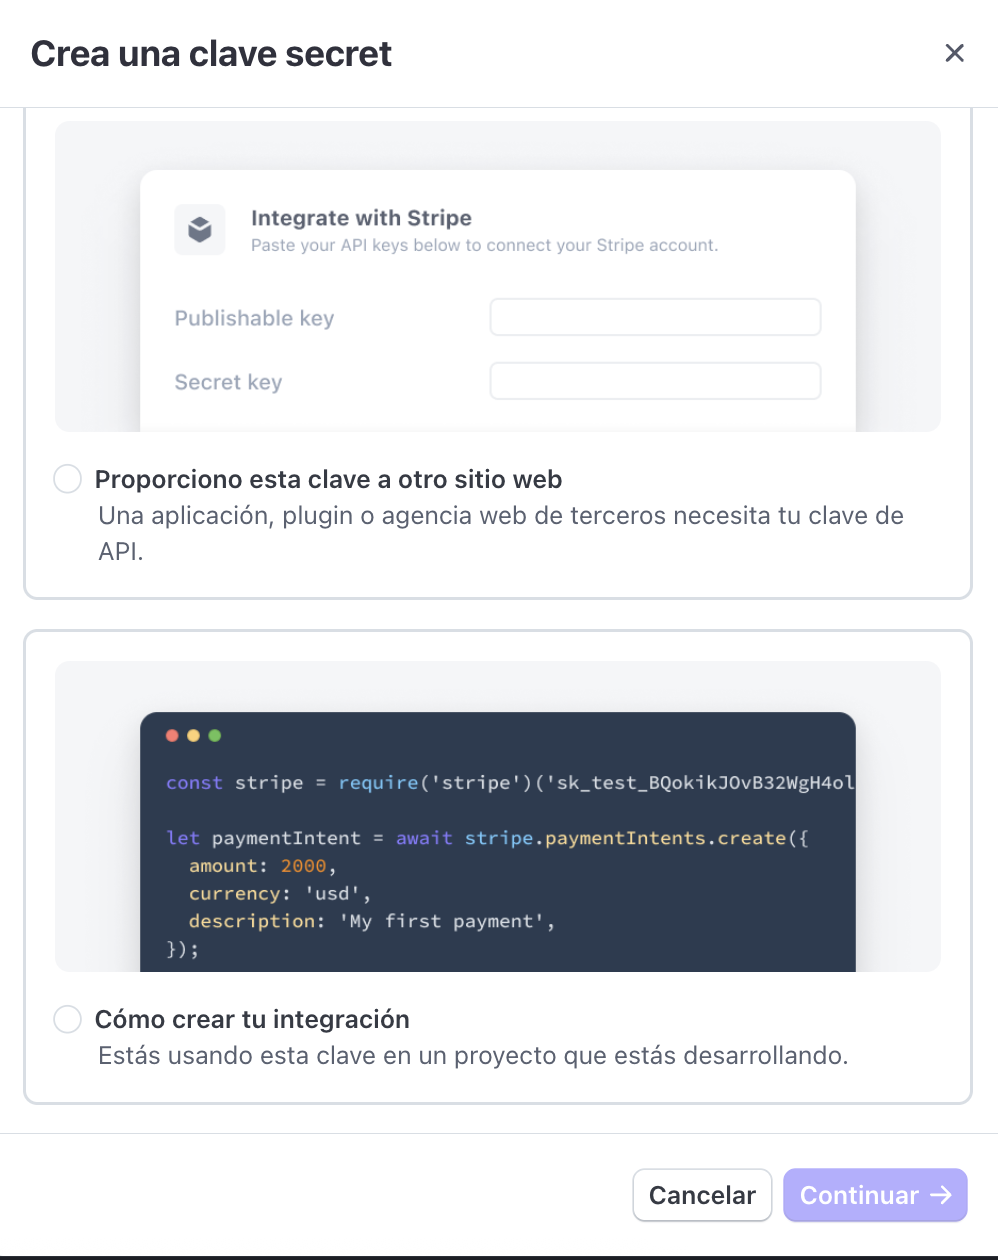
 When creating a key, Stripe usually shows options such as:
* **How I'm building my integration** (standard key / full access)
* **I'm providing this key to another website** (Stripe suggests a restricted key)
For Marketplace (BYOK) and to avoid friction, **we recommend using a standard key**.
When creating a key, Stripe usually shows options such as:
* **How I'm building my integration** (standard key / full access)
* **I'm providing this key to another website** (Stripe suggests a restricted key)
For Marketplace (BYOK) and to avoid friction, **we recommend using a standard key**.
 Stripe may recommend restricted keys for sharing with third parties.
In Jelou, the key is stored securely at the platform level (it is not exposed to the end user).
If you need additional control, review the **Restricted keys (optional)** section at the end of this guide.
If the key you copied starts with `sk_test_` or `sk_live_`, you have everything you need to install Stripe.
Stripe may recommend restricted keys for sharing with third parties.
In Jelou, the key is stored securely at the platform level (it is not exposed to the end user).
If you need additional control, review the **Restricted keys (optional)** section at the end of this guide.
If the key you copied starts with `sk_test_` or `sk_live_`, you have everything you need to install Stripe.
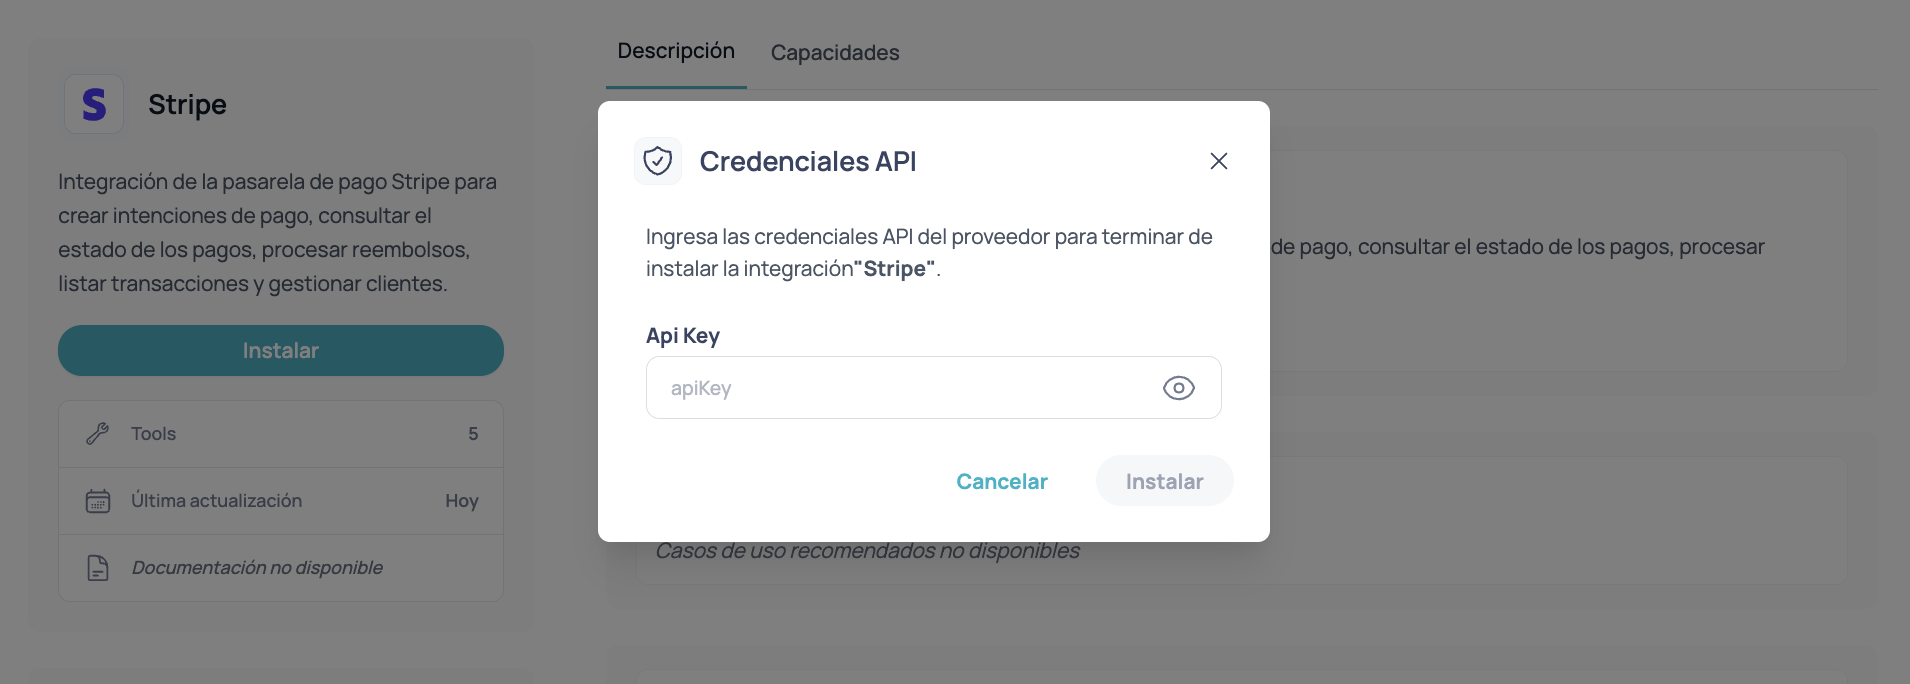
 During installation from **Marketplace**, Brain Studio will ask for a single credential: **API Key**.
Paste your Secret API Key (`sk_test_...` or `sk_live_...`) and confirm.
During installation from **Marketplace**, Brain Studio will ask for a single credential: **API Key**.
Paste your Secret API Key (`sk_test_...` or `sk_live_...`) and confirm.
 Once configured:
* Charges are processed **directly** in the merchant's Stripe account.
* Jelou **does not hold funds**.
* The payment result returns to the flow to continue based on the real status.
***
## Test vs Live in Brain Studio
* If you install with `sk_test_...`, you operate in **test mode**.
* If you install with `sk_live_...`, you operate in **production**.
To change from **Test → Live** (or vice versa), you currently need to:
**uninstall Stripe** in Marketplace and **reinstall** with the new key.
***
## Restricted keys (optional)
Stripe allows creating **Restricted Keys** (usually seen as `rk_...`) with specific permissions.
You can use a restricted key if your organization requires greater control, but you must ensure you enable the necessary permissions for Stripe to work correctly in Brain Studio.
If you want to learn more, review the official Stripe documentation on API keys:
[https://docs.stripe.com/keys](https://docs.stripe.com/keys)
***
## Troubleshooting
In some Stripe accounts, Test access appears in the **account selector** (top left) as:
* **Switch to a test environment**
* **Test mode**
* **Manage test environments**
If you are already in test mode, a **top bar** usually appears indicating you are using test data.
You are using a **Publishable key** (`pk_...`).
Go back to **Developers → API Keys** and copy a **Secret key** (`sk_...`).
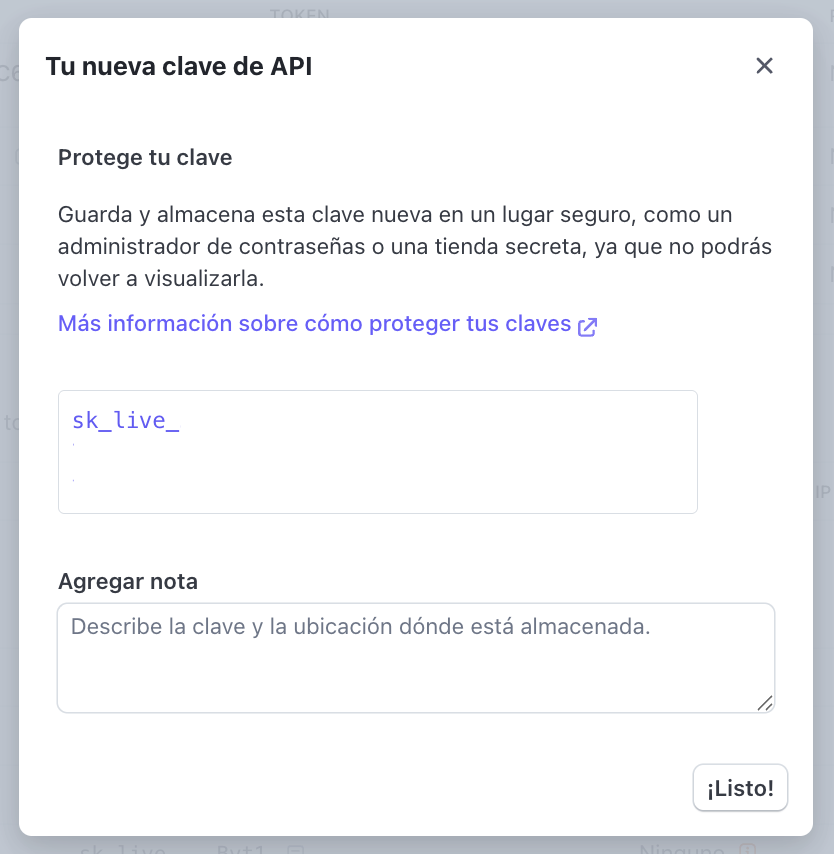
Stripe shows the full key **only once** at the moment of creation.
If you did not save it:
* create a new key
* save it in a safe place (password manager / secret vault)
This is normal Stripe behavior to protect secret keys.
***
## Best practices
* Do not share your `sk_...` by chat or email.
* Store it in a password manager or secret vault.
* If you suspect exposure, rotate it from the Stripe dashboard and reinstall Stripe in Brain Studio with the new key.
* Use `sk_test_...` for internal testing and QA.
* Before going live, install with `sk_live_...` and validate a real end-to-end payment.
***
## Part 2 — Configure webhooks in Stripe (required)
Jelou needs Stripe to **send payment events** to the platform to align the charge result with your flow in Brain Studio. This is configured **in Stripe Dashboard**: you create a webhook endpoint and select the events listed below.
Without correct webhooks, a payment may complete in Stripe and yet the flow in Brain Studio can remain **inconsistent** (for example, stuck as pending or not advancing to the expected node output).
Stripe distinguishes **test mode (Test)** and **production mode (Live)**. Configure **one webhook per mode** if you plan to use both. The **Secret API Key** you will install in Marketplace (`sk_test_...` or `sk_live_...`) must correspond to the same mode as the webhook you are configuring in the dashboard.
### Open Developers, Workbench, and Webhooks
In **Stripe Dashboard**, locate the **Developers** section (in some accounts it appears in the bottom bar).
Open the **Workbench** from the access Stripe provides (for example, the upward arrow icon in the developer bar).
Inside the Workbench, select the **Webhooks** tab and create a **new destination** or **new endpoint** (the exact name may vary depending on the panel version).
Once configured:
* Charges are processed **directly** in the merchant's Stripe account.
* Jelou **does not hold funds**.
* The payment result returns to the flow to continue based on the real status.
***
## Test vs Live in Brain Studio
* If you install with `sk_test_...`, you operate in **test mode**.
* If you install with `sk_live_...`, you operate in **production**.
To change from **Test → Live** (or vice versa), you currently need to:
**uninstall Stripe** in Marketplace and **reinstall** with the new key.
***
## Restricted keys (optional)
Stripe allows creating **Restricted Keys** (usually seen as `rk_...`) with specific permissions.
You can use a restricted key if your organization requires greater control, but you must ensure you enable the necessary permissions for Stripe to work correctly in Brain Studio.
If you want to learn more, review the official Stripe documentation on API keys:
[https://docs.stripe.com/keys](https://docs.stripe.com/keys)
***
## Troubleshooting
In some Stripe accounts, Test access appears in the **account selector** (top left) as:
* **Switch to a test environment**
* **Test mode**
* **Manage test environments**
If you are already in test mode, a **top bar** usually appears indicating you are using test data.
You are using a **Publishable key** (`pk_...`).
Go back to **Developers → API Keys** and copy a **Secret key** (`sk_...`).
Stripe shows the full key **only once** at the moment of creation.
If you did not save it:
* create a new key
* save it in a safe place (password manager / secret vault)
This is normal Stripe behavior to protect secret keys.
***
## Best practices
* Do not share your `sk_...` by chat or email.
* Store it in a password manager or secret vault.
* If you suspect exposure, rotate it from the Stripe dashboard and reinstall Stripe in Brain Studio with the new key.
* Use `sk_test_...` for internal testing and QA.
* Before going live, install with `sk_live_...` and validate a real end-to-end payment.
***
## Part 2 — Configure webhooks in Stripe (required)
Jelou needs Stripe to **send payment events** to the platform to align the charge result with your flow in Brain Studio. This is configured **in Stripe Dashboard**: you create a webhook endpoint and select the events listed below.
Without correct webhooks, a payment may complete in Stripe and yet the flow in Brain Studio can remain **inconsistent** (for example, stuck as pending or not advancing to the expected node output).
Stripe distinguishes **test mode (Test)** and **production mode (Live)**. Configure **one webhook per mode** if you plan to use both. The **Secret API Key** you will install in Marketplace (`sk_test_...` or `sk_live_...`) must correspond to the same mode as the webhook you are configuring in the dashboard.
### Open Developers, Workbench, and Webhooks
In **Stripe Dashboard**, locate the **Developers** section (in some accounts it appears in the bottom bar).
Open the **Workbench** from the access Stripe provides (for example, the upward arrow icon in the developer bar).
Inside the Workbench, select the **Webhooks** tab and create a **new destination** or **new endpoint** (the exact name may vary depending on the panel version).
 ### Choose events and destination type
When the wizard asks which events to notify, search for `payment_intent` and select **only** these three:
* `payment_intent.succeeded`
* `payment_intent.requires_action`
* `payment_intent.payment_failed`
If Stripe asks for the origin, choose **Your account**.
Choose **Webhook endpoint** (HTTPS URL), not other connectors like EventBridge.
### Choose events and destination type
When the wizard asks which events to notify, search for `payment_intent` and select **only** these three:
* `payment_intent.succeeded`
* `payment_intent.requires_action`
* `payment_intent.payment_failed`
If Stripe asks for the origin, choose **Your account**.
Choose **Webhook endpoint** (HTTPS URL), not other connectors like EventBridge.
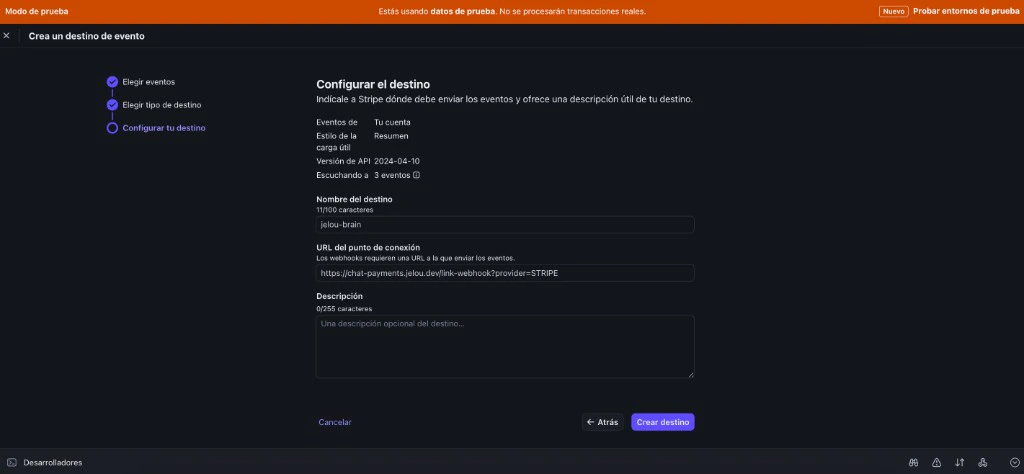
 ### Endpoint URL by environment
Copy the URL that corresponds to the active mode in the Dashboard (bar or indicator of **test mode** / **live**).
```text theme={null}
https://chat-payments.jelou.dev/link-webhook?provider=STRIPE
```
```text theme={null}
https://chat-payments.jelou.ai/link-webhook?provider=STRIPE
```
In the endpoint URL field, paste the address from the tab above according to the mode you are working in. Review the summary: it should show the **three events** and the **webhook** type. **Create** or **save** the destination.
If you use Test and Live, go back and create the endpoint in the other Dashboard mode with the other URL (`jelou.dev` for Test, `jelou.ai` for Live).
### Endpoint URL by environment
Copy the URL that corresponds to the active mode in the Dashboard (bar or indicator of **test mode** / **live**).
```text theme={null}
https://chat-payments.jelou.dev/link-webhook?provider=STRIPE
```
```text theme={null}
https://chat-payments.jelou.ai/link-webhook?provider=STRIPE
```
In the endpoint URL field, paste the address from the tab above according to the mode you are working in. Review the summary: it should show the **three events** and the **webhook** type. **Create** or **save** the destination.
If you use Test and Live, go back and create the endpoint in the other Dashboard mode with the other URL (`jelou.dev` for Test, `jelou.ai` for Live).
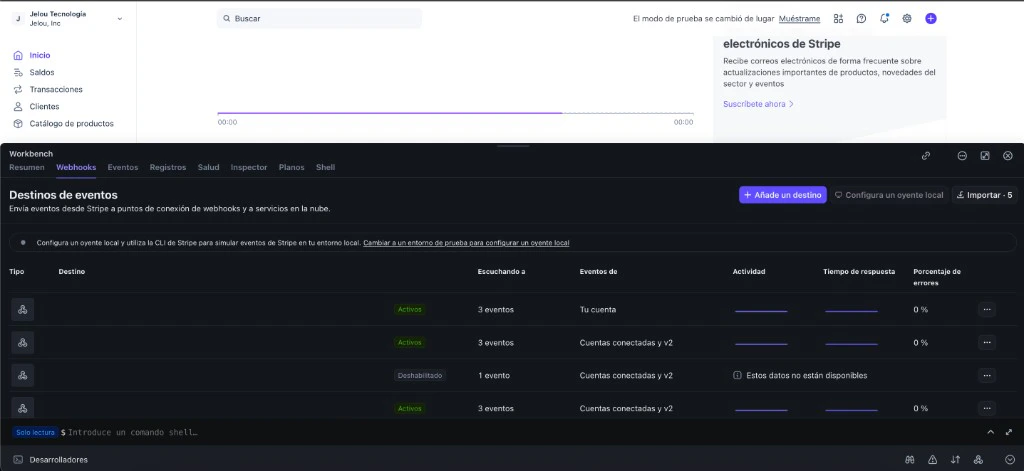
 ### Verify the endpoint in Stripe
Before continuing, confirm in the dashboard that the destination was correctly registered:
In **Stripe → Workbench → Webhooks**, the newly created endpoint should appear with status **Active**.
Open the destination detail and verify that:
* It listens to exactly the **three events** (`payment_intent.succeeded`, `payment_intent.requires_action`, `payment_intent.payment_failed`)
* The URL points to the correct Jelou address for your environment (`jelou.dev` for Test, `jelou.ai` for Live)
If the destination appears as Active with the three events and the Jelou URL, the Stripe configuration is complete.
If something doesn't match, check in this order: that the Dashboard mode (Test vs Live) matches the URL, that the three events are selected, and that the URL has no extra spaces or characters.
***
## Next step
Install Stripe in Marketplace and connect your account using your Secret API Key.
### Verify the endpoint in Stripe
Before continuing, confirm in the dashboard that the destination was correctly registered:
In **Stripe → Workbench → Webhooks**, the newly created endpoint should appear with status **Active**.
Open the destination detail and verify that:
* It listens to exactly the **three events** (`payment_intent.succeeded`, `payment_intent.requires_action`, `payment_intent.payment_failed`)
* The URL points to the correct Jelou address for your environment (`jelou.dev` for Test, `jelou.ai` for Live)
If the destination appears as Active with the three events and the Jelou URL, the Stripe configuration is complete.
If something doesn't match, check in this order: that the Dashboard mode (Test vs Live) matches the URL, that the three events are selected, and that the URL has no extra spaces or characters.
***
## Next step
Install Stripe in Marketplace and connect your account using your Secret API Key.