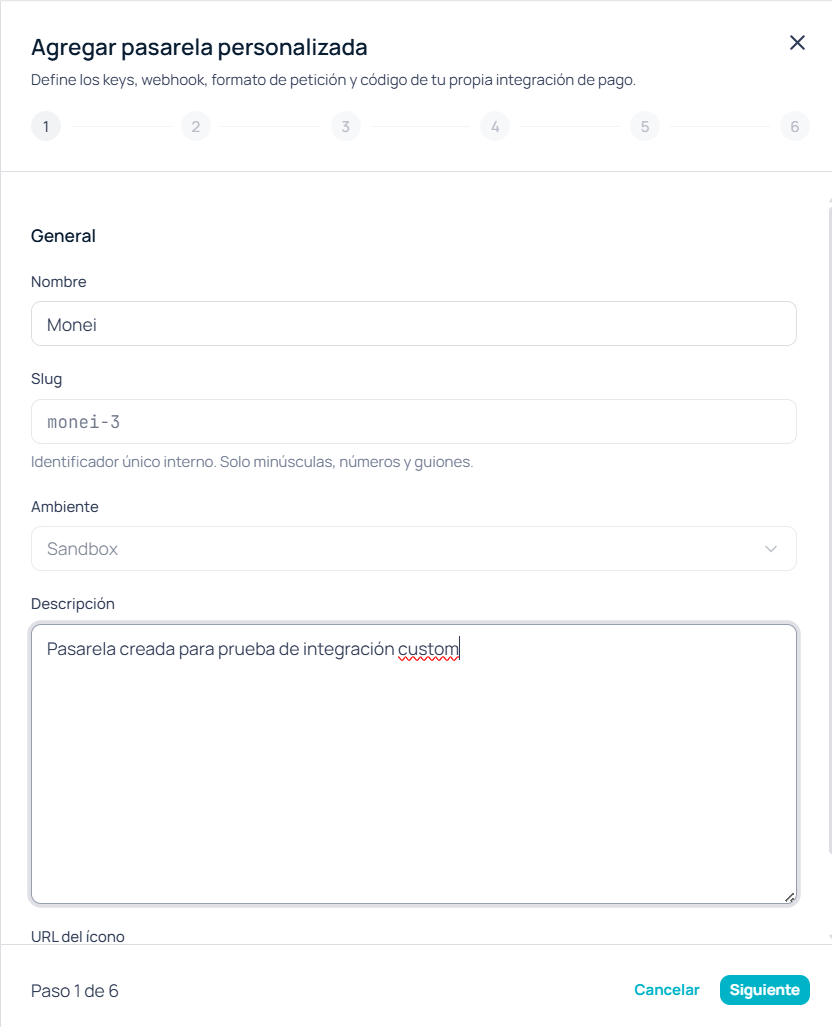
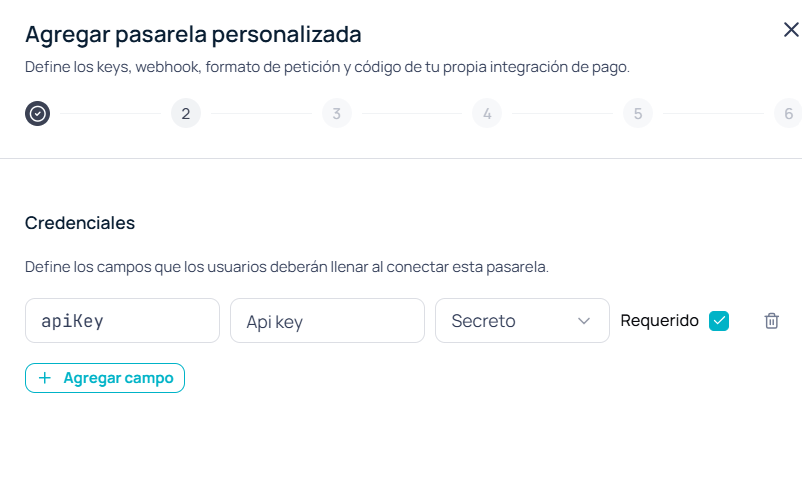
Configure the 6-step wizard, step by step, to set up a custom payment provider in Payments.
From Payments → Integrations, the Add gateway button opens the setup wizard. When creating a new gateway, steps are linear: you must complete each one before moving on. Once the gateway exists, you can move freely between steps to edit it.
Before filling the wizard, use the compatibility prompt with your LLM and your PSP’s documentation. You leave with the mapping ready for each step.
Payment link path and Transaction id path — path in the response JSON where the checkout URL and transaction id live (for example data.checkout_url)
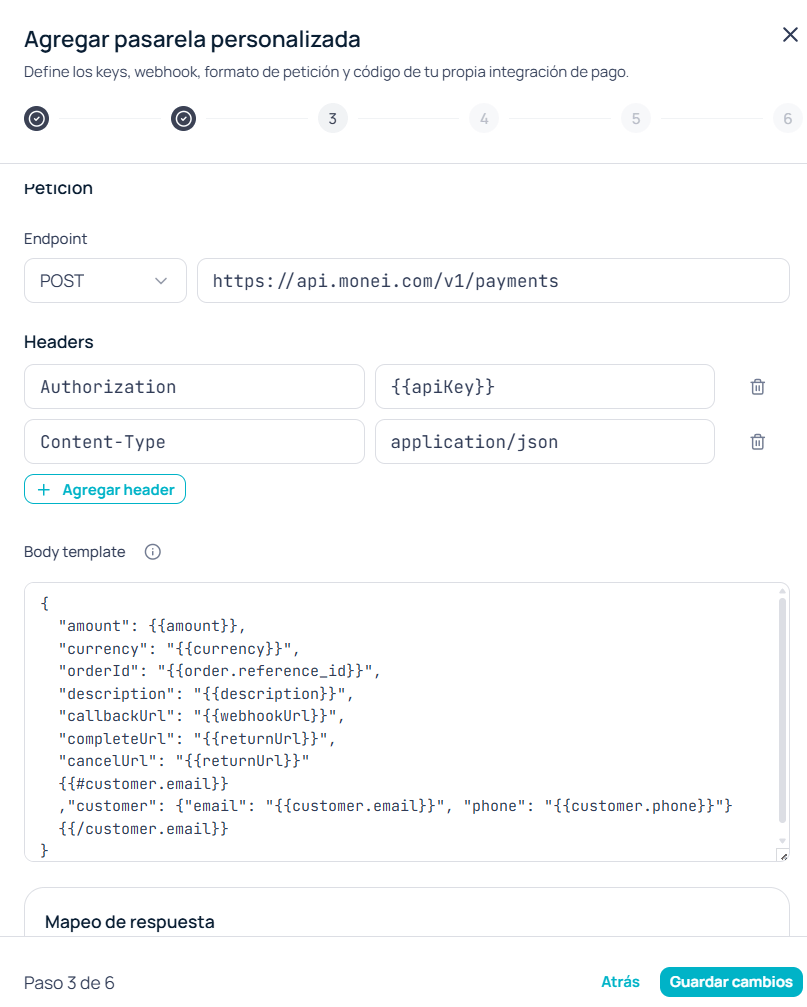
Wizard step 3: endpoint, headers, and body template for the request
URL and Body template are required. Every {{...}} must match a declared credential or a recognized placeholder.Return (optional)
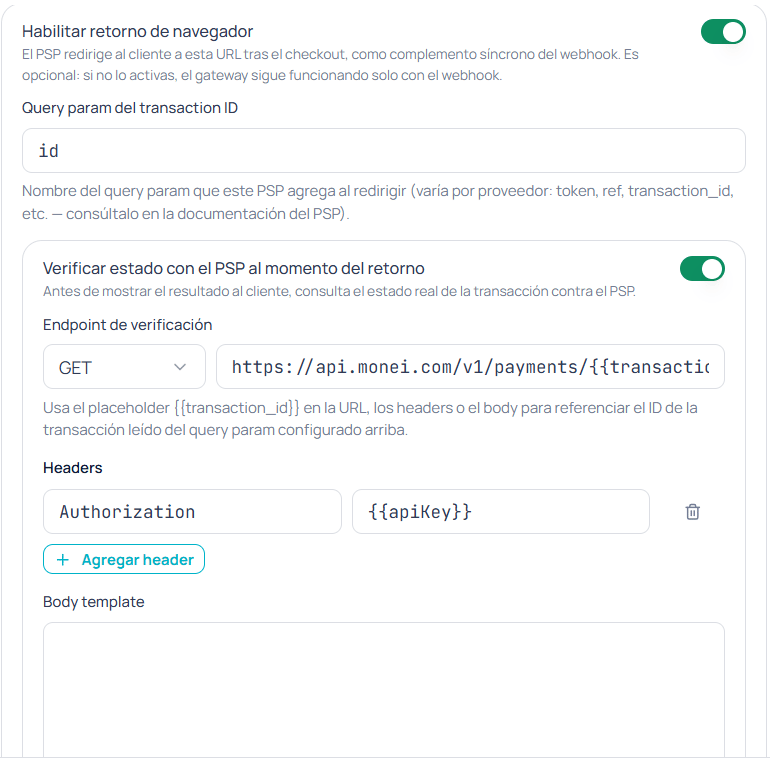
Transaction id parameter — query param the PSP adds when redirecting after checkout
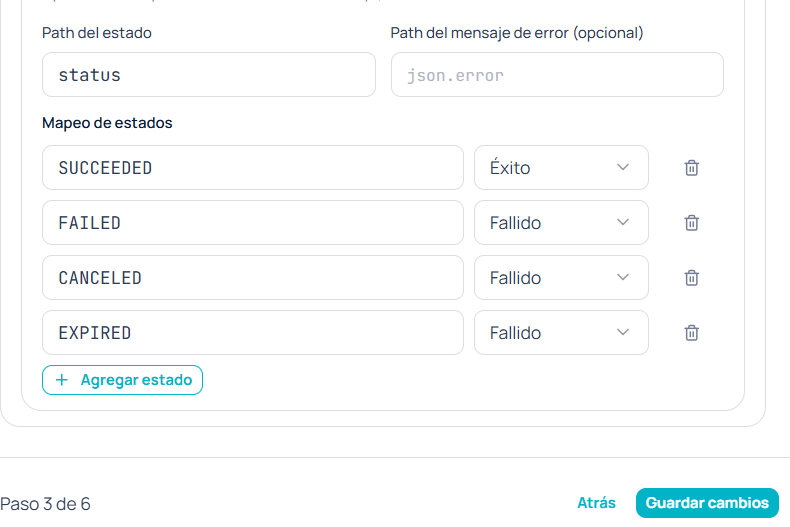
Check status with the PSP on return — active status lookup (method, URL, headers, paths, and mapping to Success / Failed / None)
Return block: enable browser return and status check with the PSP
Mapping each PSP status value to Success, Failed, or None
Confirming this step creates or updates the gateway. Slug and Environment are locked in. If creation fails, the wizard blocks progress.
Notes on the HTTP method
The selector may show DELETE, but only GET, POST, PUT, or PATCH are accepted. Choosing DELETE causes the save to fail.
4
Connect
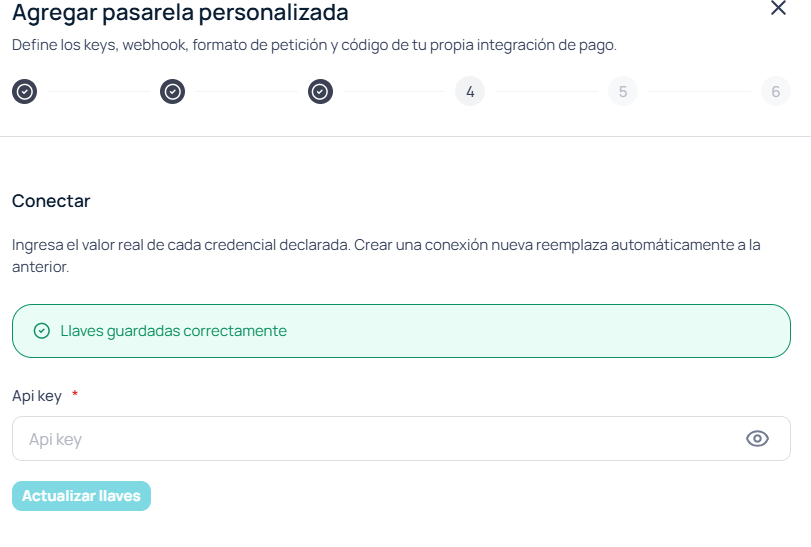
Available after the previous step is saved. Enter the real values for each declared credential—your PSP’s secrets, not their names.
Wizard step 4: real values for the declared credentials
In Sandbox, paste the PSP’s test keys. In Production, the real keys. Without this step, the gateway can’t authenticate with the provider.
5
Webhook
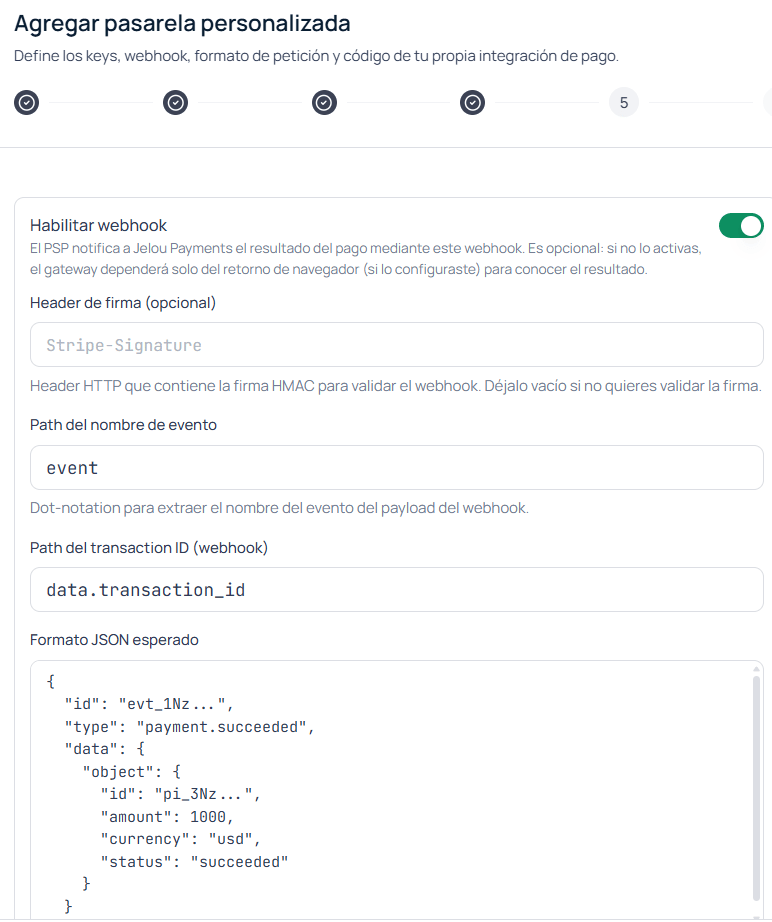
Configure how to interpret inbound notifications from the PSP:
Enable or disable the webhook with Enabled. If you disable it, the wizard skips to Finish.
Signature header (optional) — header where the PSP sends its HMAC signature
Event name path and Transaction id path — paths inside the payload
Events table — map each PSP event to Success, Failed, or None
Wizard step 5: confirmation webhook configuration
The Expected JSON format field is only a visual reference—it isn’t sent to the backend.
6
Webhook secret
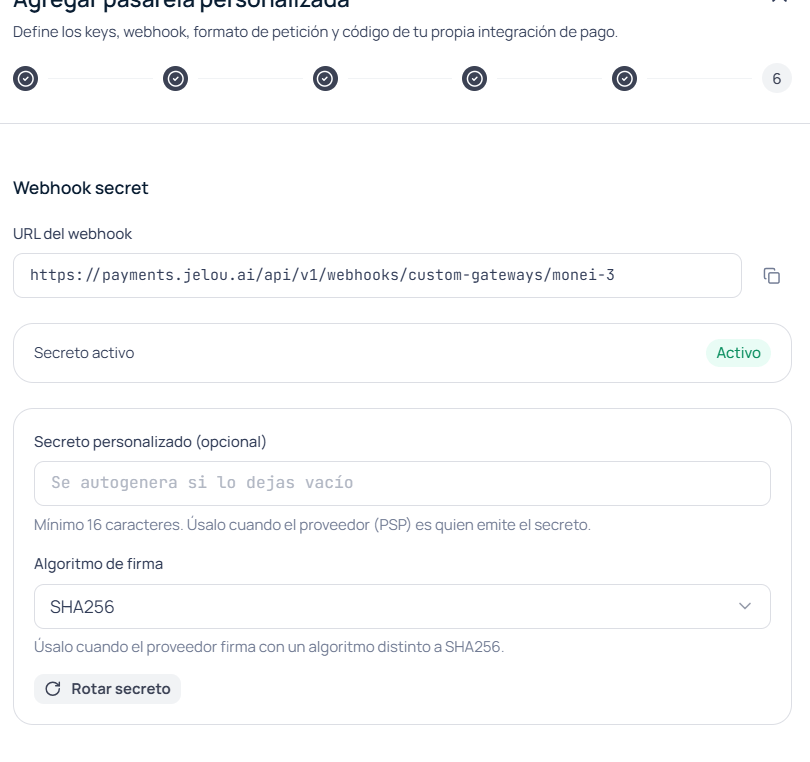
Only appears if the webhook is enabled. Copy the Webhook URL the wizard generates, configure it in your PSP’s dashboard, and generate or rotate the HMAC secret.
Available algorithms: SHA256, SHA384, or SHA512
A custom secret must be at least 16 characters
Wizard step 6: webhook URL and signing secret
Finishing this step closes the wizard.
Before using the gateway in production, use Test from the Integrations list. See Test the gateway.