
- Manage conversations from Genesys using communication channels connected in Jelou.
- Transfer conversations and interaction context between Jelou and Genesys to ensure seamless and efficient support.
- Escalate conversations to Genesys agents when needed.
- Centralize conversation management in an integrated ecosystem between both platforms.
Prerequisites
To use the Genesys integration, you need:- An active Enterprise account on Jelou.
- The Genesys node enabled on your account.
- An active Genesys Cloud account with administrative permissions.
- An OAuth client with permissions to consume Genesys Cloud APIs.
- The channels and flows participating in the interoperability previously defined.
Install the app
Access the Brain module
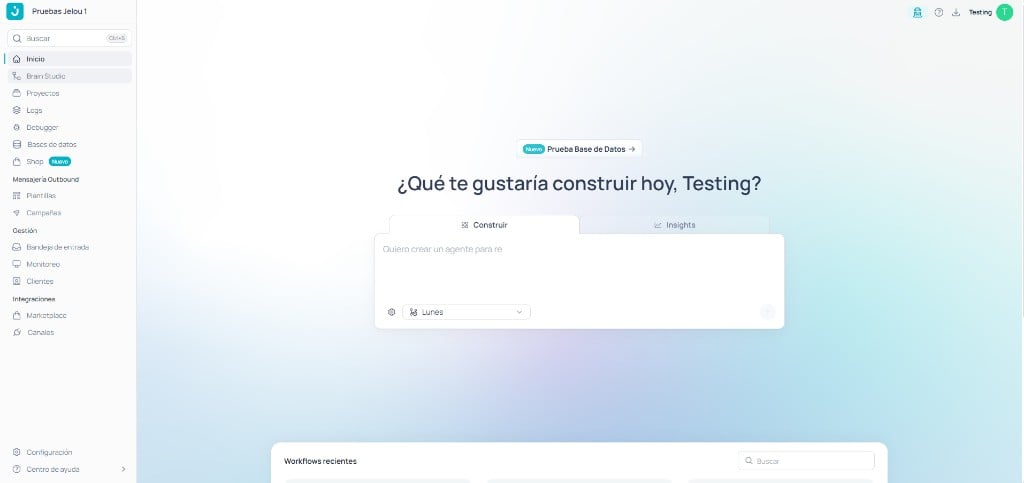
Brain module Canvas
Create a flow and add the Genesys node
- Add a text node and configure a welcome message for the channel.
- From the node sidebar, drag the Genesys node into the flow.
- A confirmation message for successful transfers.
- An error handling message in case of integration failure.
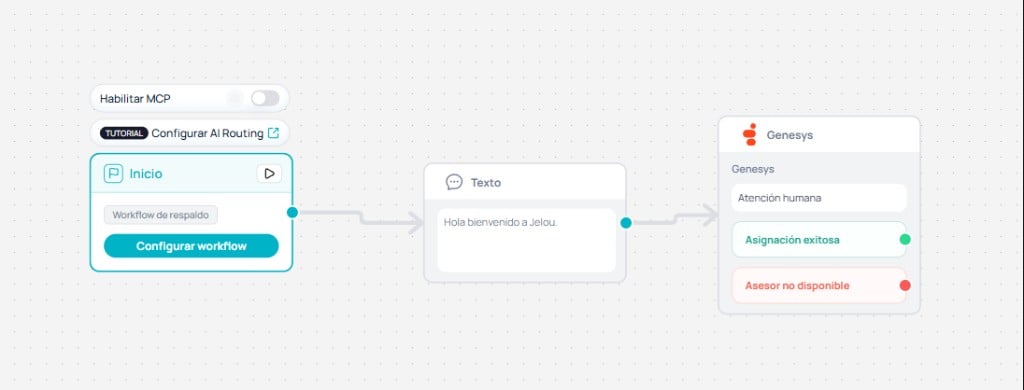
Genesys node in Brain
Configure roles in Genesys Cloud

Roles configured in Genesys Cloud
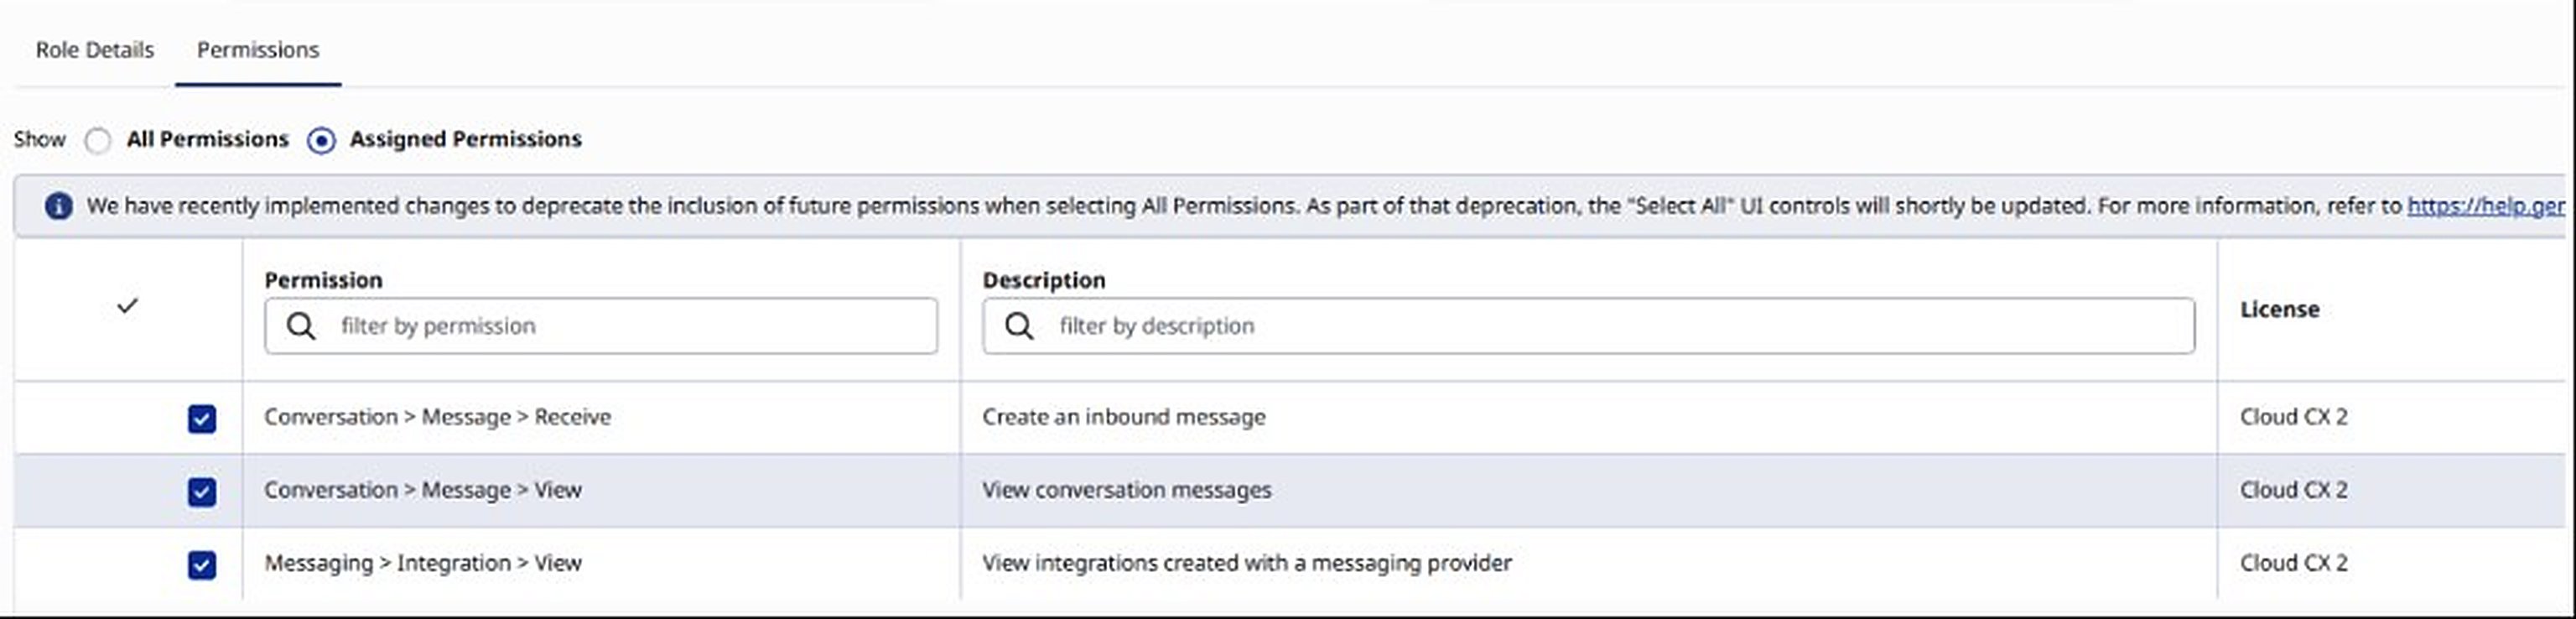
Role permission details
Create the OAuth client

OAuth client
- Application name.
- Authentication type.
- Grant Type.
- General configuration.
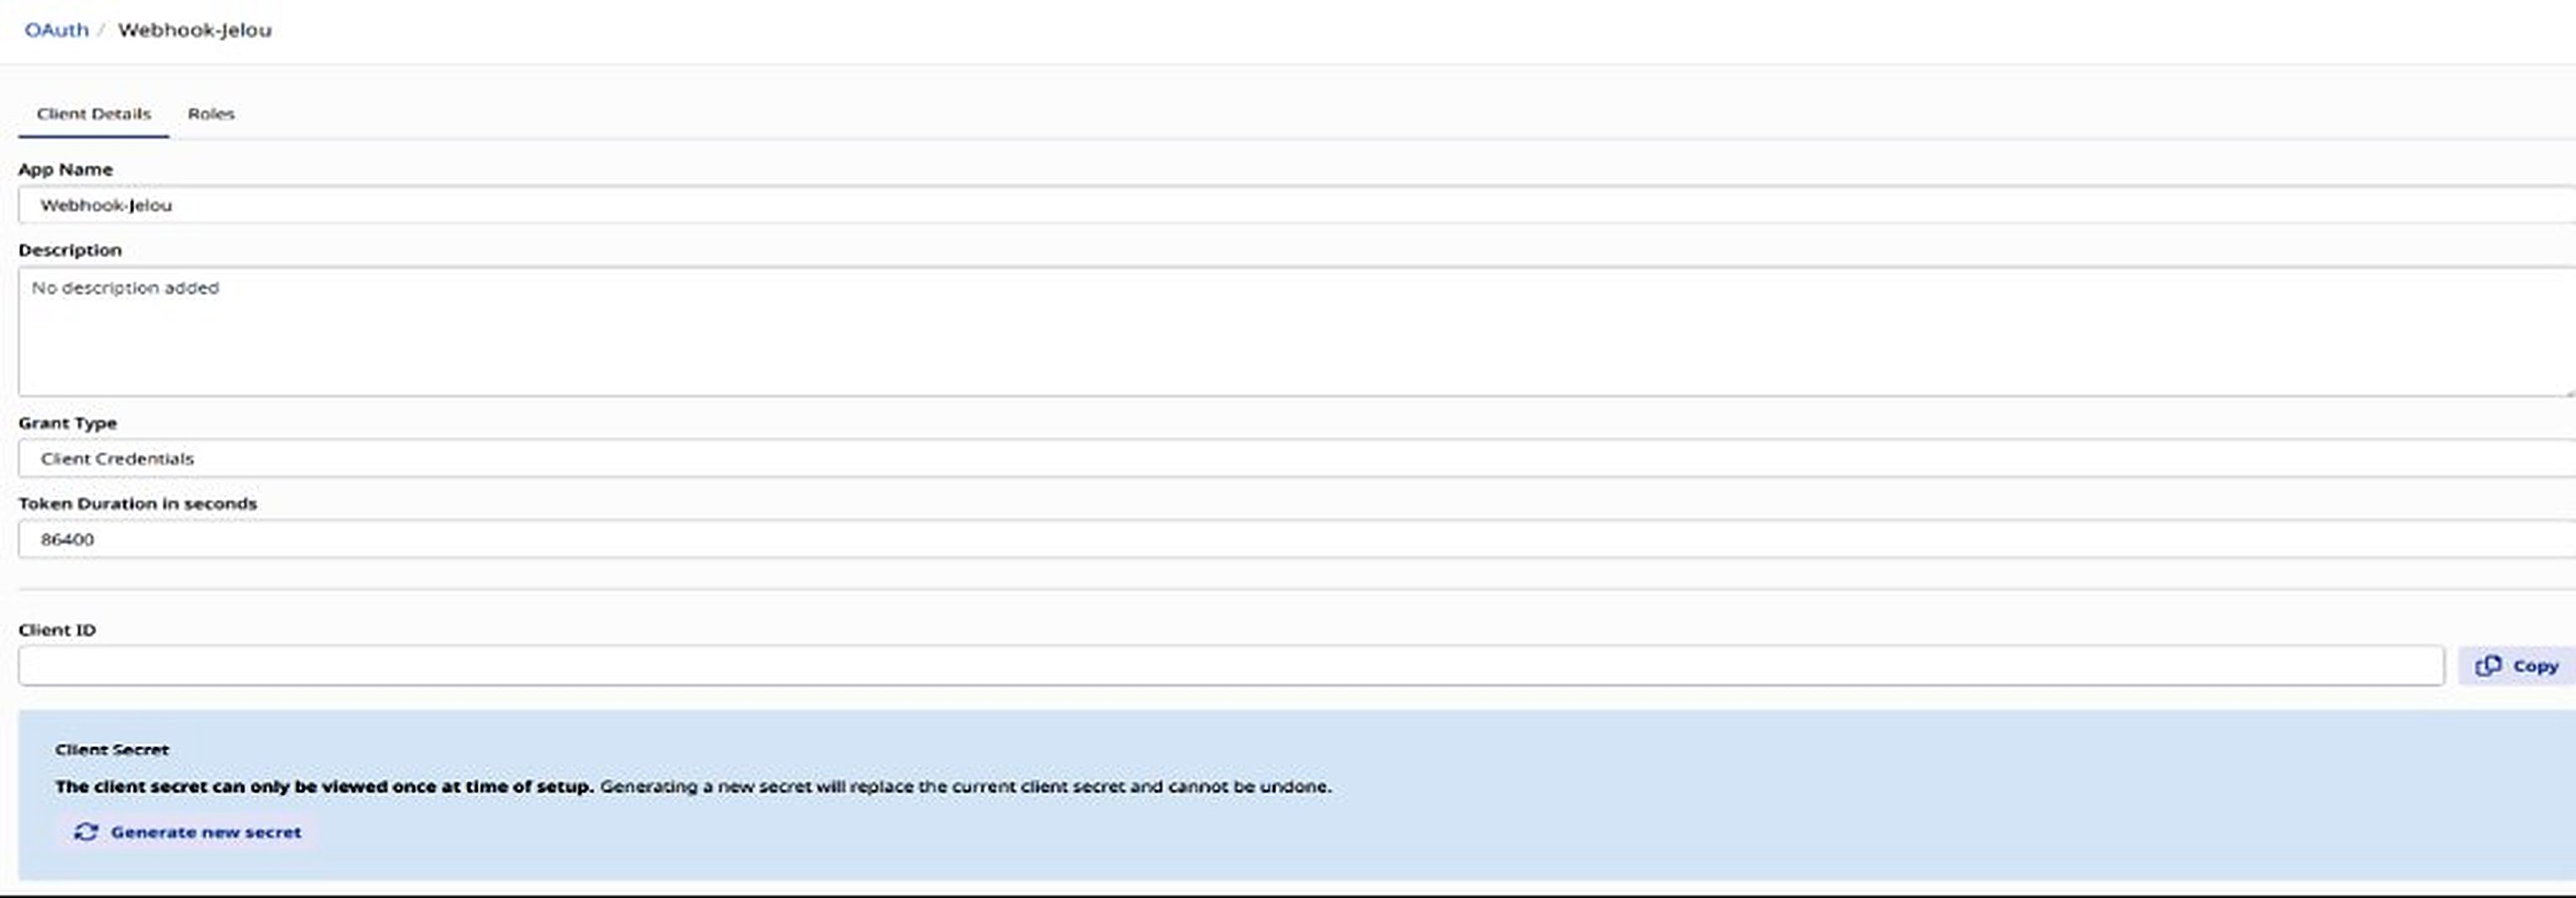
OAuth client configuration
Assign roles to the OAuth client

Roles assigned to the OAuth client
Create the Open Messaging integration

Open Messaging integration
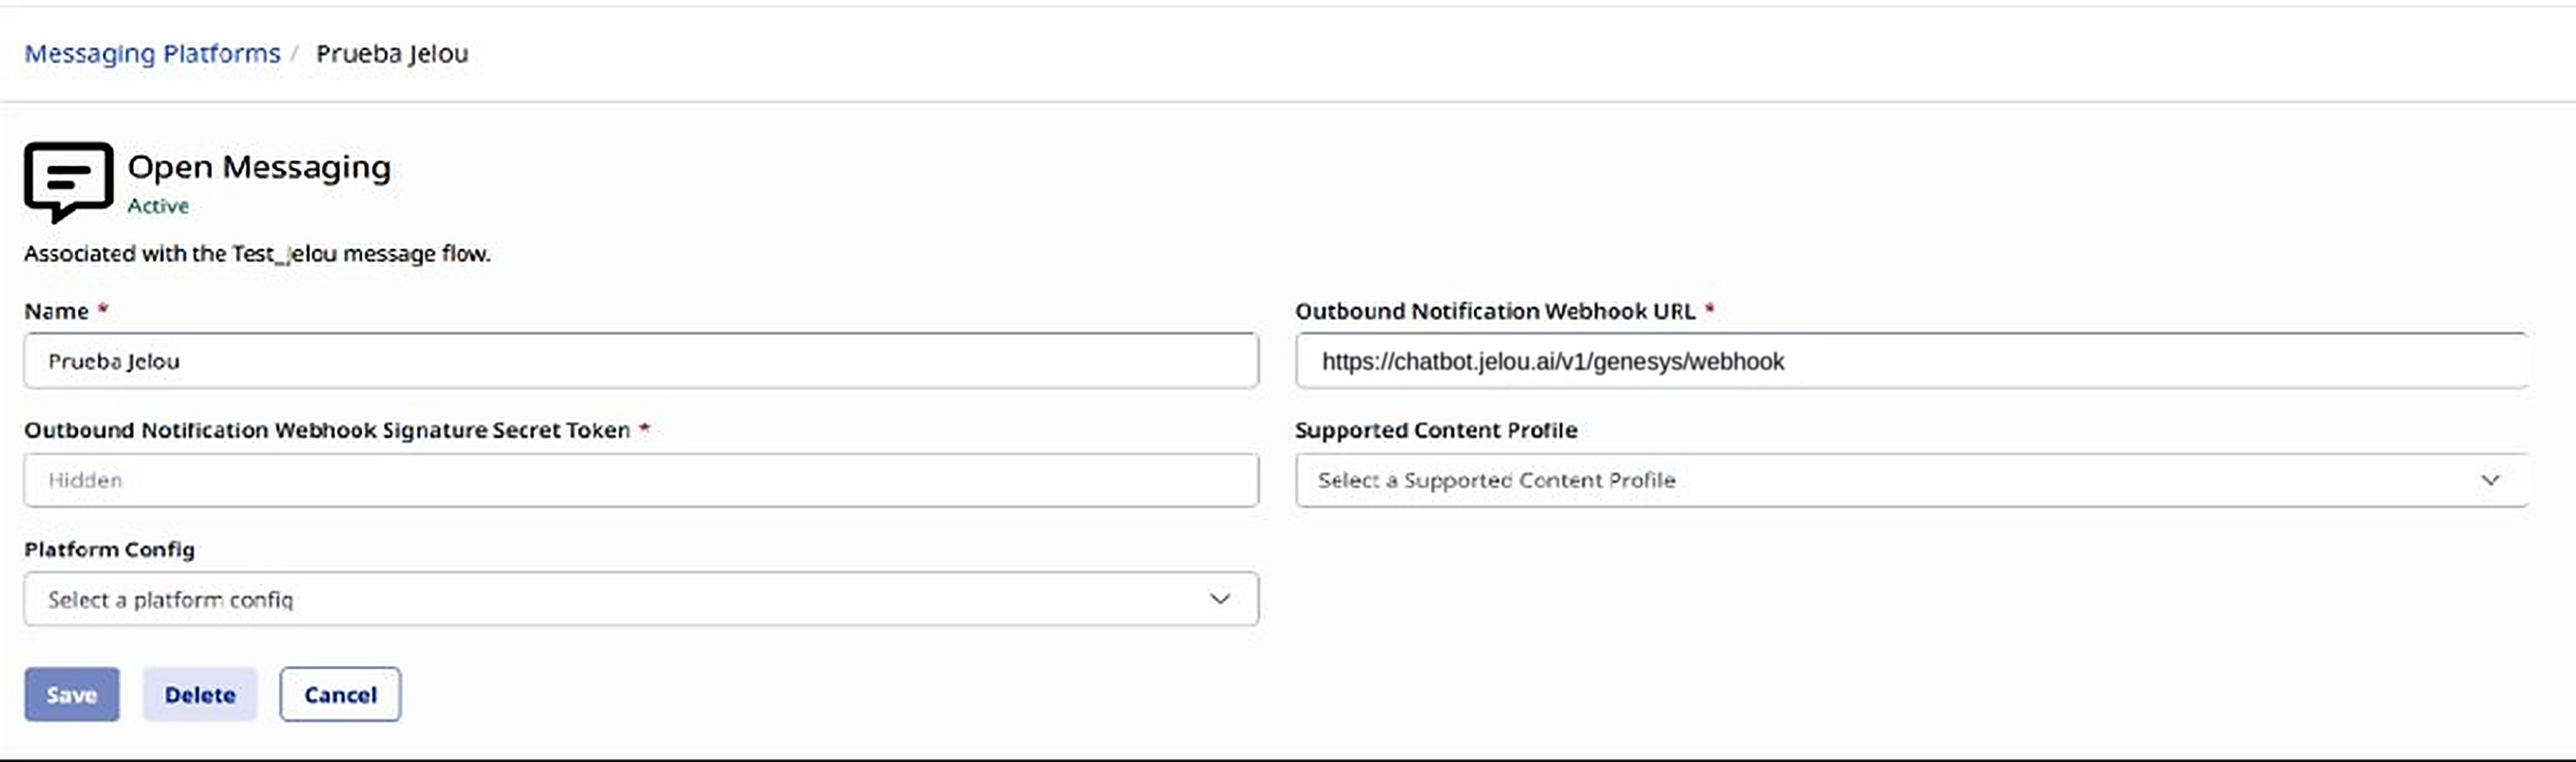
Open Messaging integration details
Obtain the Integration ID
Create the Trigger

Configured Trigger
Configure the Trigger condition
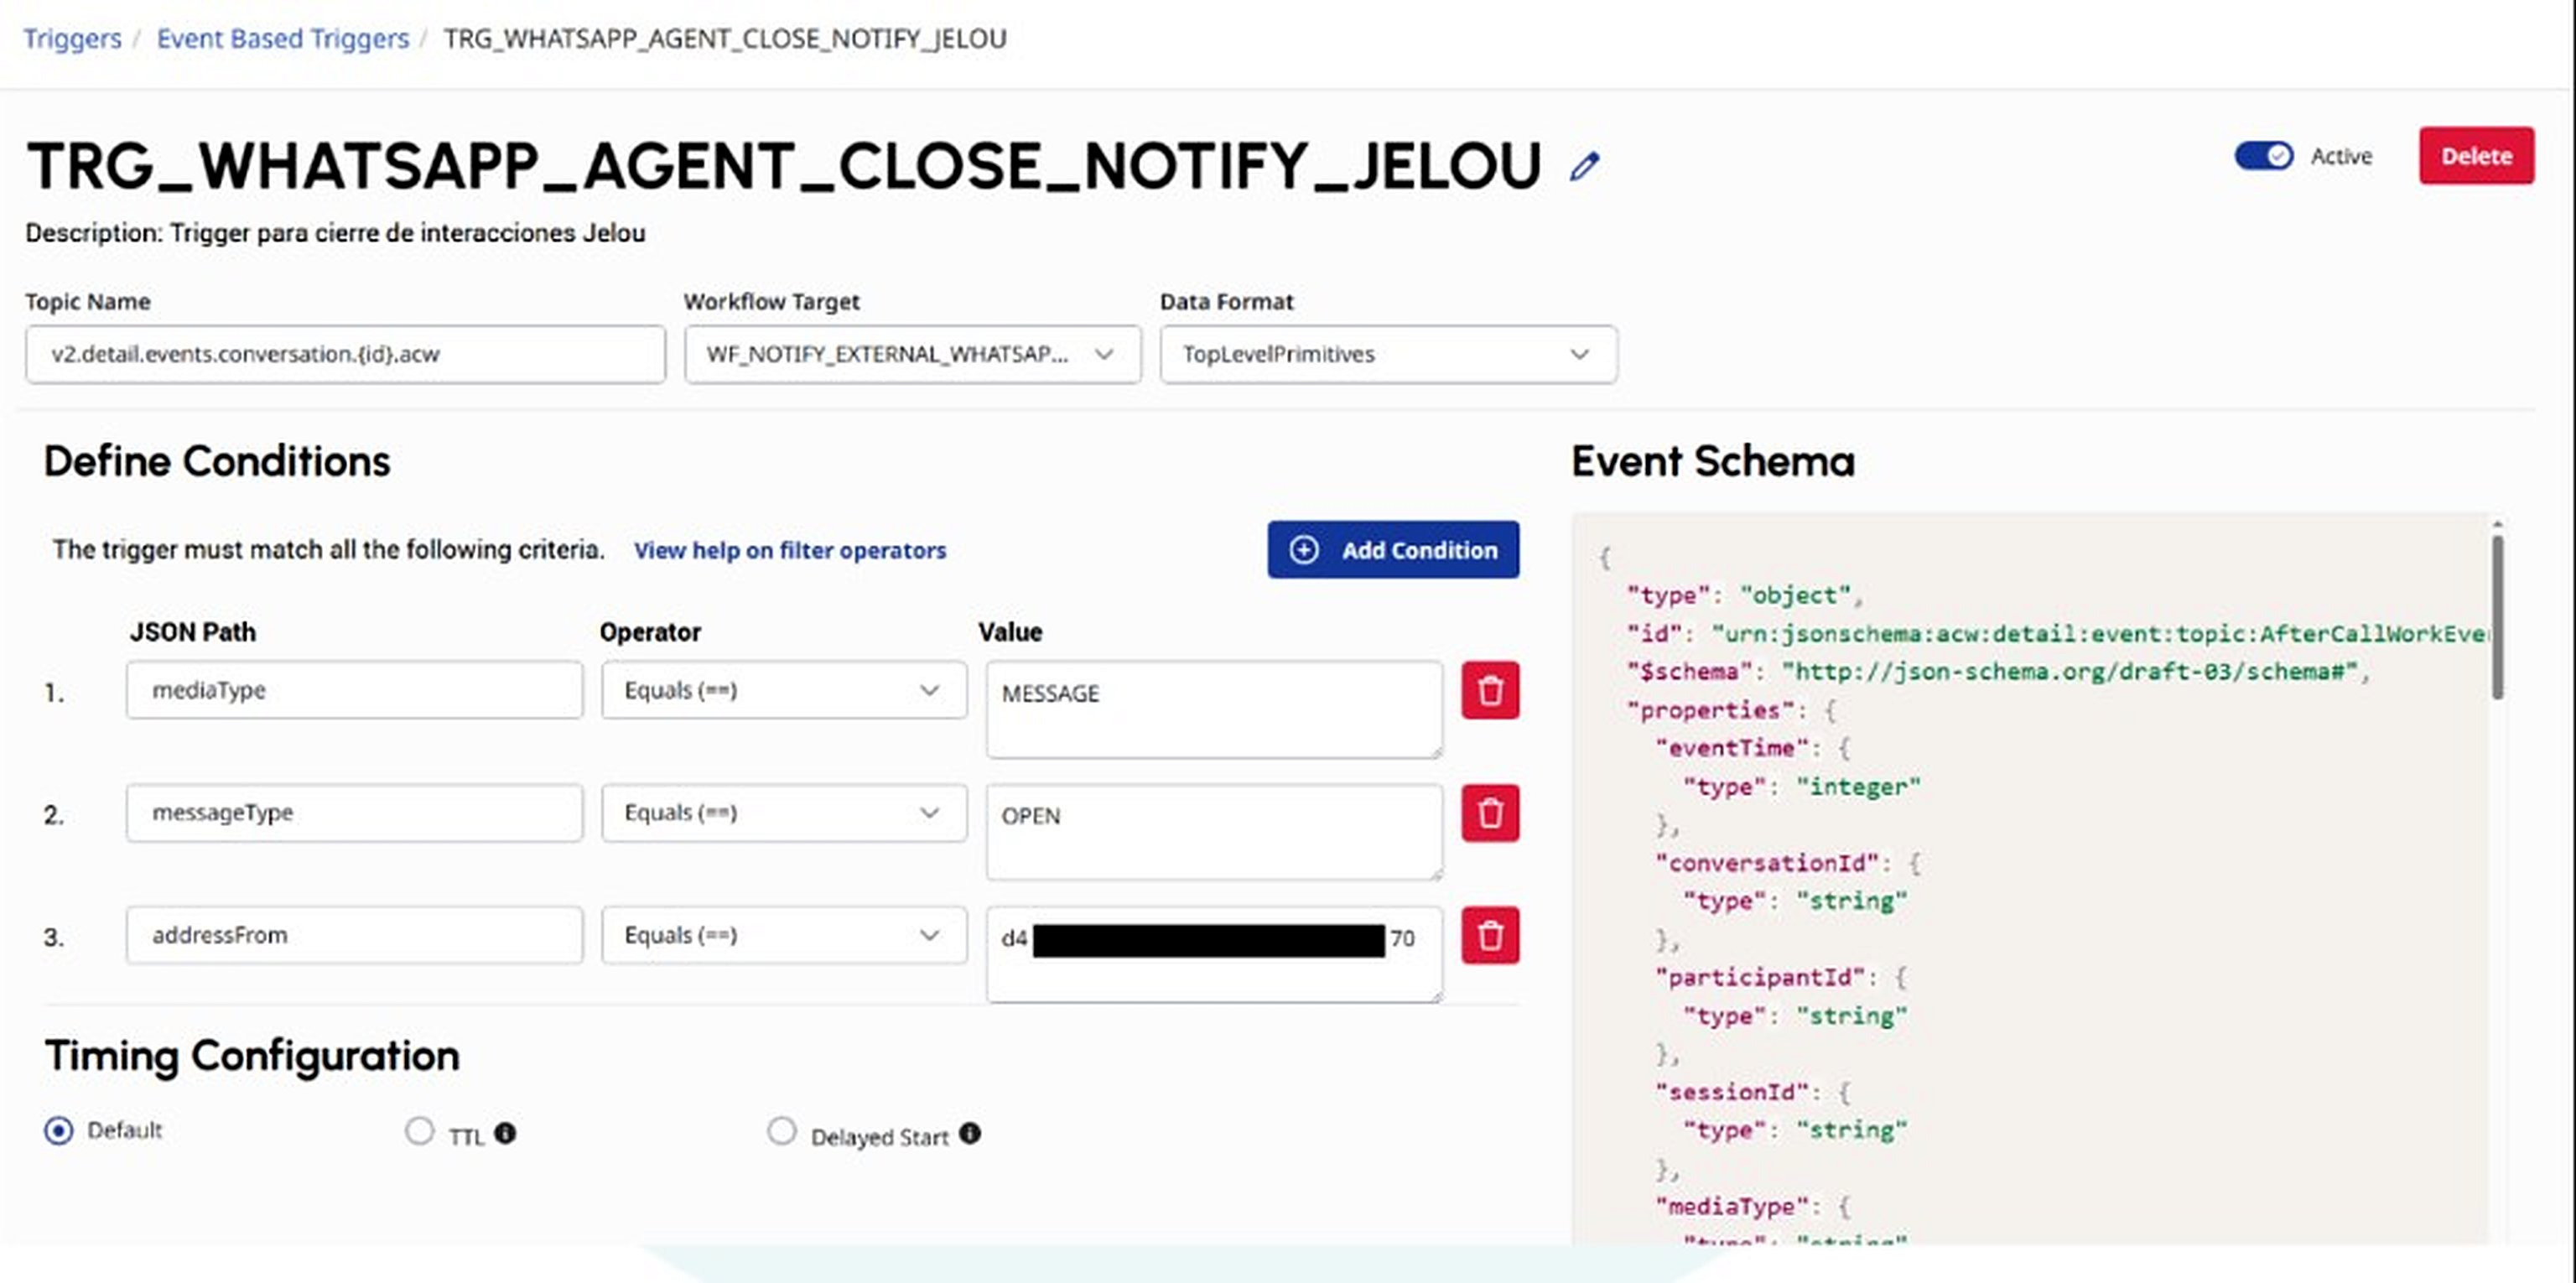
Trigger condition
Create the Workflow in Architect

Workflow in Architect
Configure the Workflow variables
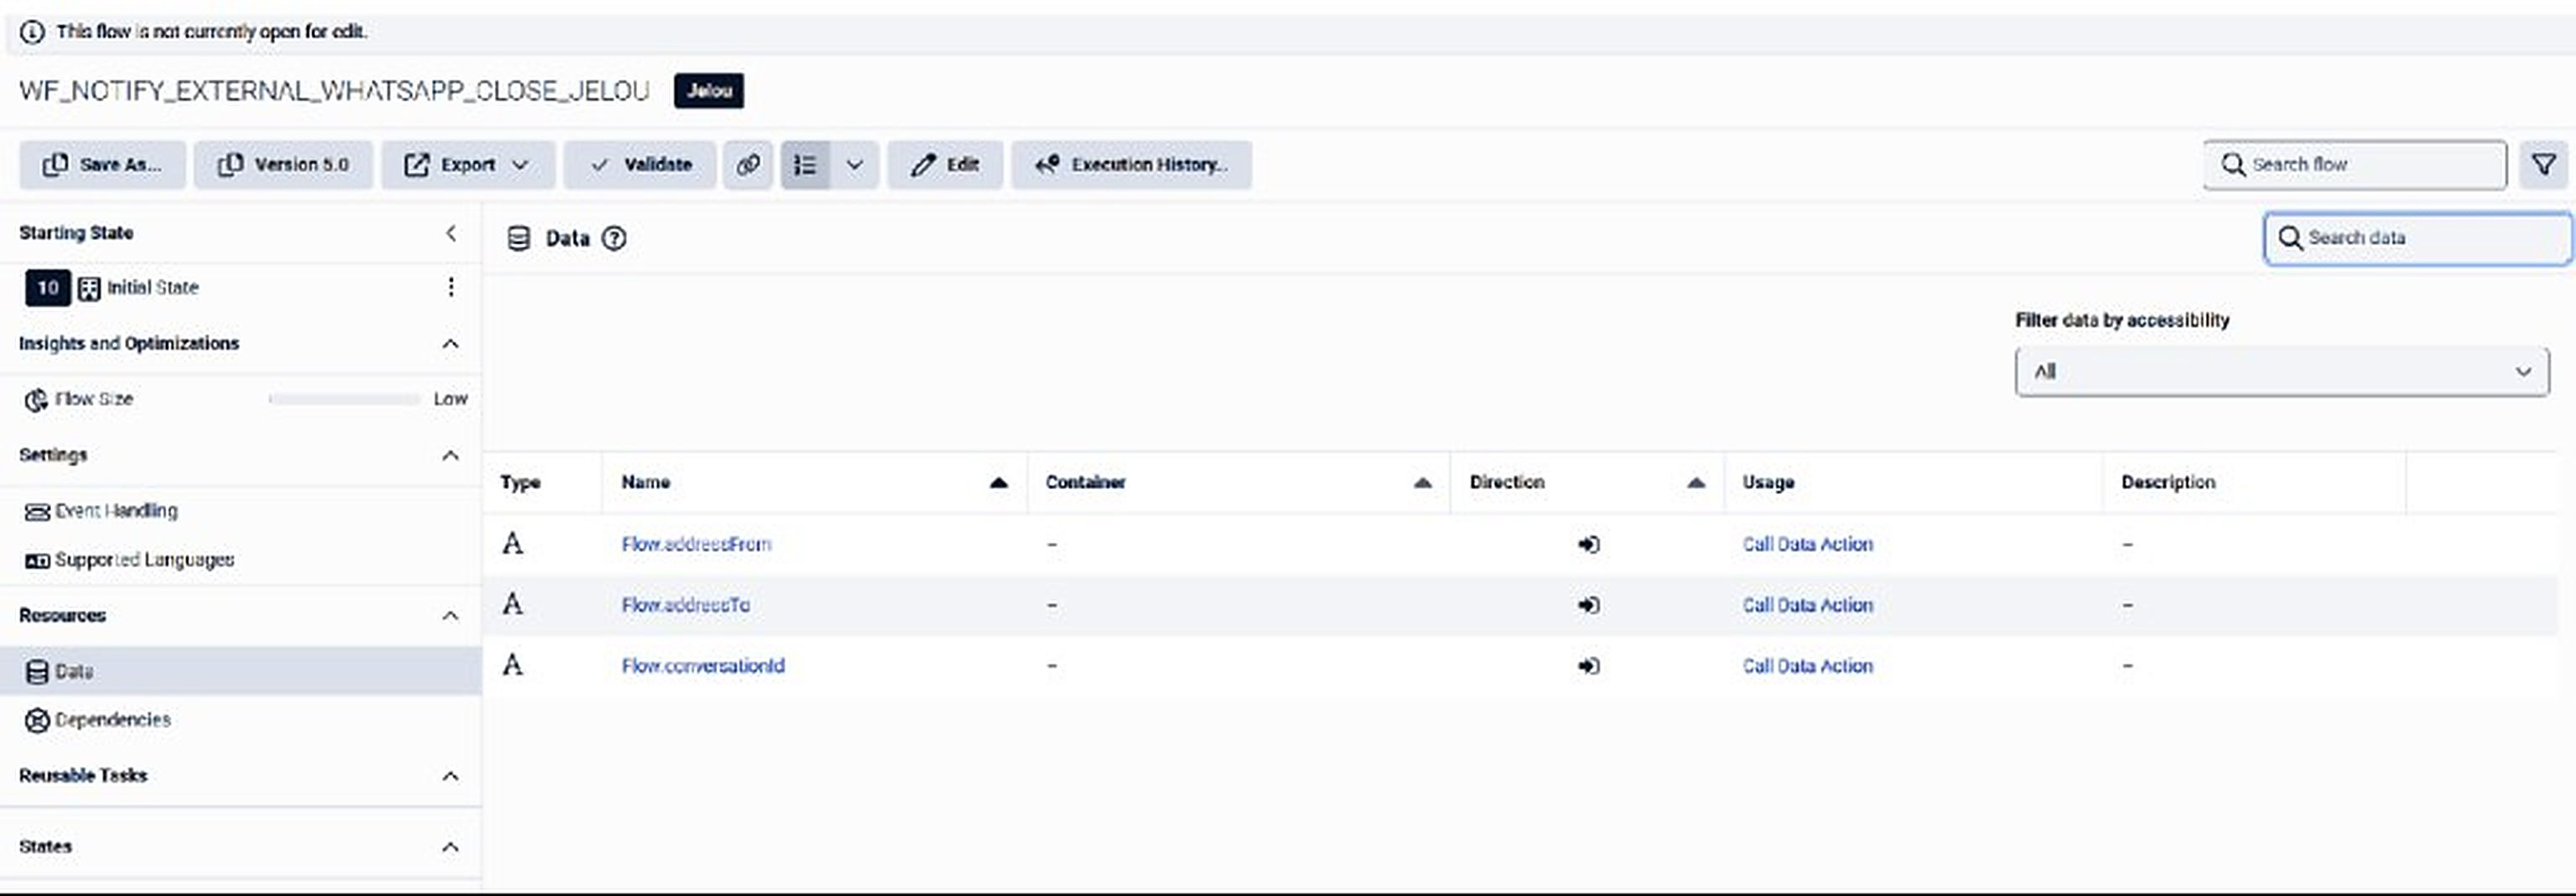
Workflow variables
Invoke the Data Action
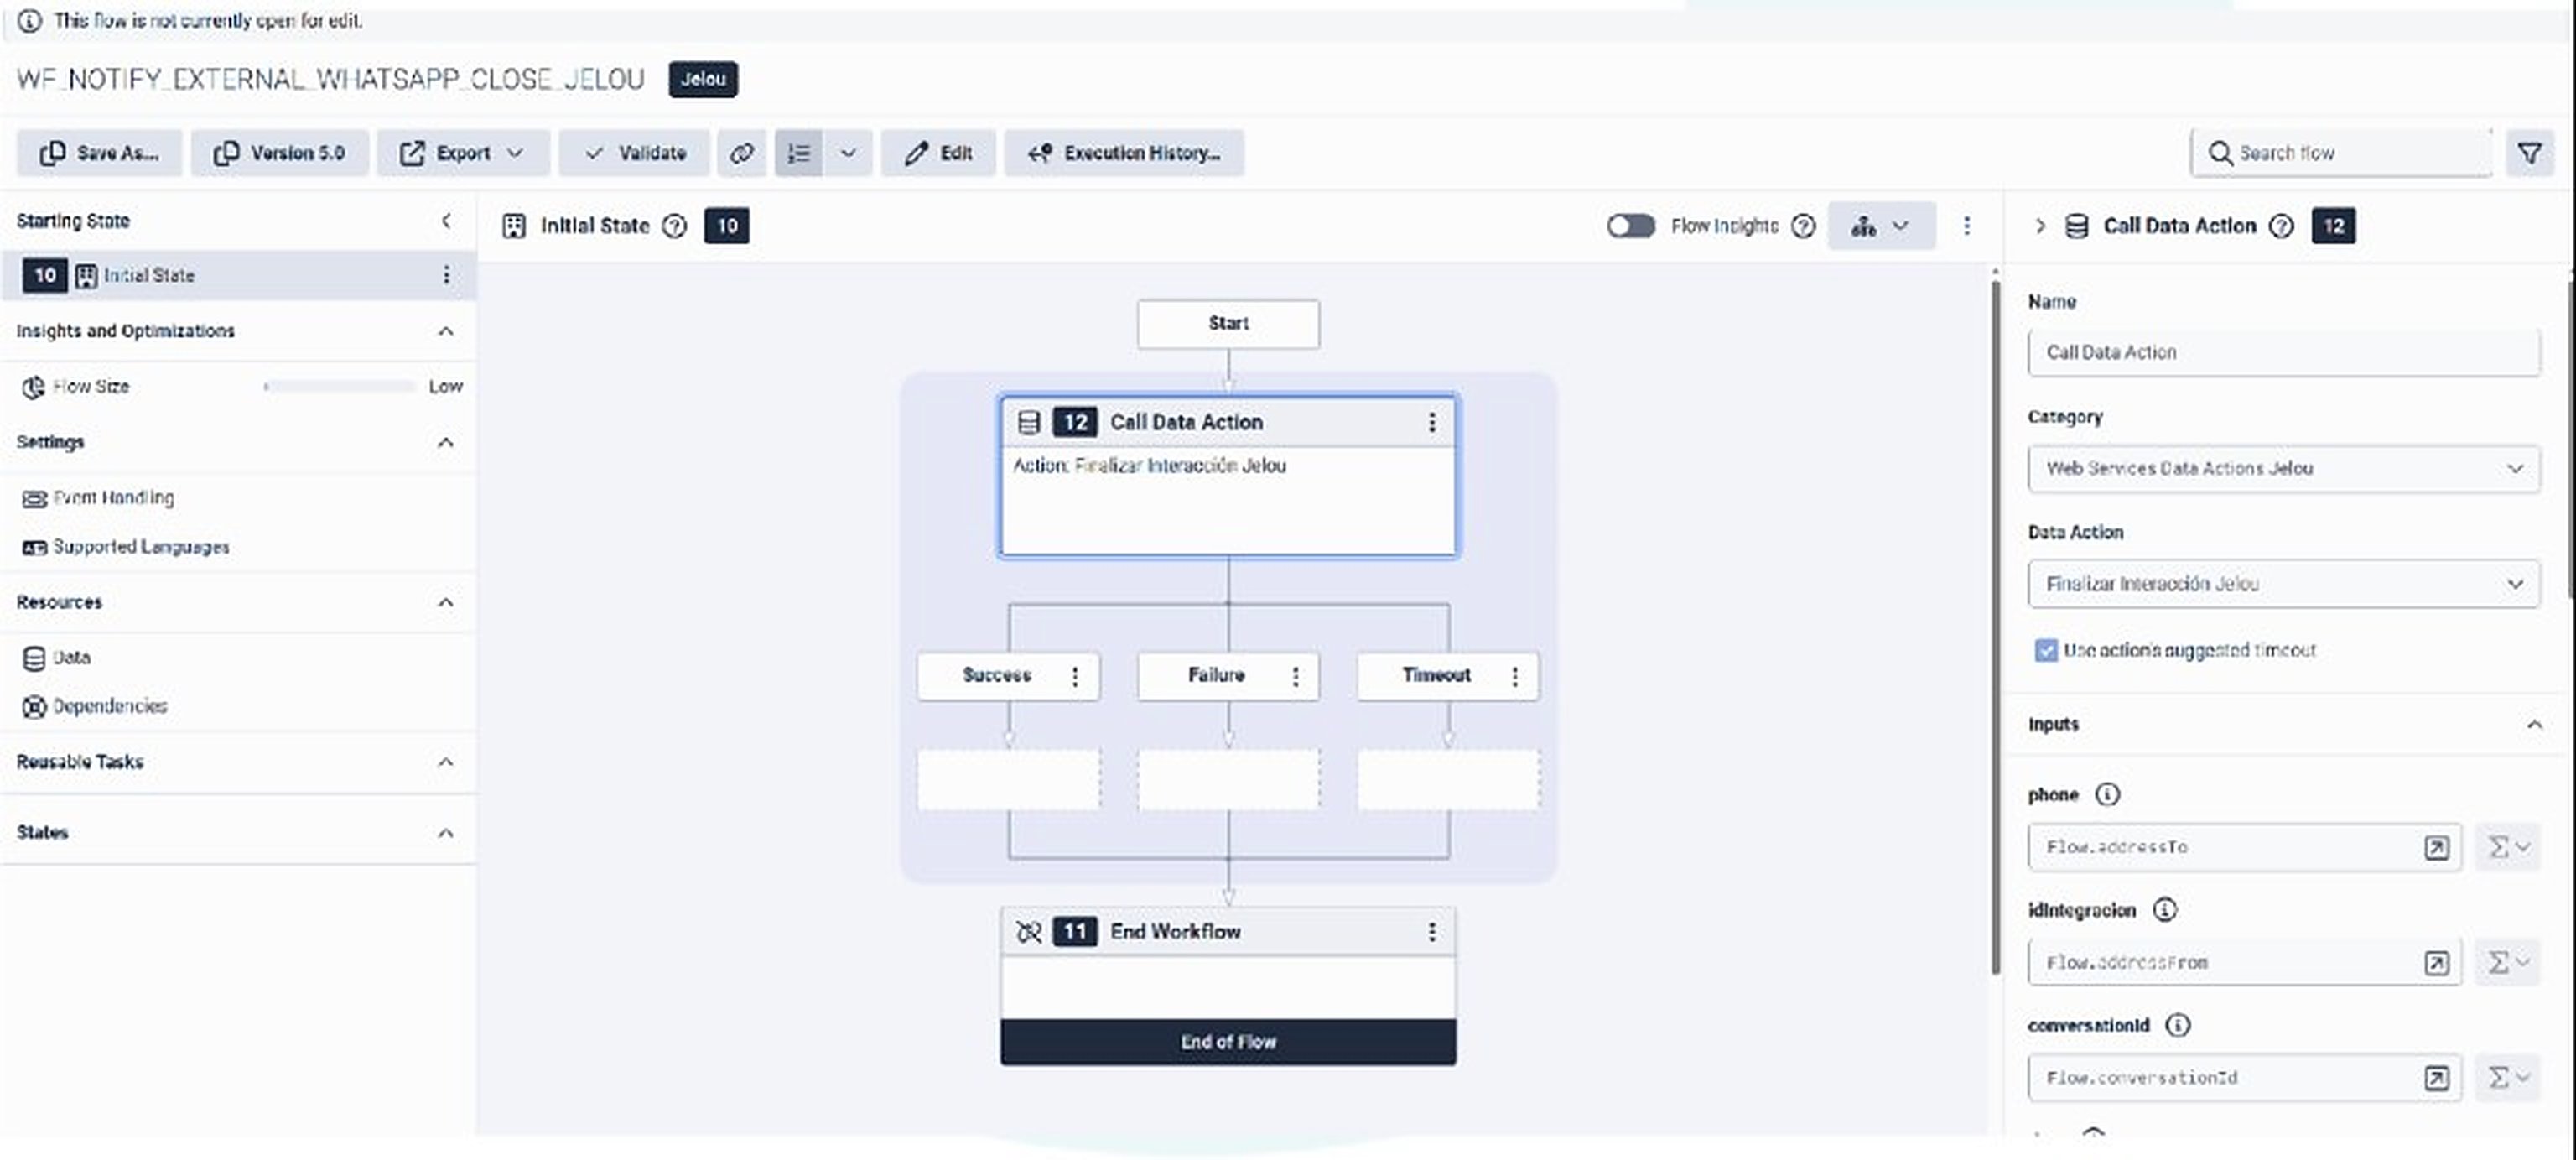
Data Action invocation
Create the Data Action

Data Action
Configure the Data Action request
direction field is named from the Genesys Cloud point of view: Outbound means the event leaves Genesys toward Jelou. The webhook rejects payloads marked as Inbound.${input.variableName} syntax. The names in the example are illustrative: use the ones you defined in your Workflow.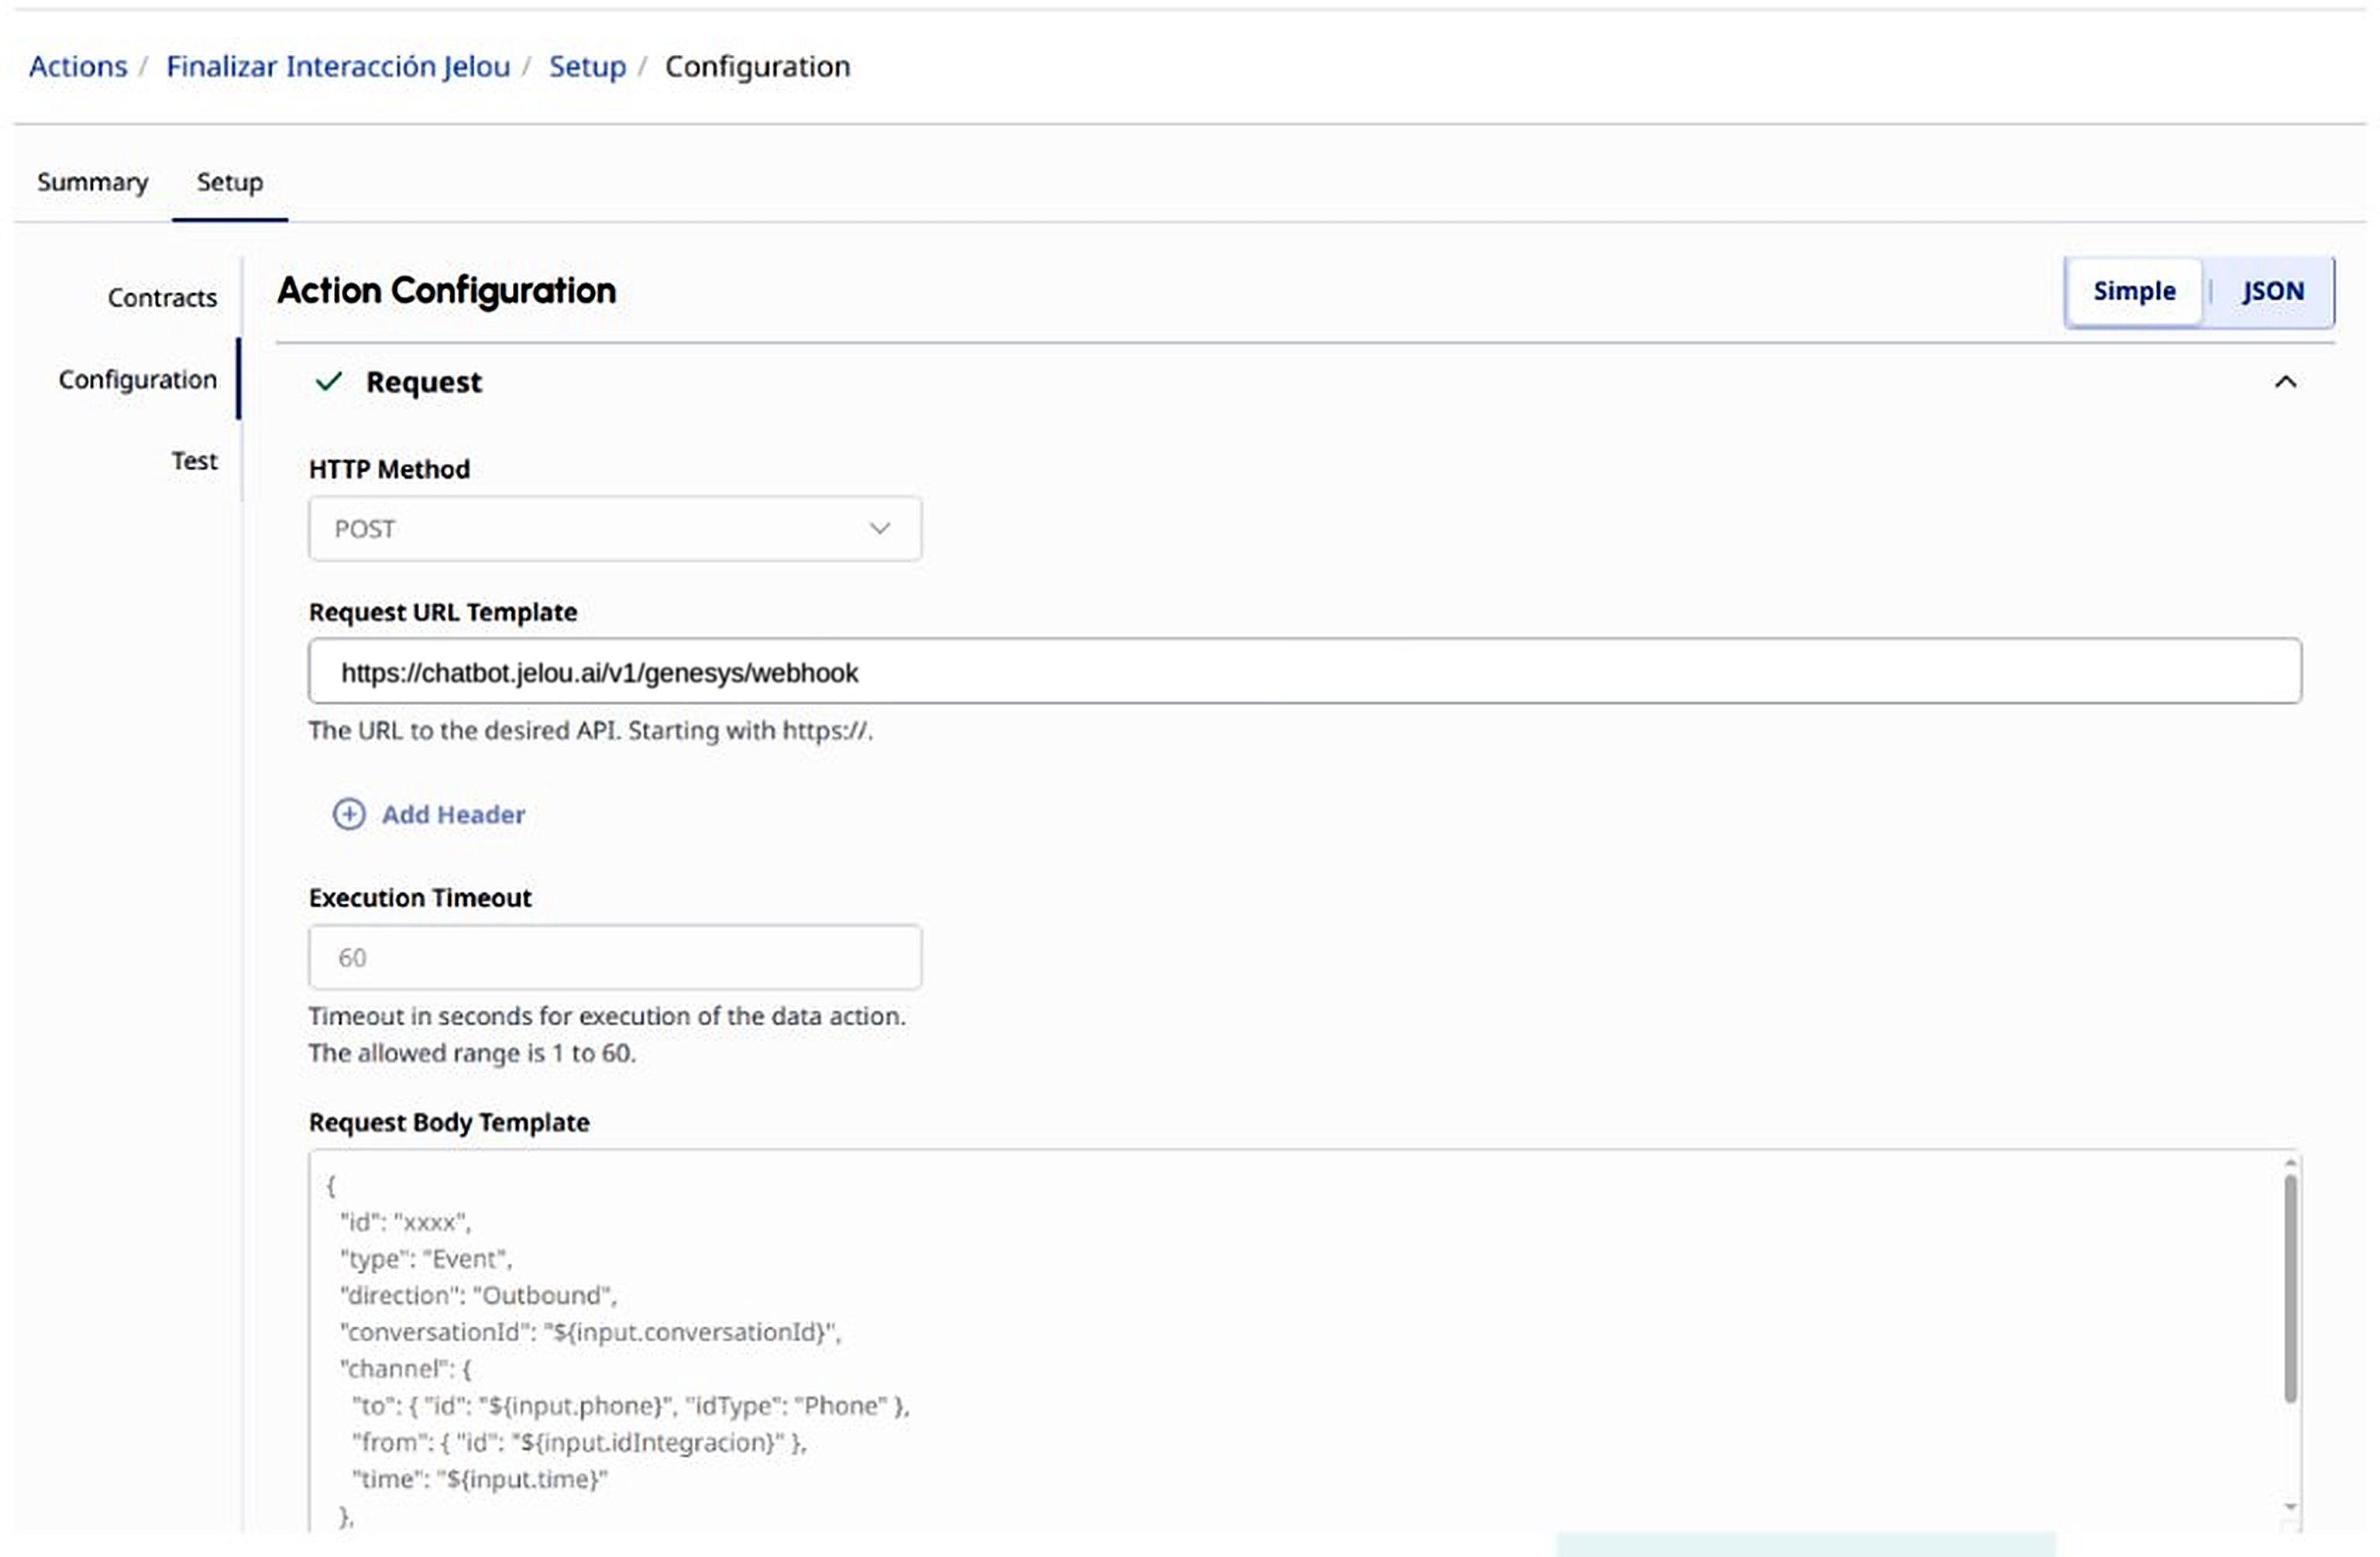
Data Action configuration
Configure the app
After completing the configuration in Genesys Cloud:Return to the Brain module
Configure the interoperability
Save and publish
Use the app
Once the integration is configured:- Conversations can be automatically transferred between Jelou and Genesys Cloud.
- Channels created in Jelou will automate initial customer support.
- Agents can continue the conversation directly from Genesys Cloud.
- When the interaction ends in Genesys Cloud, the Trigger and the Workflow notify Jelou and the channel resumes the conversation with the end user.
- Conversation events will be automatically processed through Open Messaging, Trigger, Workflow, and Data Actions.