Test: test environment. Lets you simulate payments without moving real money.
Production: live environment. Processes transactions with real money.
Each environment has its own key pair and its own webhook. Do not mix test credentials or webhooks with production ones.
Environment
Public key
Private key
Webhook
Test
Visible in Test API Keys
You must create it with Create new private key
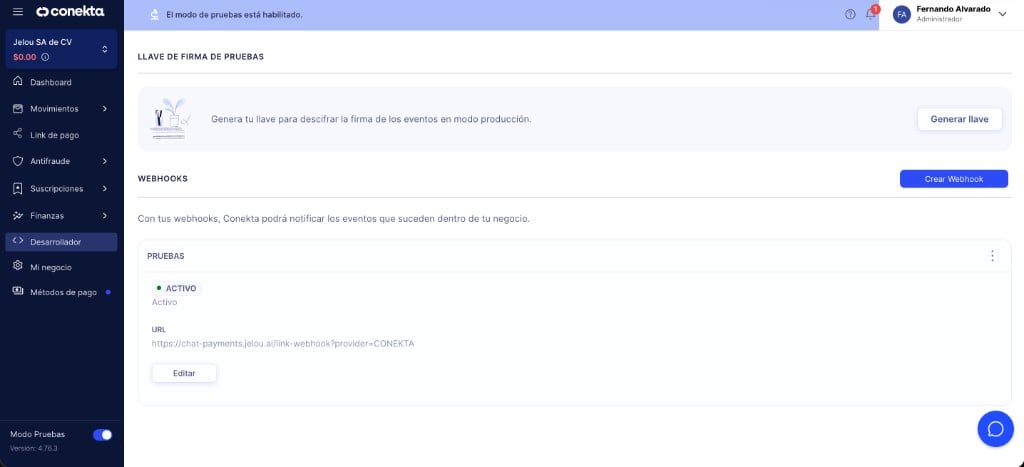
Configure it with Test Mode enabled
Production
Visible in Production API Keys
You must create it with Create new private key
Configure it with Test Mode disabled
Do not mix credentials or webhooks across environments. If even one key or webhook belongs to the wrong environment, installation may fail or payment statuses may not sync correctly.
Conekta only lets you copy or view the private key at the moment it is created. If you lose it, you must generate a new one.
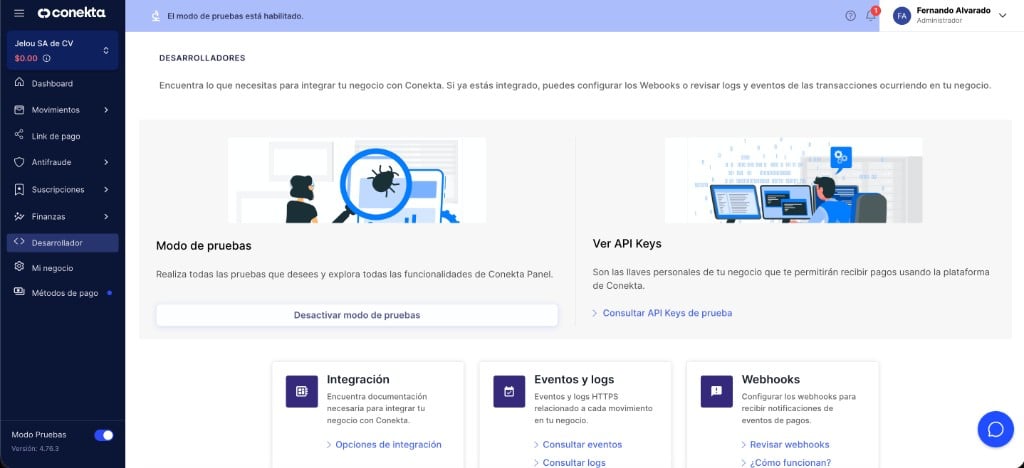
In the bottom-left corner of the panel, turn on the Test Mode switch.You should see the Test mode is enabled notice at the top of the panel.
3
Open Developers
In the sidebar menu, open Developer.
Conekta panel with test mode enabled, Developers section, and Webhooks card
4
View test API Keys
In the View API Keys card, click View test API Keys.
5
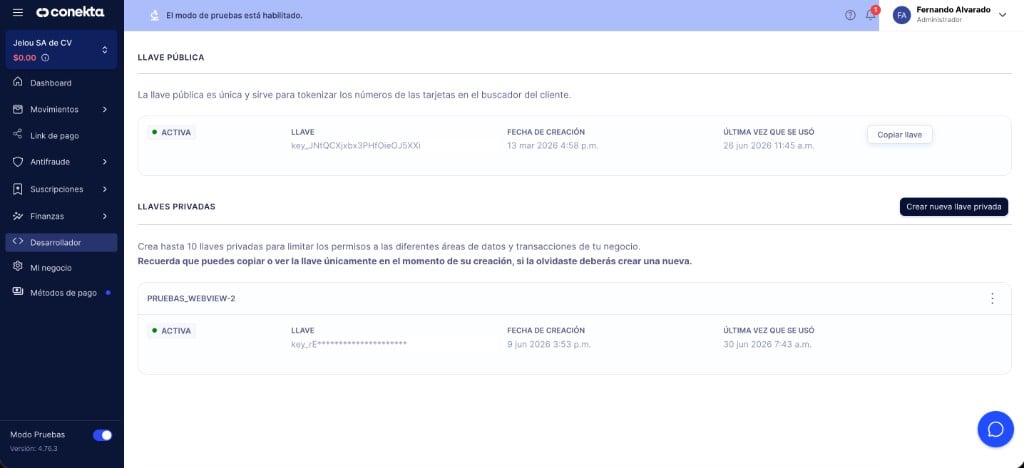
Copy the public key
In the Public key section, copy the active key using Copy key.
Test API Keys: public key and private key creation
6
Create and copy the private key
In the Private keys section, click Create new private key.Assign a descriptive name, confirm creation, and copy the private key immediately. Conekta will not show the full key again after you close that step.
7
Open test Webhooks
Return to Developer. In the Webhooks card, click Review webhooks.
Part 2 — Prepare production credentials and webhook
1
Disable test mode
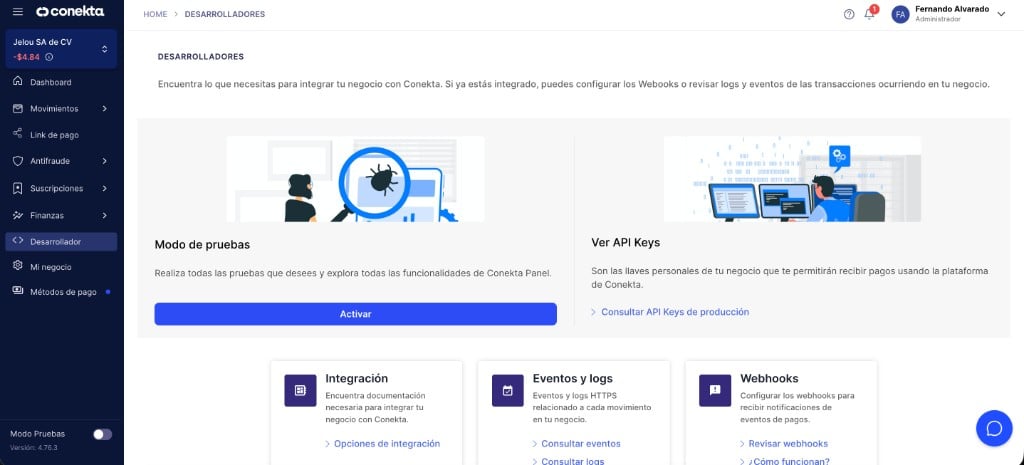
In the bottom-left corner of the panel, turn off the Test Mode switch.Confirm that the test mode notice no longer appears.
2
Open Developers
In the sidebar menu, open Developer.
Conekta panel with test mode disabled and Developers section
3
View production API Keys
In the View API Keys card, click View production API Keys.
4
Copy the public key
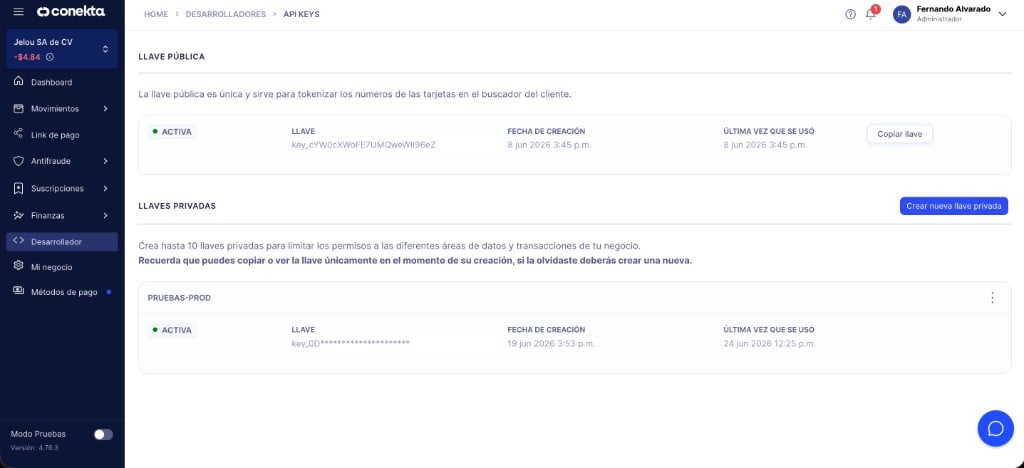
In the Public key section, copy the active key using Copy key.
Production API Keys: public key and private key creation
5
Create and copy the private key
In the Private keys section, click Create new private key.Assign a descriptive name, confirm creation, and copy the private key immediately.When you move Conekta to production in Brain Studio, use this production pair. Do not reuse test credentials.
6
Open production Webhooks
Return to Developer. In the Webhooks card, click Review webhooks.
7
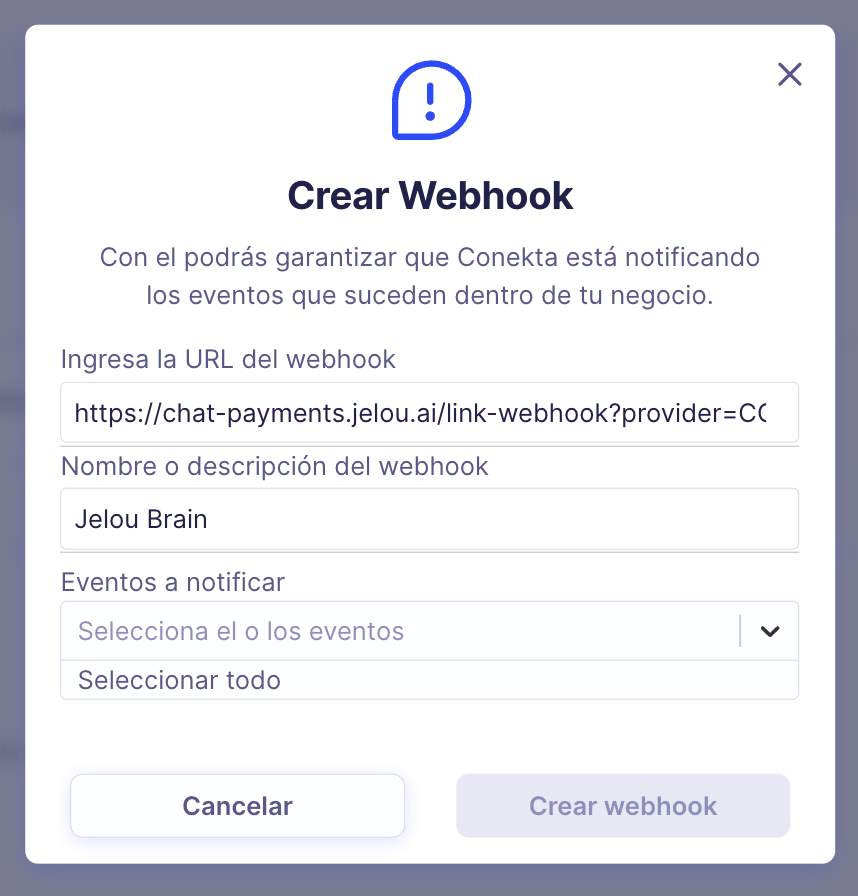
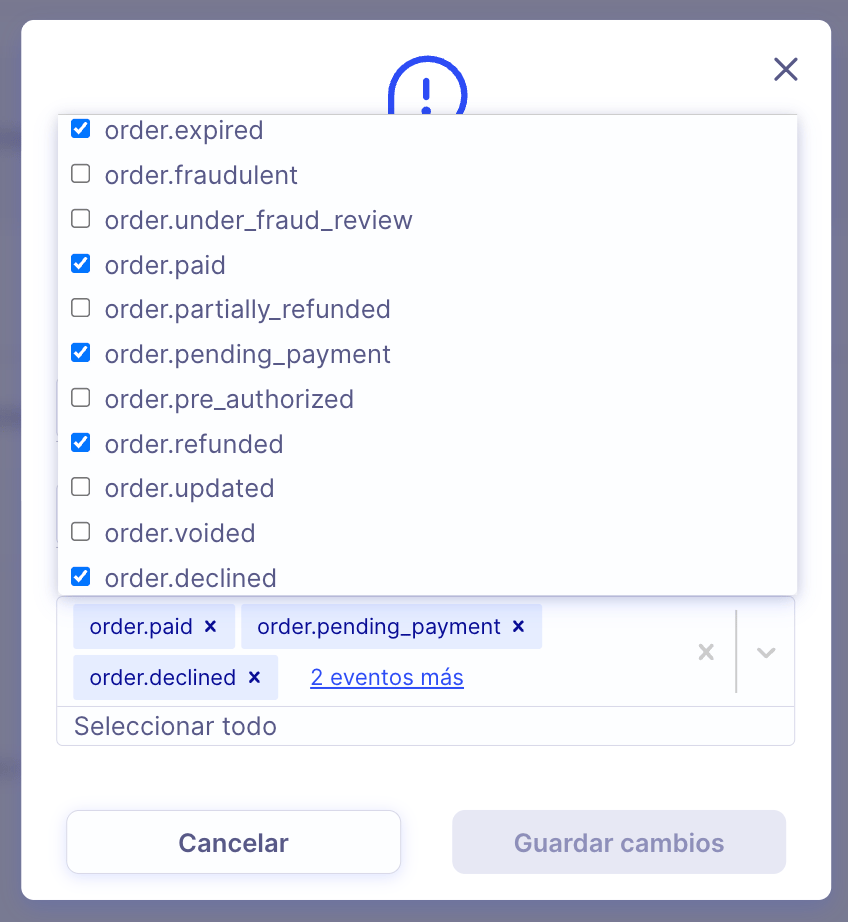
Create the production webhook
Click Create Webhook and complete the same configuration as in test:
Active public key from the environment you are connecting
Private key
Private key you just created in Conekta
VAT rate
VAT percentage the integration will use during collection
VAT is configured during connection in Brain Studio, not in the Conekta panel. The webhook is configured directly in Conekta and is not entered in Brain Studio.