To manage your databases, collections, fields, and records in Datum, see the full Datum documentation. This node assumes the database already exists.
Core concept
Every operation is resolved against a database + collection + operation triple. All three are required for the node to build the correct request.| Concept | What it means |
|---|---|
| Database | The container you have provisioned in Datum. |
| Collection | The table inside the database: users, orders, products, etc. |
| Operation | The action you will perform on the collection: list, get, create, update, or delete. |
Configuration
The panel is organized top-down, in the same order you must configure it.Database
Dropdown with the databases available on your account in Datum. Next to the label there is an Open button that opens the database in a new tab of the Datum app — useful to review collections and records while you configure the node.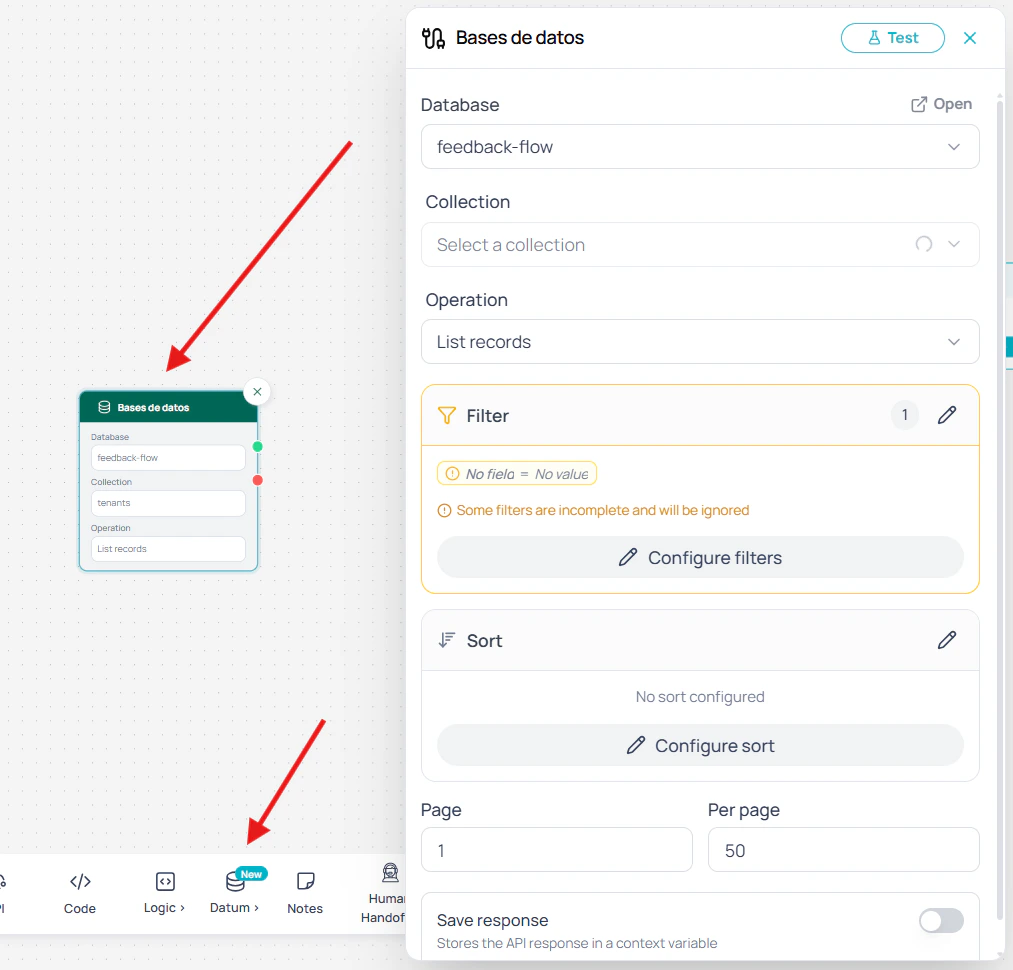
If the list is empty or you see a 401/403 error, your user does not have permission on that database. Contact the Datum administrator on your account.
Collection
Enabled only when a database is selected. Shows the collections you created in the database (Datum’s internal collections are hidden). While loading, the selector is disabled; if loading fails, it stays disabled until the database changes or permissions are fixed.Operation
Defines what the node will do on the collection:| Operation | What it does |
|---|---|
| List records | Fetch multiple records with filters, sort, and pagination. |
| Get record | Fetch a single record by its id. |
| Create record | Insert a new record. |
| Update record | Modify an existing record by id. |
| Delete record | Remove a record by id. |
Fields per operation
The rest of the panel changes based on the operation you pick.Record ID
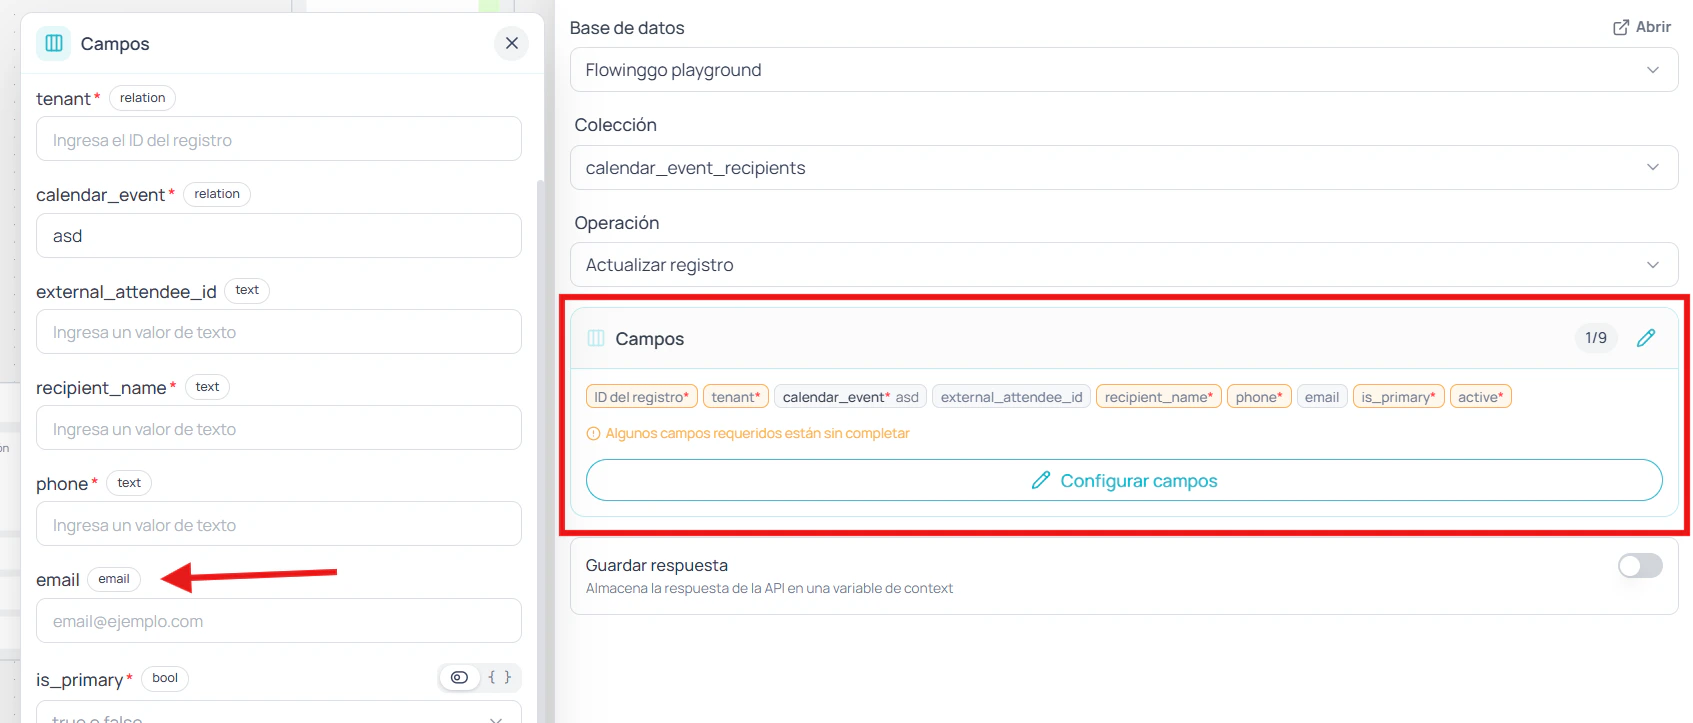
Required by Get, Update, and Delete. Accepts a fixed value or a variable:Field values
For Create and Update, the panel opens an editor with a control tailored to each field type declared in the collection:| Field type | Control |
|---|---|
text, email, url, number | Input with variable support |
bool | true/false switch or variable input |
date | Calendar + time picker or variable input |
select (single or multi) | Dropdown or variable input |
editor | Rich text editor |
json | Textarea with JSON syntax |
{{$memory.x}} or {{$context.y}}).
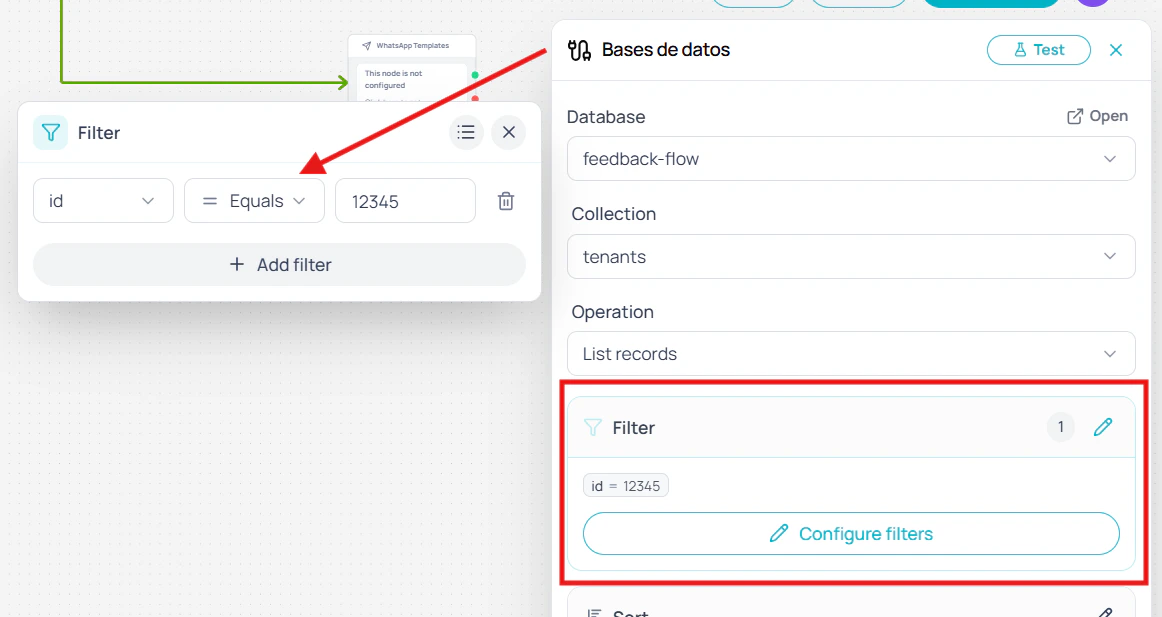
Filters (List only)
Visual builder with one or more terms joined by AND. Each row is made of field, operator, and value.| Operator | Meaning |
|---|---|
=, != | Equals / not equals |
>, >=, <, <= | Numeric or date comparison |
~ | Contains the text |
!~ | Does not contain the text |
Sort (List only)
Builder with one row per criterion. Each row picks a field and a direction (ascending or descending). Criteria apply in the order they are shown.Pagination (List only)
Two numeric fields: page (default1) and per page (default 50). If you leave one empty or enter an invalid number, the node falls back to the default at run time.
Save the response
Toggle Save response in the panel header and set a variable name. The full service response is stored in that variable and becomes available to downstream nodes.Access the response as-is
Use the variable directly in other nodes:Manipulate the response in a Code node
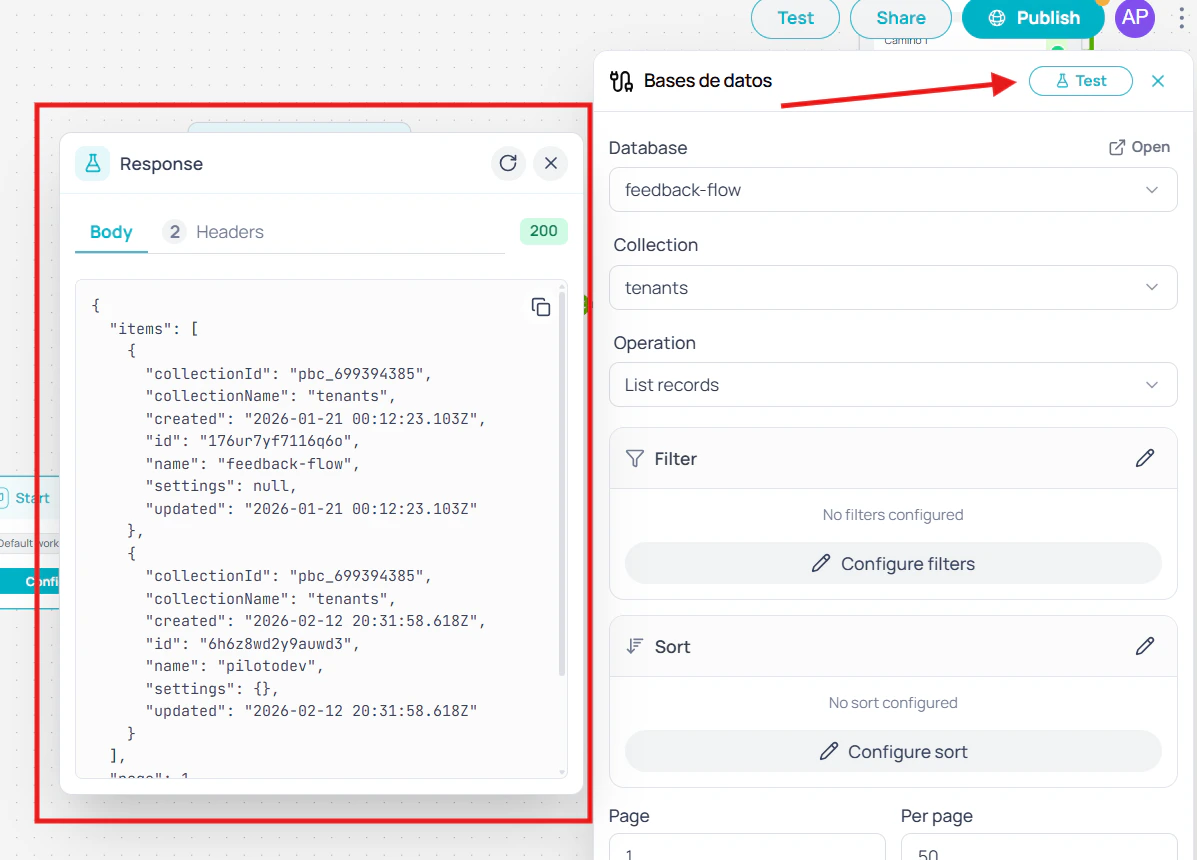
Test response
The Test button in the header runs the request against Datum and opens a popover with the result. The popover shows:- Status code (for example,
200or404) - Body tab — response formatted as JSON with a copy button
- Headers tab — response headers from the service
Use cases
Lead capture from a WhatsApp workflow
Lead capture from a WhatsApp workflow
A WhatsApp workflow that captures leads needs to store the user’s phone number and name without going through an external endpoint. Map
{{$user.phone}} and {{$memory.nombre}} to the fields in the leads collection, pick the Create operation, and the record is saved without writing a single line of code.Customer support with personalized responses
Customer support with personalized responses
A customer support workflow that personalizes responses first queries the
clientes collection filtered by the user’s email. The result is stored in a variable and downstream nodes use it to tailor the message. Before, this required an API node with a hand-crafted URL; now it’s three dropdowns and a visual filter.Order tracking with status update
Order tracking with status update
An order-tracking workflow receives a code, fetches the record using the Get operation, and updates the
status field to entregado with the date taken from {{$context.now}}. The same process that used to require two API nodes now takes just one.