
Access certificates
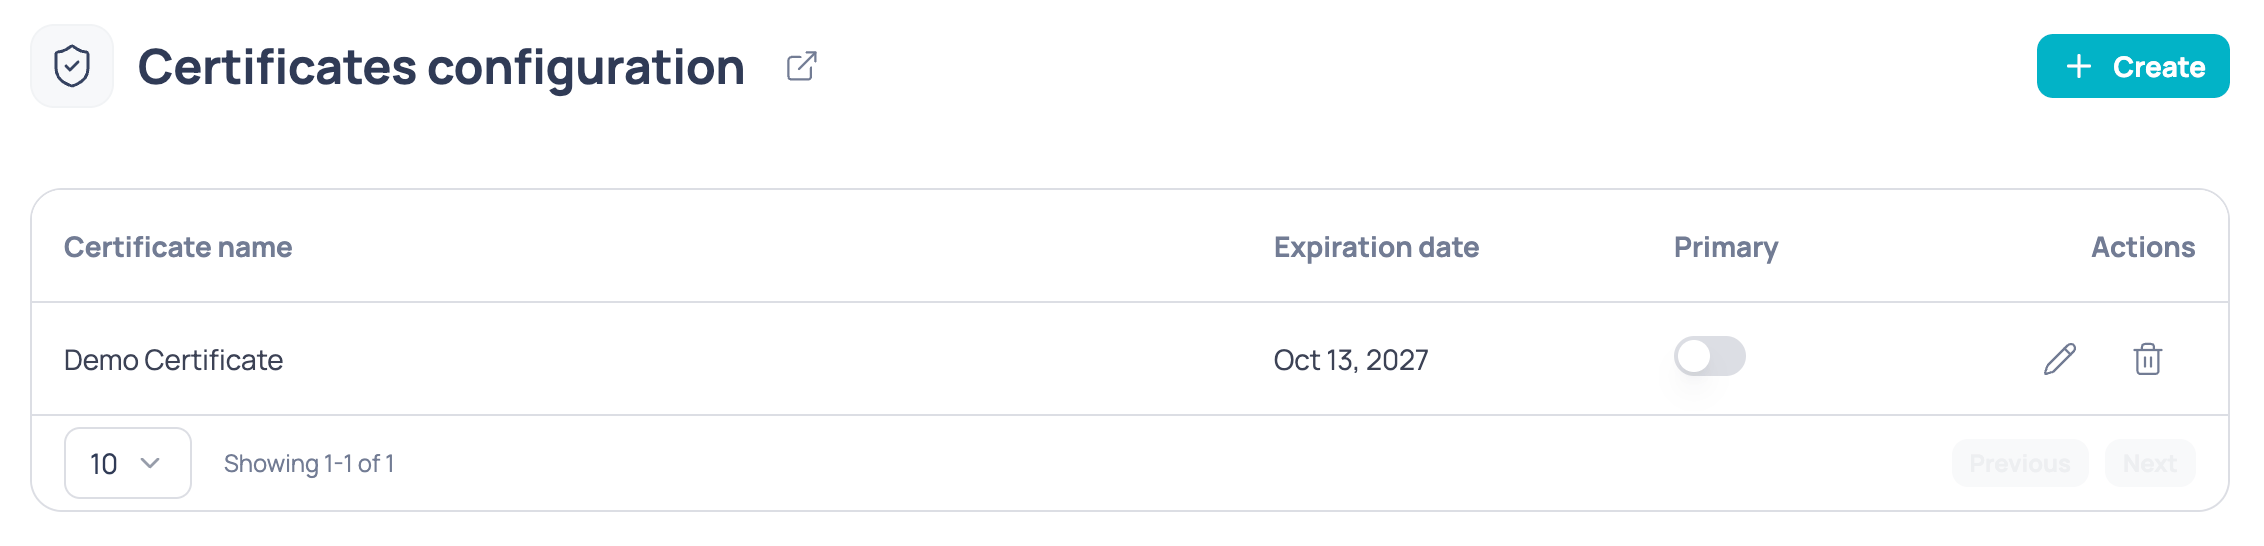
To manage your mTLS certificates, go to Settings > Certificates. This section lets you manage all certificates associated with your company.The certificates section is not available for self-service companies.
Create certificate
Click Create at the top of the list to open a side panel with these fields: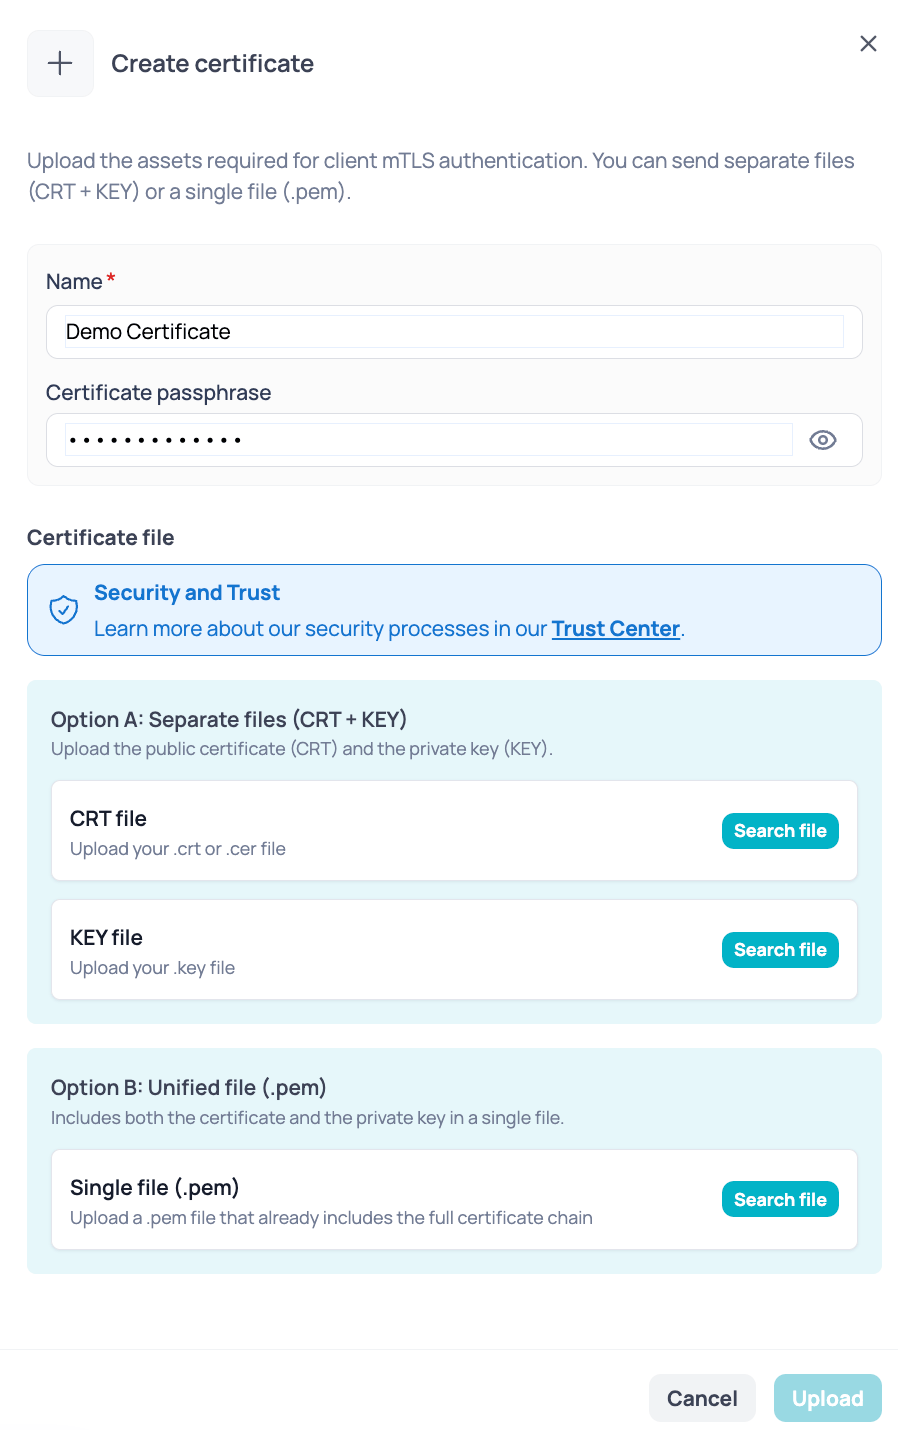
- Name (required): up to 100 characters, unique within your company (case-insensitive), and no emojis.
- Certificate passphrase (optional): if your private key is protected, enter its password. It must be 8 to 128 characters long, with no emojis and no leading or trailing spaces.
- Certificate file: choose one of the two options below.
Each file can be up to 5 MB. Make sure the certificates are valid and have not expired before uploading them. The expiration date is extracted automatically from the certificate.
.pem file or the CRT + KEY pair. New certificates are not marked as primary: you can do that later from the list.
Option A: separate files (CRT + KEY)
Both files are required:- CRT file (
.crtor.cer): contains the certificate - KEY file (
.key): contains the private key
Option B: single file (.pem)
A.pem file that contains both the certificate and the private key.
View certificates
In the Certificates section you can see all your company’s certificates in a table with these columns:- Certificate name
- Expiration date (for example,
Oct 13, 2027;-is shown if there is no date) - Primary: a switch that indicates whether it is the primary certificate
- Actions: icons to edit and delete
Mark a certificate as primary
Turn on the Primary switch for the certificate. This certificate will be automatically selected when you enable mTLS on an API node if you have not manually selected another certificate.Only one certificate can be marked as primary at a time. If you mark a new certificate as primary, the previous one will automatically lose that status.
Edit a certificate
You can edit the name of your existing certificates to identify them more easily. This is useful when you have multiple certificates for different purposes or environments. Click the edit icon (pencil) in the Actions column next to the certificate you want to modify. The name must follow the same rules as when you created it.You can only change the name. Files cannot be replaced: to use a different certificate or key, create a new certificate.