- Get your Secret API Key (Test or Live) to install Stripe in Marketplace.
- Configure webhooks so Jelou receives payment events and your flow works correctly.
Before you begin
Environments in Stripe (Test vs Live)
Stripe separates environments by key type:- Test (
sk_test_...): for testing without real transactions. - Live (
sk_live_...): for real charges in production.
Part 1 — Get your Secret API Key
Log in to the Stripe dashboard
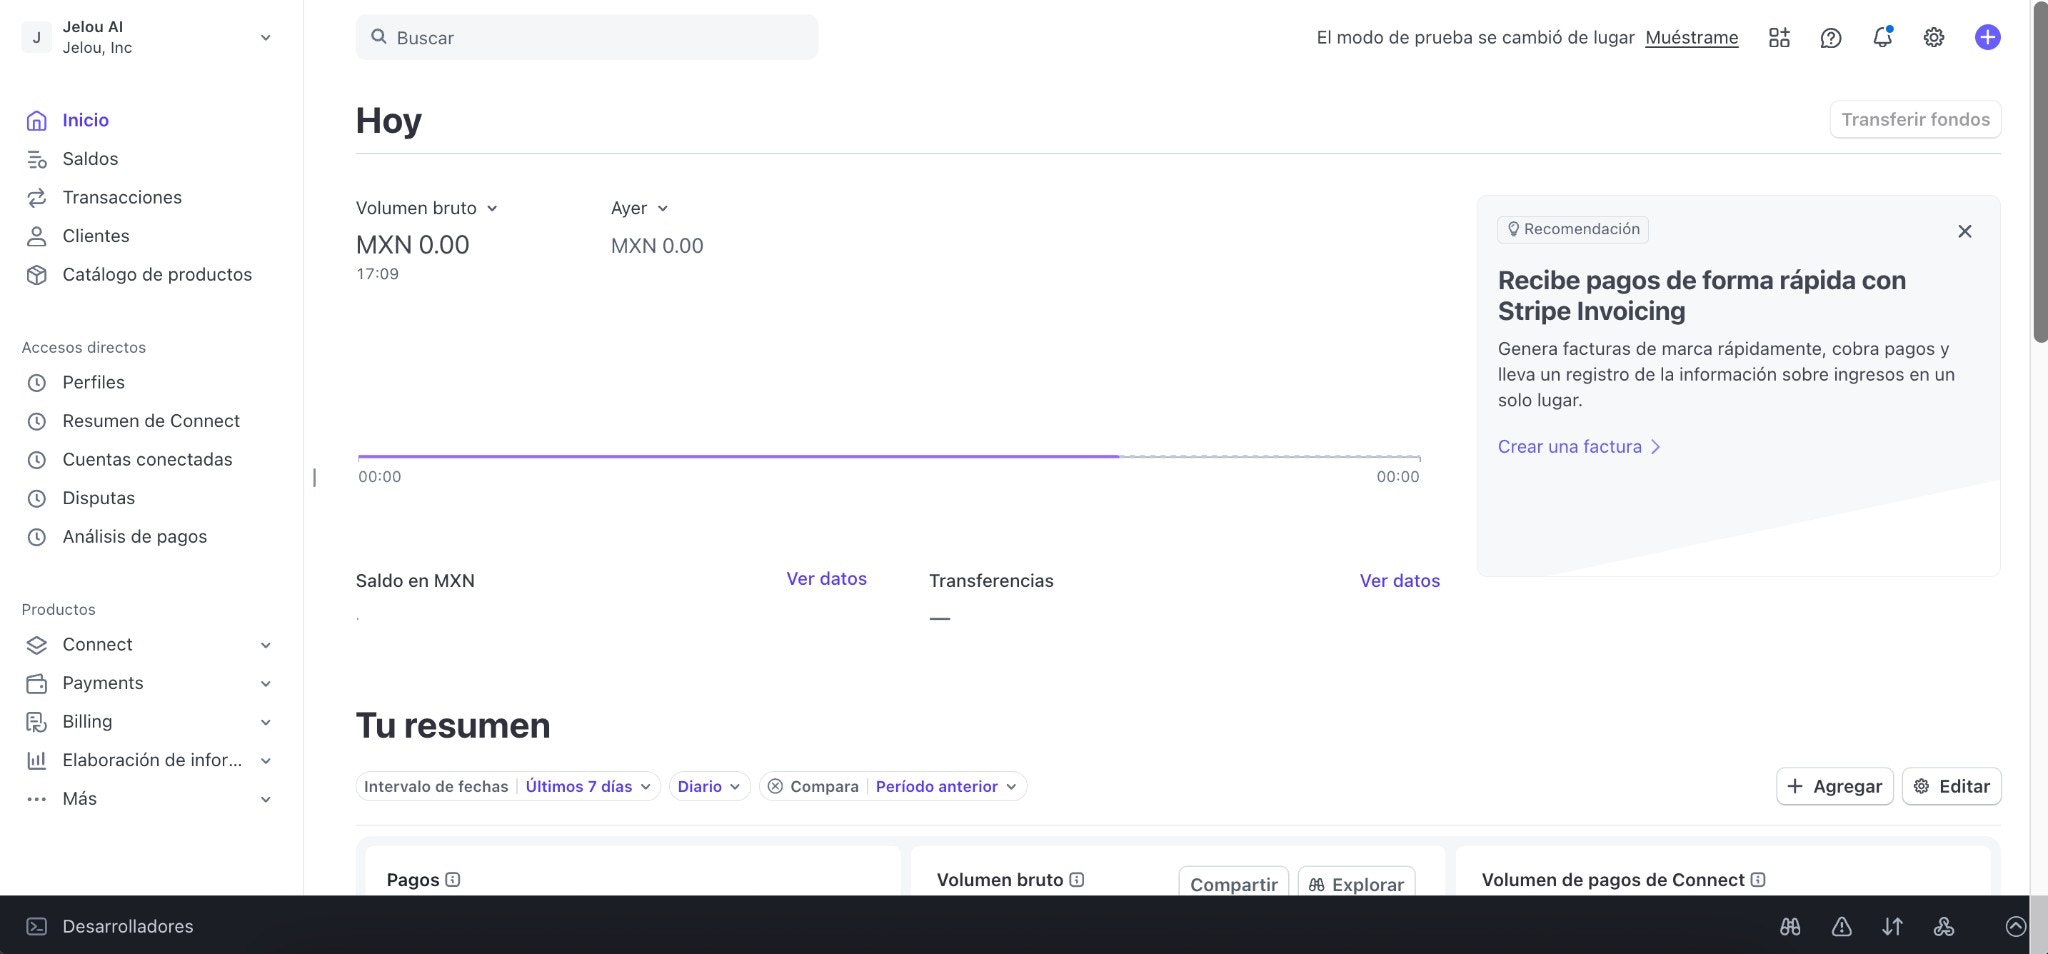
Stripe Dashboard (merchant account)
Go to Developers → API Keys
- Via settings (icon at the top right → Developers → Manage API keys)
- In the left side menu, find the Developers section and click API Keys.
Direct access to Developers in the side menu
Choose the environment (Test or Live)
- An option like “Test mode” / “Switch to a test environment” from the account selector.
- A top bar indicating you are using test data.
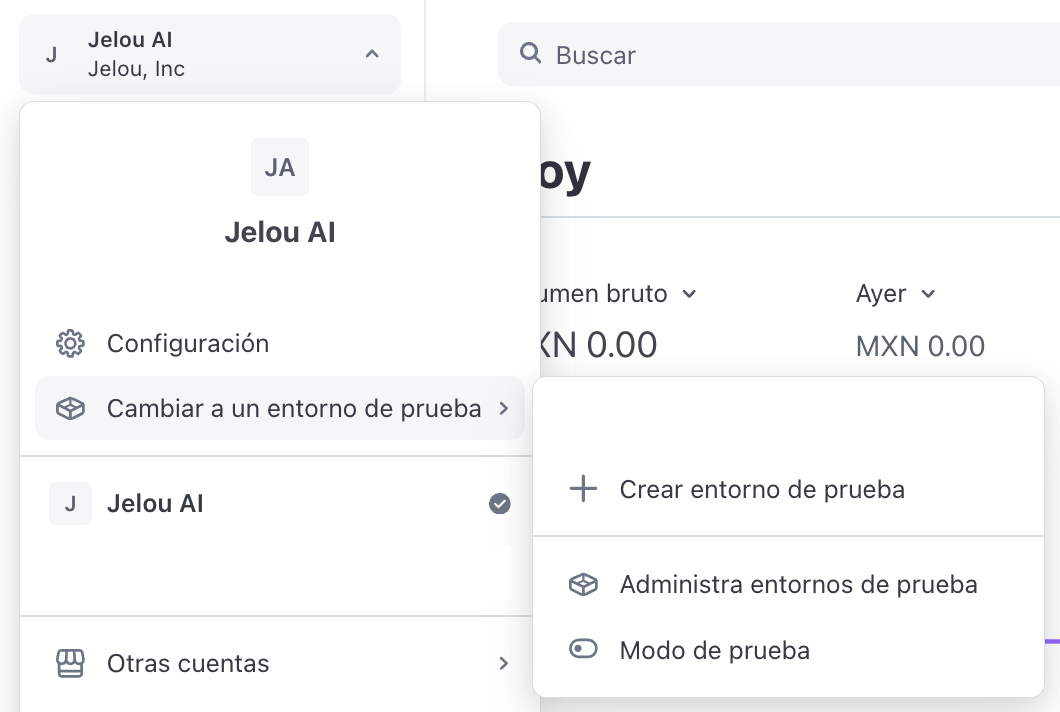
Switching to 'Test mode'
live in the API Keys section.
To get Test keys, you must enter Test mode and return to this same screen.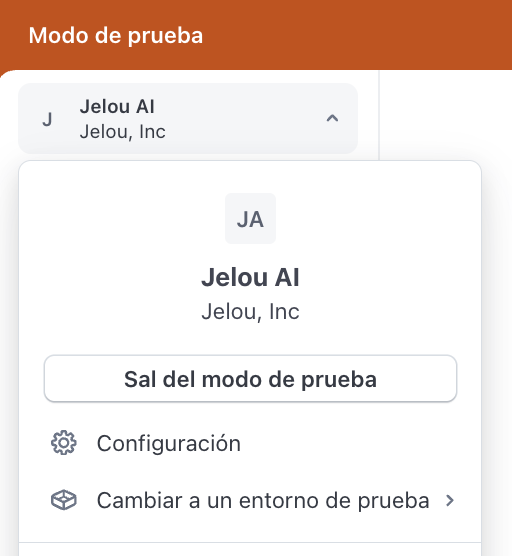
Exiting 'Test mode'
Create (or copy) your Secret API Key
- Publishable key (
pk_...) → NOT used to install Stripe in Brain Studio - Secret key (
sk_...) → YES, this is the one you need

'Standard Keys' section with 'Create secret key' button
Choose the key type (recommended: Standard)
- How I’m building my integration (standard key / full access)
- I’m providing this key to another website (Stripe suggests a restricted key)
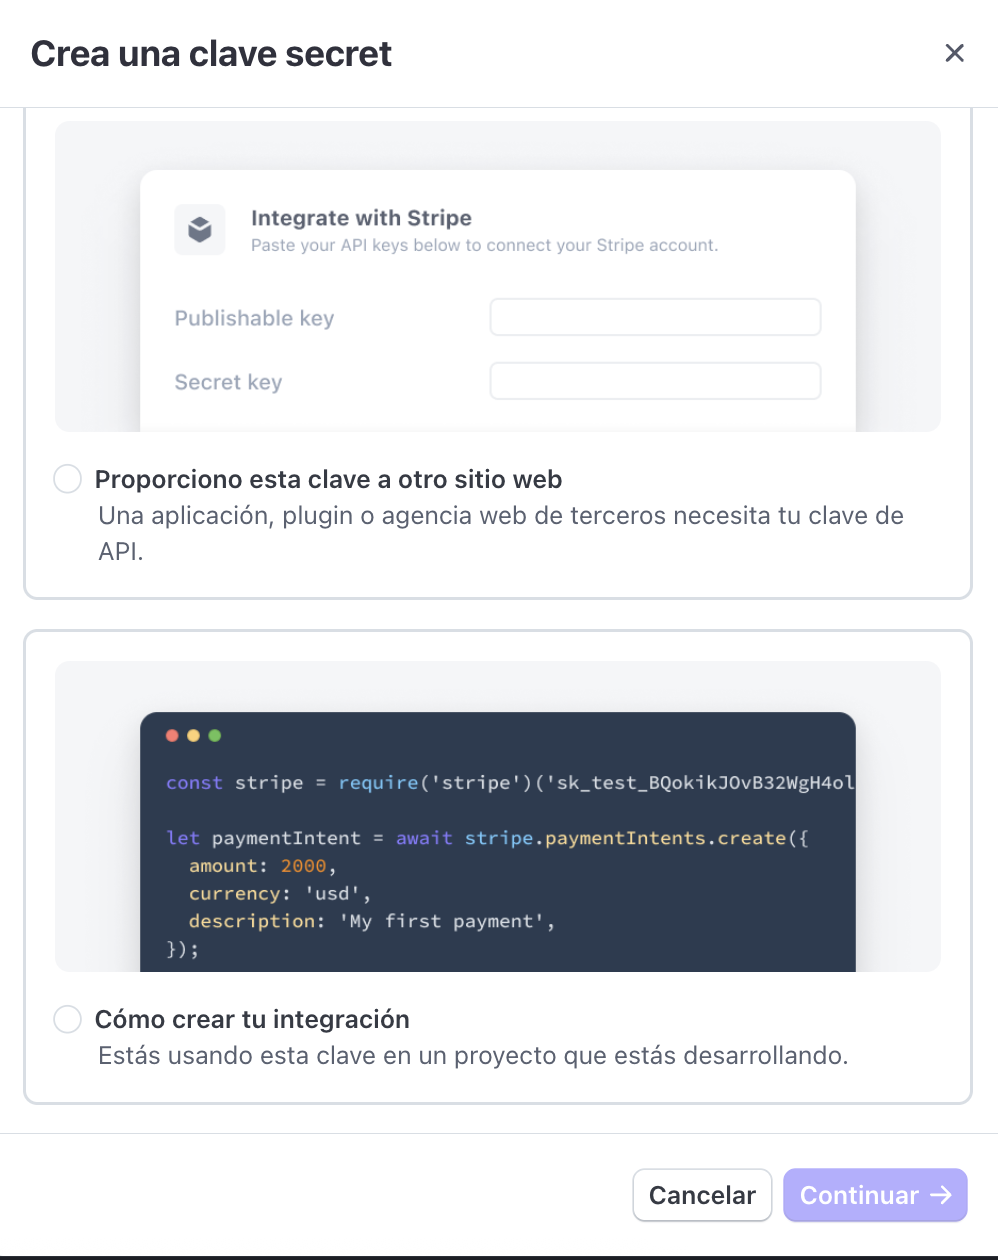
Secret key creation options
sk_test_ or sk_live_, you have everything you need to install Stripe.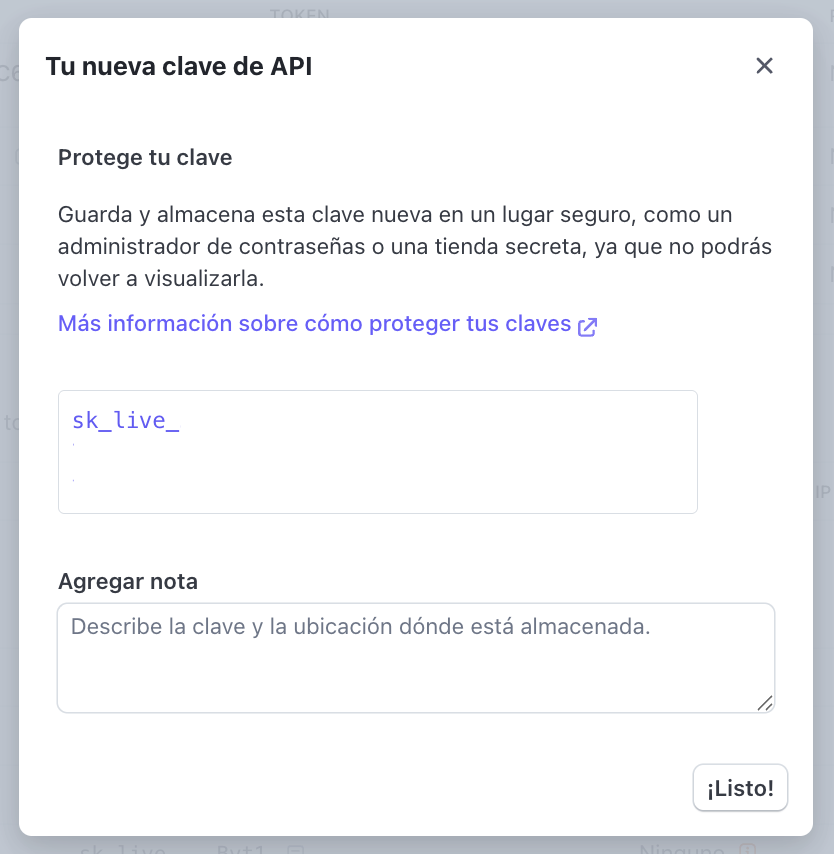
Secret key delivery
Use the Secret API Key in Brain Studio
sk_test_... or sk_live_...) and confirm.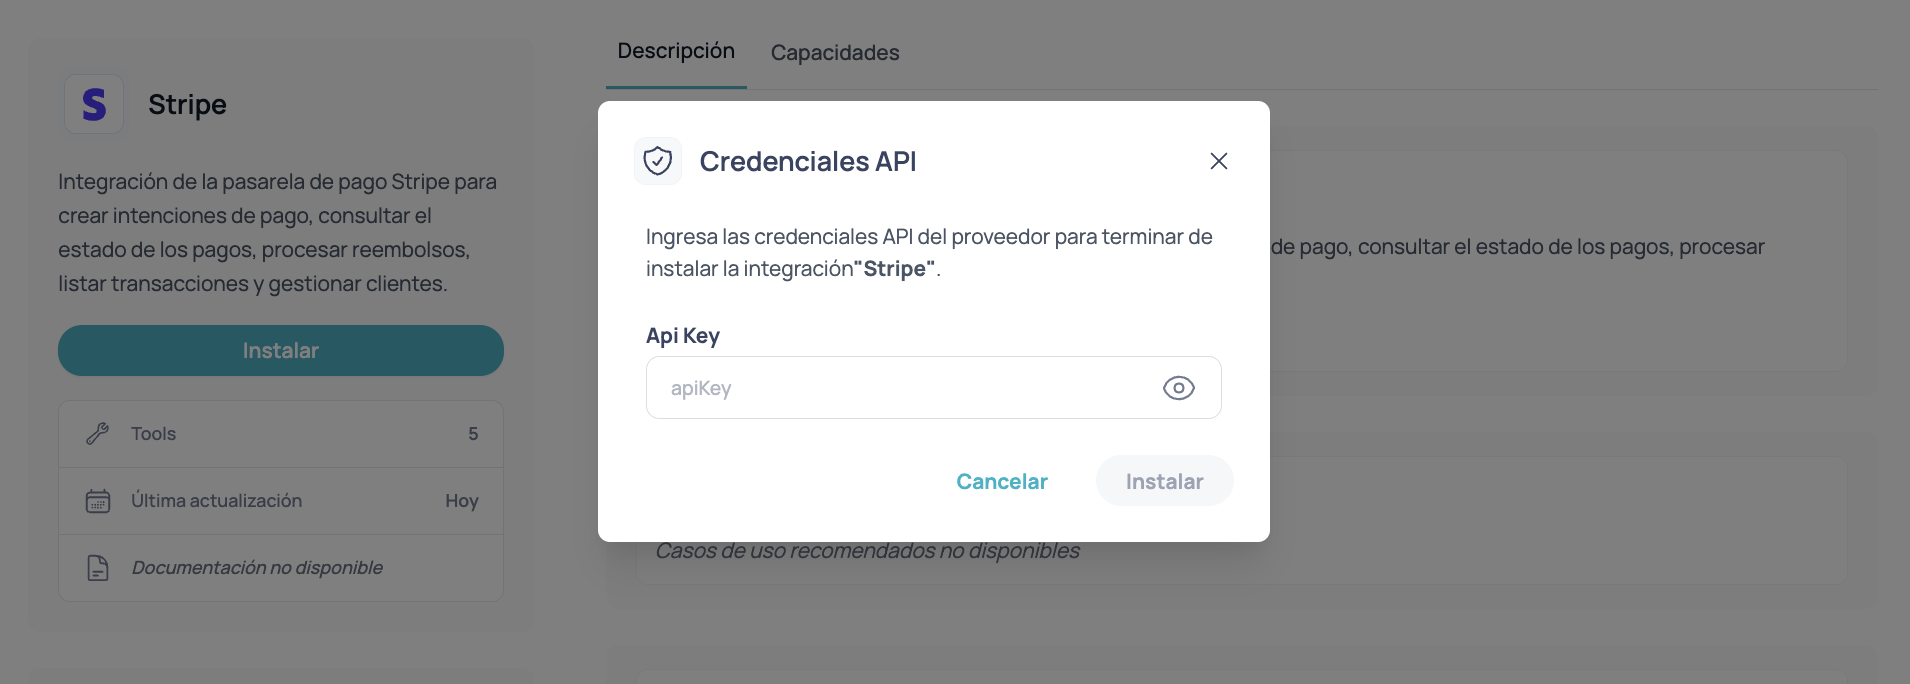
Brain Studio installation modal requesting 'API Key' for Stripe
- Charges are processed directly in the merchant’s Stripe account.
- Jelou does not hold funds.
- The payment result returns to the flow to continue based on the real status.
Test vs Live in Brain Studio
- If you install with
sk_test_..., you operate in test mode. - If you install with
sk_live_..., you operate in production.
Restricted keys (optional)
Stripe allows creating Restricted Keys (usually seen asrk_...) with specific permissions.
You can use a restricted key if your organization requires greater control, but you must ensure you enable the necessary permissions for Stripe to work correctly in Brain Studio.
Troubleshooting
I cannot find 'Test mode' or 'View test data'
I cannot find 'Test mode' or 'View test data'
- Switch to a test environment
- Test mode
- Manage test environments
I copied a key starting with `pk_` and Brain Studio does not accept it
I copied a key starting with `pk_` and Brain Studio does not accept it
pk_...).Go back to Developers → API Keys and copy a Secret key (sk_...).I created a key and cannot see it in full again
I created a key and cannot see it in full again
- create a new key
- save it in a safe place (password manager / secret vault)
Best practices
Secret API Key security
Secret API Key security
- Do not share your
sk_...by chat or email. - Store it in a password manager or secret vault.
- If you suspect exposure, rotate it from the Stripe dashboard and reinstall Stripe in Brain Studio with the new key.
Usage per environment
Usage per environment
- Use
sk_test_...for internal testing and QA. - Before going live, install with
sk_live_...and validate a real end-to-end payment.
Part 2 — Configure webhooks in Stripe (required)
Jelou needs Stripe to send payment events to the platform to align the charge result with your flow in Brain Studio. This is configured in Stripe Dashboard: you create a webhook endpoint and select the events listed below.sk_test_... or sk_live_...) must correspond to the same mode as the webhook you are configuring in the dashboard.Open Developers, Workbench, and Webhooks
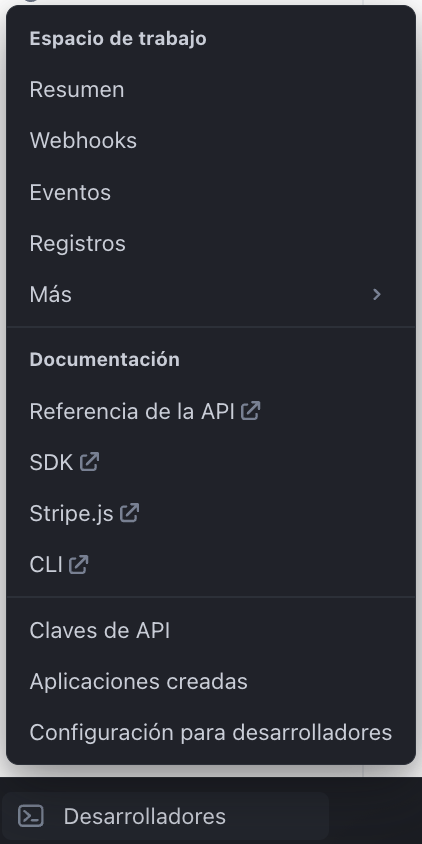
Open Developers
Open Workbench
Go to the Webhooks tab
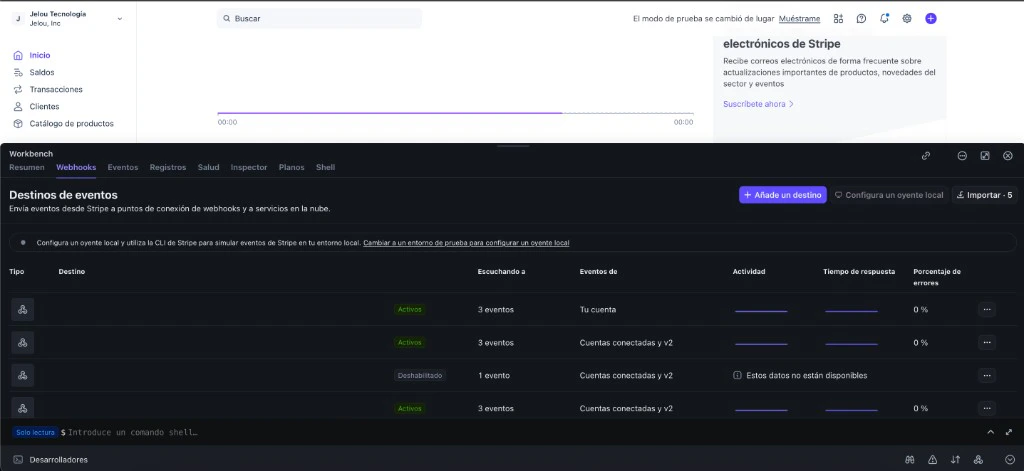
Stripe Workbench: access to the Webhooks tab
Choose events and destination type
Select events
payment_intent and select only these three:payment_intent.succeededpayment_intent.requires_actionpayment_intent.payment_failed
Event origin
Destination type

payment_intent events selected in the Stripe wizard
Endpoint URL by environment
Copy the URL that corresponds to the active mode in the Dashboard (bar or indicator of test mode / live).- Test mode
- Production mode (Live)
Paste the URL and save
Repeat for the other mode (if applicable)
jelou.dev for Test, jelou.ai for Live).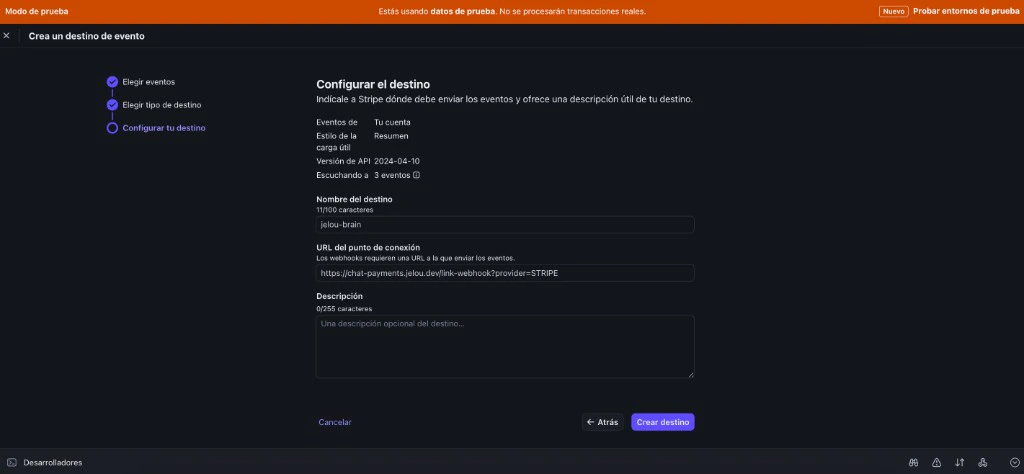
Jelou webhook URL entered in the Stripe endpoint
Verify the endpoint in Stripe
Before continuing, confirm in the dashboard that the destination was correctly registered:Review the destination list
Confirm events and URL
- It listens to exactly the three events (
payment_intent.succeeded,payment_intent.requires_action,payment_intent.payment_failed) - The URL points to the correct Jelou address for your environment (
jelou.devfor Test,jelou.aifor Live)