Add the node to the Canvas
Locate the integration in Marketplace
In the left side panel of Brain Studio, open the Marketplace folder.If the integration is correctly connected, you will see Payphone listed as an available provider.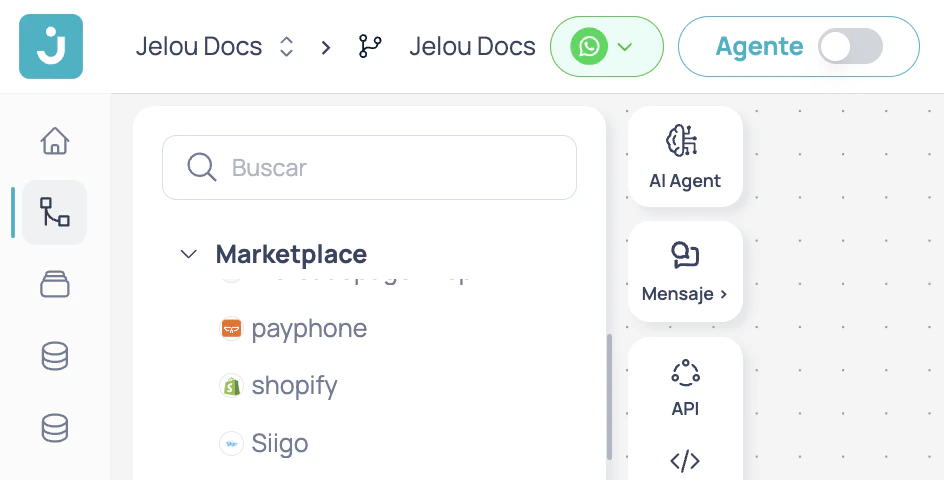
Drag the node to the Canvas
Drag Payphone from the side panel into your flow in the Canvas.When you drop it, the node block will be created with its available outputs.
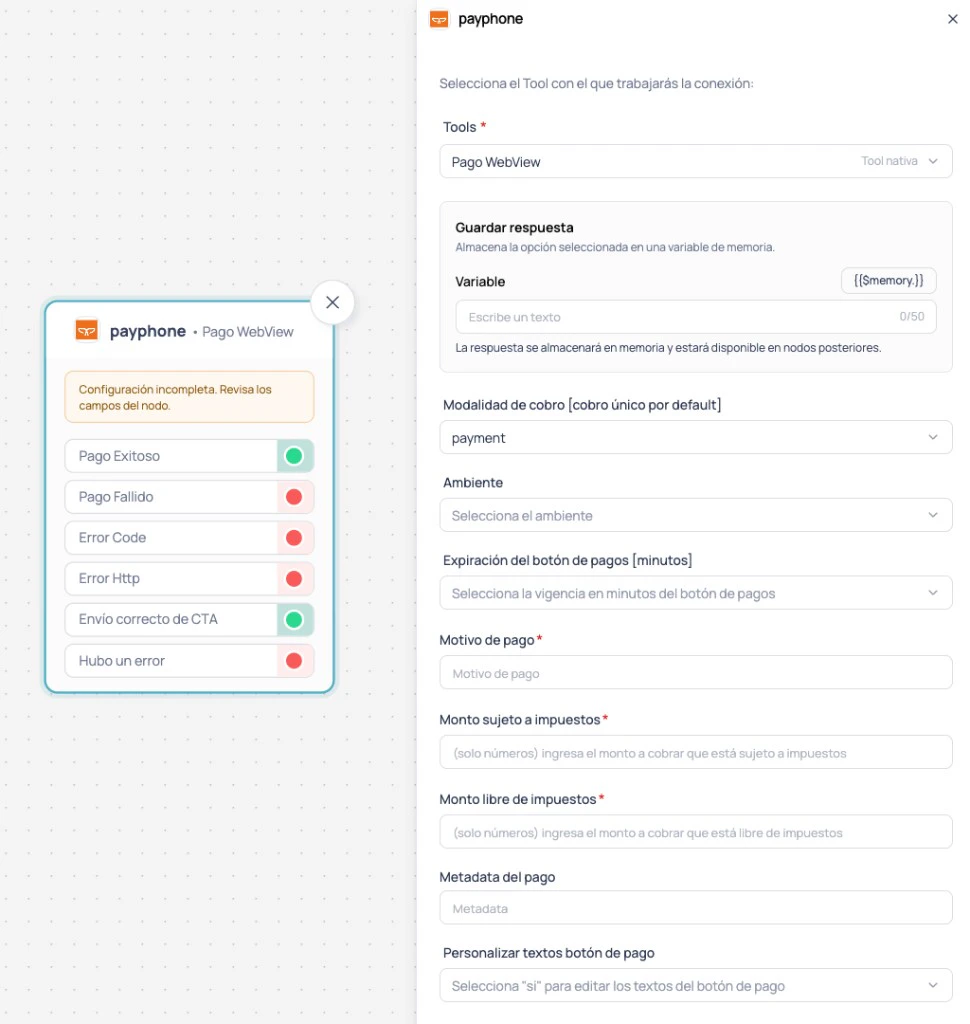
Configure the node
- Inputs
- Outputs
Save result as
Save result as
Defines the name of the variable where Brain Studio will store the complete JSON response from the node.
Charge mode [one-time payment by default]
Charge mode [one-time payment by default]
Defines the charge mode.For this integration, the default value is
payment.Environment
Environment
Defines the environment in which the charge will be executed.Available values:
DEV, PRODPayment reason
Payment reason
Descriptive text for the charge.Examples:
- order number
- product or service name
- internal payment reference
Taxable amount
Taxable amount
Enter the amount to charge that is subject to taxes.Accepts numeric values in dollars, including decimals when applicable.
Tax-exempt amount
Tax-exempt amount
Enter the amount to charge that is exempt from taxes.Accepts numeric values in dollars, including decimals when applicable.
Payment metadata
Payment metadata
Additional information for traceability or internal reference.
You can use this field to correlate the payment with an order, a quote, or a reconciliation operation.
Header
Header
Title of the message that accompanies the payment button.
Body
Body
Main text of the message that accompanies the payment button.
Important considerations
The node environment must match Payphone
The node environment must match Payphone
If you configure the node in
DEV, the application in Payphone Developer must also be in Test.If you configure the node in PROD, the application in Payphone Developer must be in Production.Handling pending payments
Handling pending payments
When a payment is initially pending, the agent informs the user of that status through the corresponding message.If Payphone later updates the result, the flow continues through the corresponding final output:
- Successful Payment
- Failed Payment
The pending state is not exposed as an independent output of the node.